
Corvette V8-7.0L VIN E (2006)
41. Using a pry bar, CAREFULLY release the wheel drive shafts from the differential.
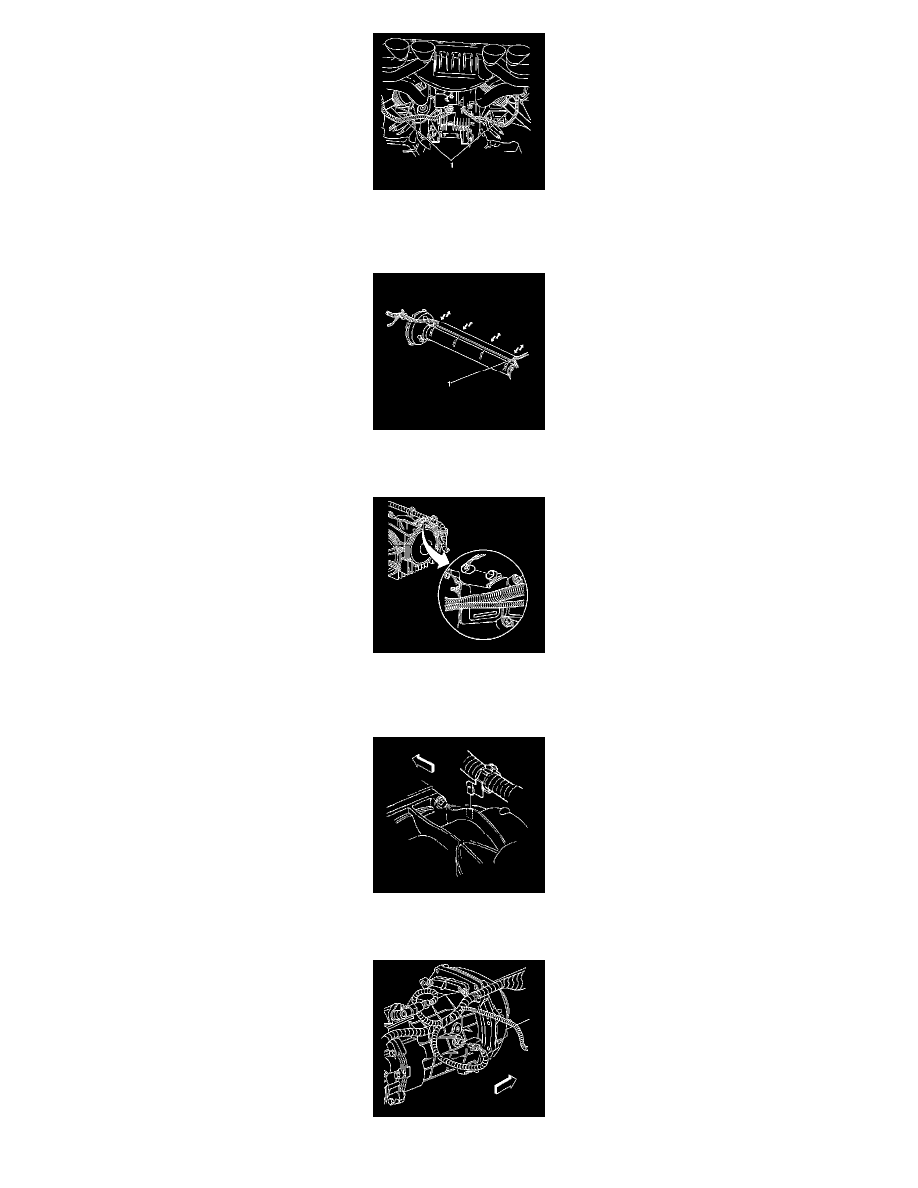
42. Tie off the wheel drive shafts (1) to the underbody to support out of the way. The muffler assembly pipes toward the rear offer a good location to
help support the wheel drive shafts (1).
43. Release the retainer (1) securing (and positioning) the wiring harness to the L-shaped brackets along the driveline support assembly, then slide the
harness up out of the brackets and position out of the way.
44. SLOWLY lower the driveline approximately 51 mm (2 inch), while simultaneously adjusting the angle of tilt, in order to access the electrical
connectors.
45. Disconnect the vehicle speed sensor (VSS) electrical connector.
46. Disconnect the wiring harness retainer from the stud at the differential rear cover.
47. Disconnect the wiring harness retainer clip from the top of the differential.
48. Disconnect the backup lamp switch electrical connector.