
Corvette V8-7.0L VIN E (2006)
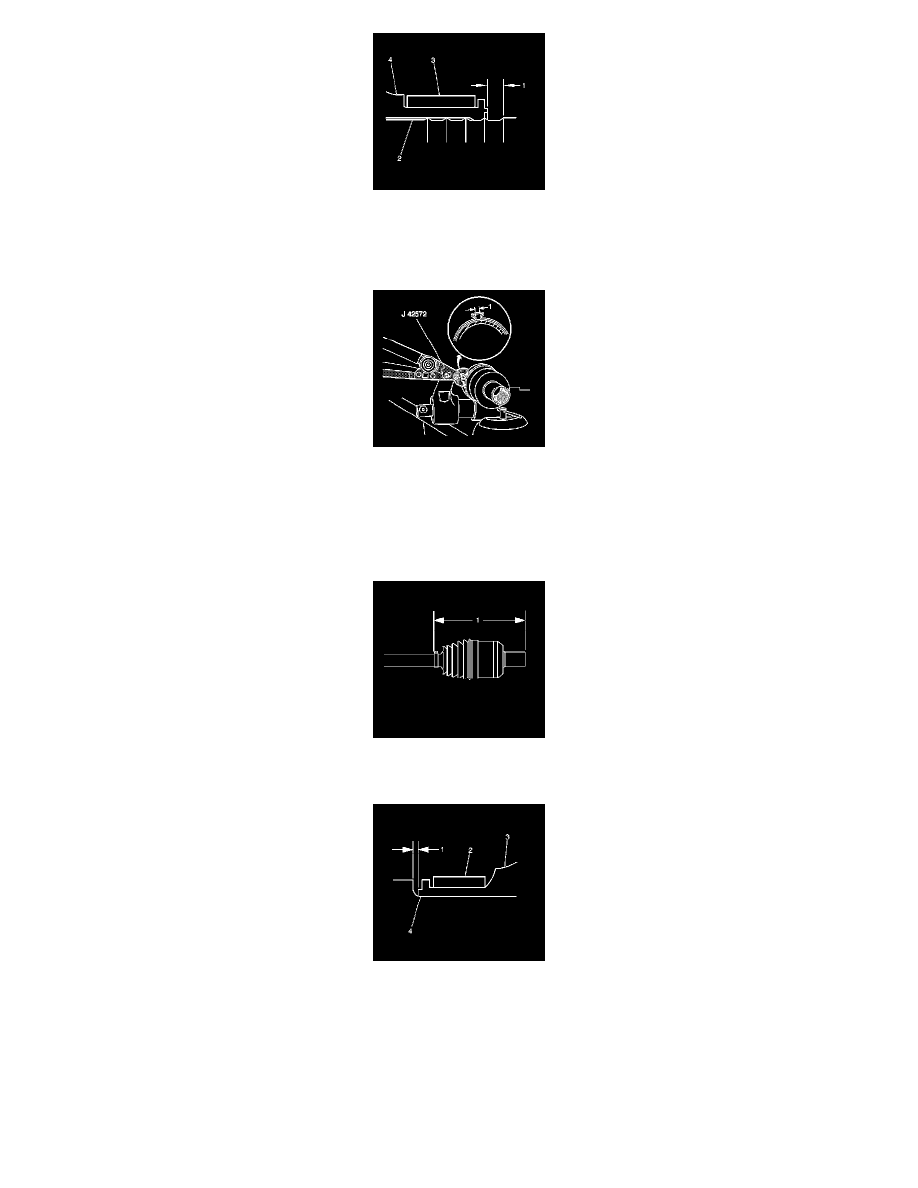
21. Position the small seal retaining clamp (3) onto the neck of the seal (4).
22. Position the seal and small retaining clamp to the axle shaft (2) as shown.
23. Measure the distance (1) between the edge of the seal and the edge of the last axle shaft groove closing edge; adjust fit accordingly.
2.5 mm (0.10 inch)
24. Crimp the small seal retaining clamp using the J 42572.
^
Tighten the small seal retaining clamp until the base of the omega (ohm) shape has a gap width (1) between 2 and 3 mm (0.079 and 0.118
inch), with a difference in the gap width from side to side no greater than 0.4 mm (0.016 inch). The clamping hold time must be no less than 2
seconds.
Important: The seal retaining clamp must not be over-tightened or under-tightened.
25. Measure the distance (1) between the end of the seal and the end of the joint outer race; adjust the plunging motion of the joint accordingly.
224 - 228 mm (8.82 - 8.98 inch)
26. Position the large seal retaining clamp (2) onto the seal (3).
27. Position the seal and large retaining clamp to the joint outer race (4) as shown.
28. Measure the distance (1) between the edge of the seal and the edge of the joint outer race last groove closing edge; adjust fit accordingly.
0.8 mm (0.03 inch)
29. Inspect the seal for proper shape. If the seal is NOT shaped correctly, equalize the pressure in the seal and shape the seal properly by hand.
Important: The seal must not be dimpled, stretched or out of shape in any way.
30. Inspect the seal for damage. If the seal has been cut or punctured during assembly, you must discard and replace the seal.