
Cruze L4-1.4L Turbo (2011)
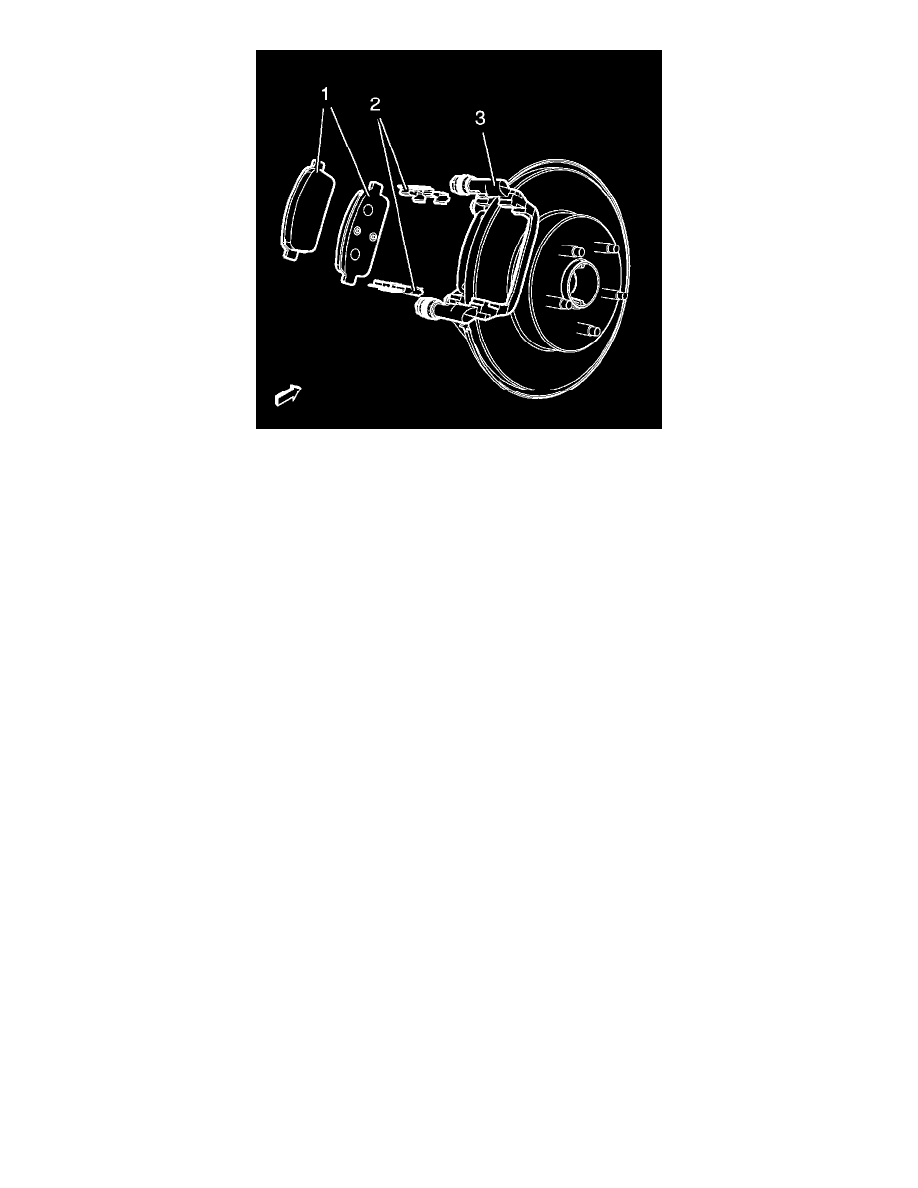
3. Install the brake pad retainers (2) to the brake caliper bracket (3).
4. Install the brake pads (1) to the brake caliper bracket.
5. Install the brake caliper. Refer to Rear Brake Caliper Replacement (with Dampener) (See: Rear Brake Caliper Replacement (with Dampener)).
6. Install the rear tire and wheel assembly. Refer to Tire and Wheel Removal and Installation (See: Maintenance/Wheels and Tires/Service and
Repair).
7. Lower the vehicle.
8. Pump the brake pedal 2-3 times in order to seat the rear disc brake pads to the rotor.
Rear Brake Caliper Replacement (with Dampener)
Rear Brake Caliper Replacement (with Dampener)
Removal Procedure
Warning: Refer to Brake Fluid Irritant Warning (See: Service Precautions/Technician Safety Information/Brake Fluid Irritant Warning).
Caution: Refer to Brake Fluid Effects on Paint and Electrical Components Caution (See: Service Precautions/Vehicle Damage Warnings/Brake
Fluid Effects on Paint and Electrical Components Caution).
1. Inspect the fluid level in the brake master cylinder reservoir.
2. If the brake fluid level is midway between the maximum-full point and the minimum allowable level, no brake fluid needs to be removed from the
reservoir before proceeding.
3. If the brake fluid level is higher than midway between the maximum-full point and the minimum allowable level, remove brake fluid to the
midway point before proceeding.
4. Raise and suitably support the vehicle. Refer to Lifting and Jacking the Vehicle (See: Maintenance/Vehicle Lifting/Service and Repair).
5. Remove the tire and wheel assembly. Refer to Tire and Wheel Removal and Installation (See: Maintenance/Wheels and Tires/Service and Repair
).