
Cruze L4-1.4L Turbo (2011)
3. Apply a very thin coating of high temperature silicone brake lubricant to the pad hardware mating surfaces of the caliper bracket only.
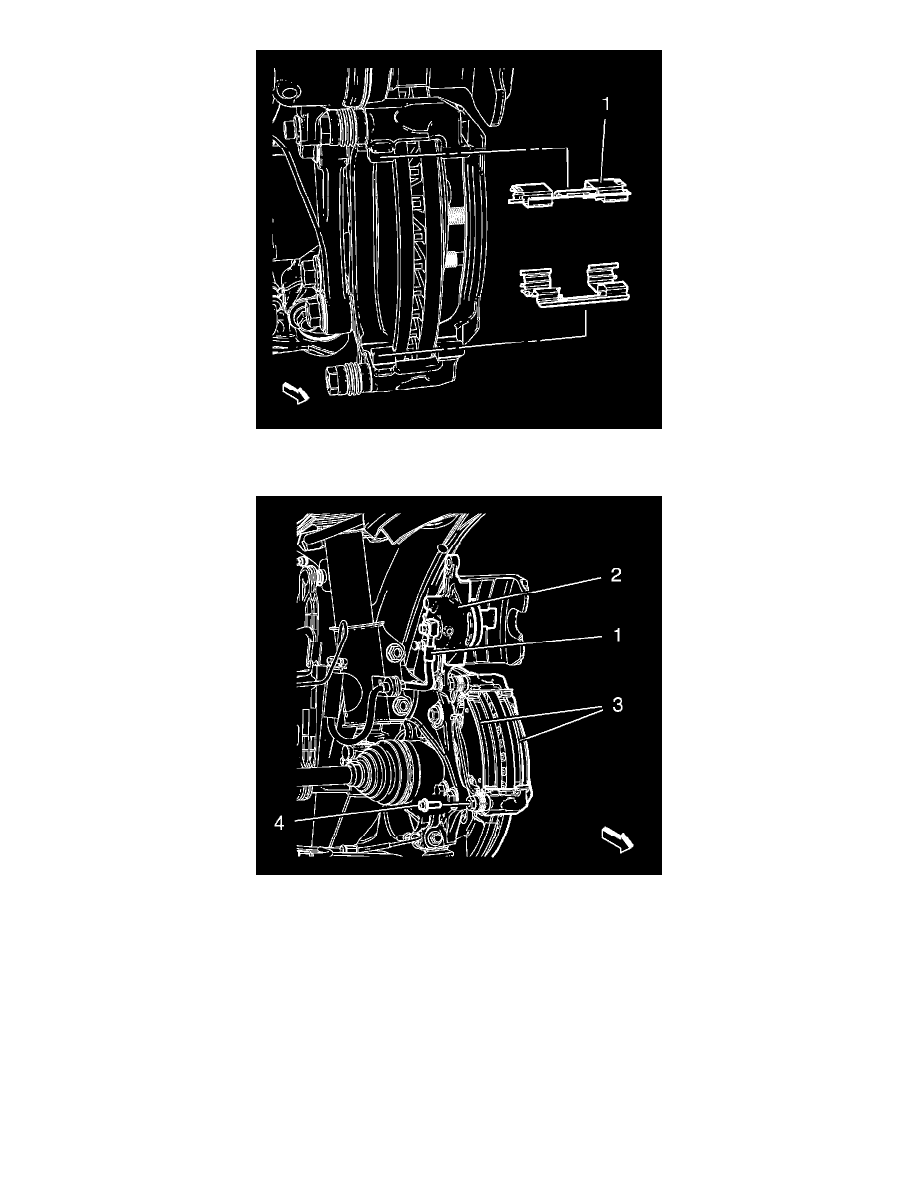
4. Install the brake pad retainer springs (1).
Note: The wear sensor equipped disc brake pad must be mounted inboard of the rotor with the leading edge of the sensor facing the brake rotor
during forward wheel rotation, or at the top of the pad when installed in vehicle position.
5. Install the brake pads (3) to the brake caliper bracket.
6. Remove the support and reposition the brake caliper (2) over the brake pads and to the caliper bracket. Assure that guide pin bolts boots apply
firmly.
7. Install guide pin bolts and tighten to 28 Nm (21 lb ft).
8. Install the tire and wheel assembly. Refer to Tire and Wheel Removal and Installation (See: Maintenance/Wheels and Tires/Service and Repair).
9. Lower the vehicle.
10. With the engine OFF, gradually apply the brake pedal approximately 2/3 of its travel distance.
11. Slowly release the brake pedal.
12. Wait 15 seconds, then gradually apply the brake pedal approximately 2/3 of its travel distance again until a firm brake pedal apply is obtained.
This will properly seat the brake caliper pistons and brake pads.
13. Fill the master cylinder auxiliary reservoir to the proper level. Refer to Master Cylinder Reservoir Filling (See: Brake Master Cylinder/Service
and Repair/Procedures/Master Cylinder Reservoir Filling).