
Cruze L4-1.4L Turbo (2011)
Constant Velocity Joint: Service and Repair
Front Wheel Drive Shaft Inner Joint and Boot Replacement
Front Wheel Drive Shaft Inner Joint and Boot Replacement
Special Tools
*
GE-396 - Snap Ring Pliers
*
CH-804 - Tensioner
For equivalent regional tools, refer to Special Tools (See: Tools and Equipment).
Removal Procedure
1. Remove the left or right wheel drive shaft, refer to Front Wheel Drive Shaft Replacement - Left Side (See: Service and Repair/Front Wheel Drive
Shaft Replacement - Left Side) or Front Wheel Drive Shaft Replacement - Right Side (See: Service and Repair/Front Wheel Drive Shaft
Replacement - Right Side)
Caution: Do not cut through the wheel drive shaft inboard or outboard boot during service. Cutting through the boot may damage the sealing
surface of the housing and the tripot or the constant velocity joint bushing. Damage to the sealing surface may lead to water and dirt intrusion and
premature wear of the constant velocity joint.
2. If equipped with a small swage ring, use a hand grinder to cut through the swage ring, taking care not to damage the halfshaft bar, in order to
remove the swage ring. Otherwise, remove the small seal retaining clamp with a side cutter. Discard the retaining clamp.
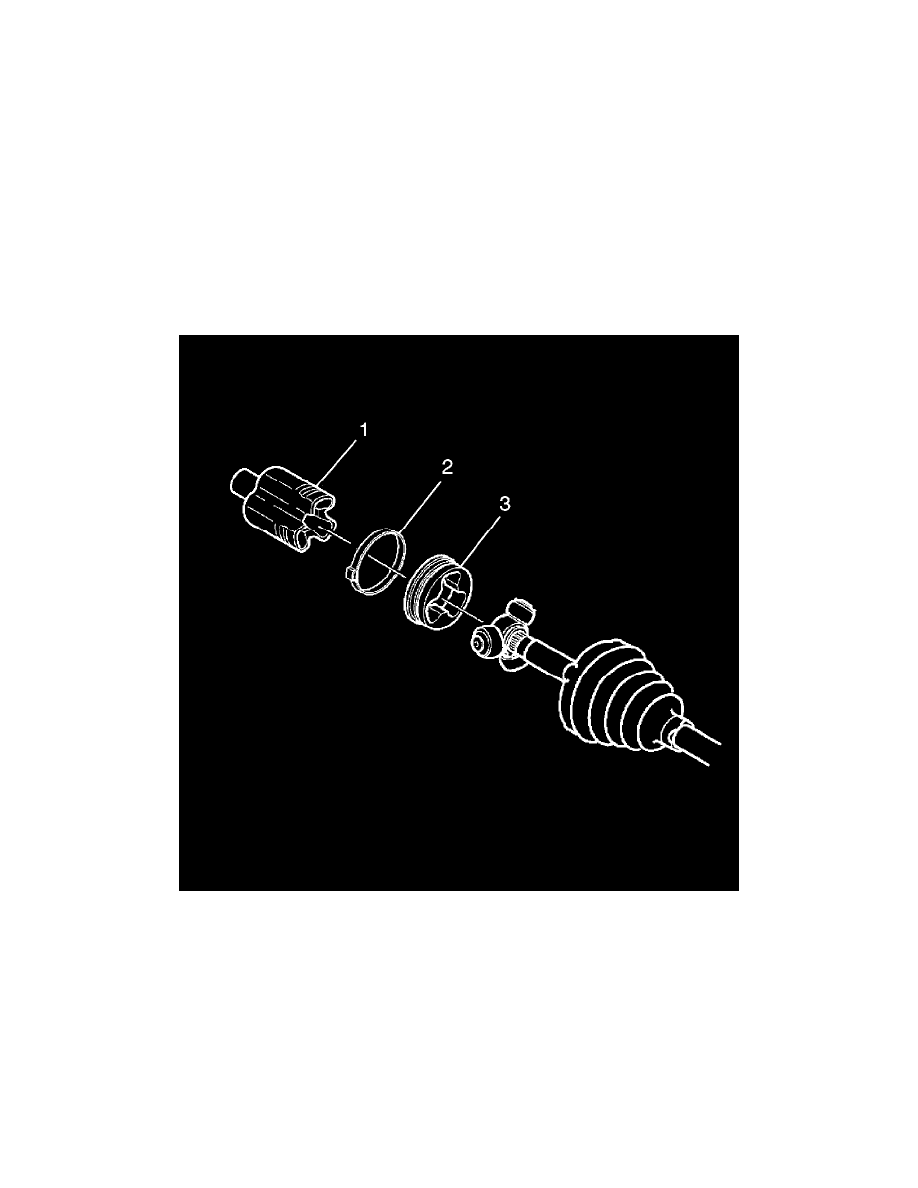
3. Remove the large seal retaining clamp (2) from the tripot joint with side cutters. Discard the large seal retaining clamp.
4. Separate the inboard seal from the trilobal tripot bushing (3) at the large diameter.
5. Slide the seal away from the joint along the halfshaft bar.