
Cruze L4-1.4L Turbo (2011)
Shift Solenoid: Service and Repair
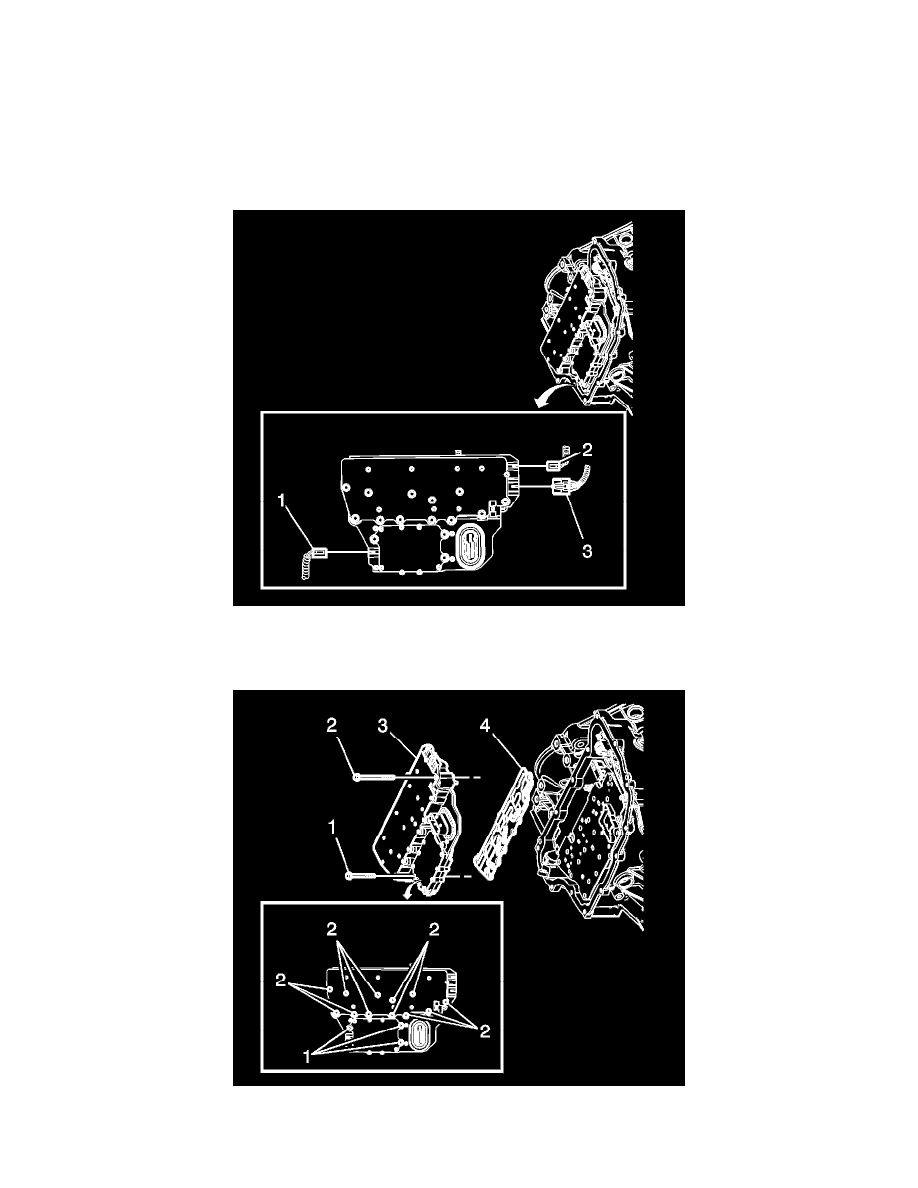
Control Solenoid Valve and Transmission Control Module Assembly Replacement
Removal Procedure
1. Remove the transmission control valve body cover. Refer to Control Valve Body Cover Replacement (LDE, LUW) (See: Automatic
Transmission/Transaxle/Valve Body/Service and Repair/Control Valve Body Cover Replacement)Control Valve Body Cover Replacement (LLU,
LUJ) (See: Automatic Transmission/Transaxle/Valve Body/Service and Repair/Control Valve Body Cover Replacement).
2. Disconnect the output speed sensor electrical connector (2).
3. Disconnect the shift position switch electrical connector (3).
4. Disconnect the input speed sensor electrical connector (1).
5. Remove the 3 control valve body bolts (1) M5 x 40.5.
6. Remove the 12 control valve body bolts (2) M6 x 97.