
EL Camino V8-305 5.0L (1984)
2.
To insure proper sealing of the hole, remove any dirt or foreign material from around the hole on the underside of the floor pan where the sealer is
to be applied.
3.
Place sealer on the hole from the underside of the floor pan and assemble the bolt, anchor bracket, anchor plate and lock nut to the floor pan as
shown. Tighten securely and make certain that the hole is completely sealed.
4.
Use the child seat only in the second seat seating position for which the anchor bracket has been installed. Use the child seat as directed in the
usage instructions, latching the child seat top strap hook to the anchor bracket as shown.
Second Seat Installation - For Vehicles Equipped With A Third Seat
Use the child seat as directed in the usage instructions furnished with the child seat, in any second seat seating position. Latch the child seat top strap
hook to the third seat lap belt tongue located most directly behind the child seat.
Third Seat Installation
The child seat is not recommended for use in the third seat of a 110 inch wheelbase "G" van.
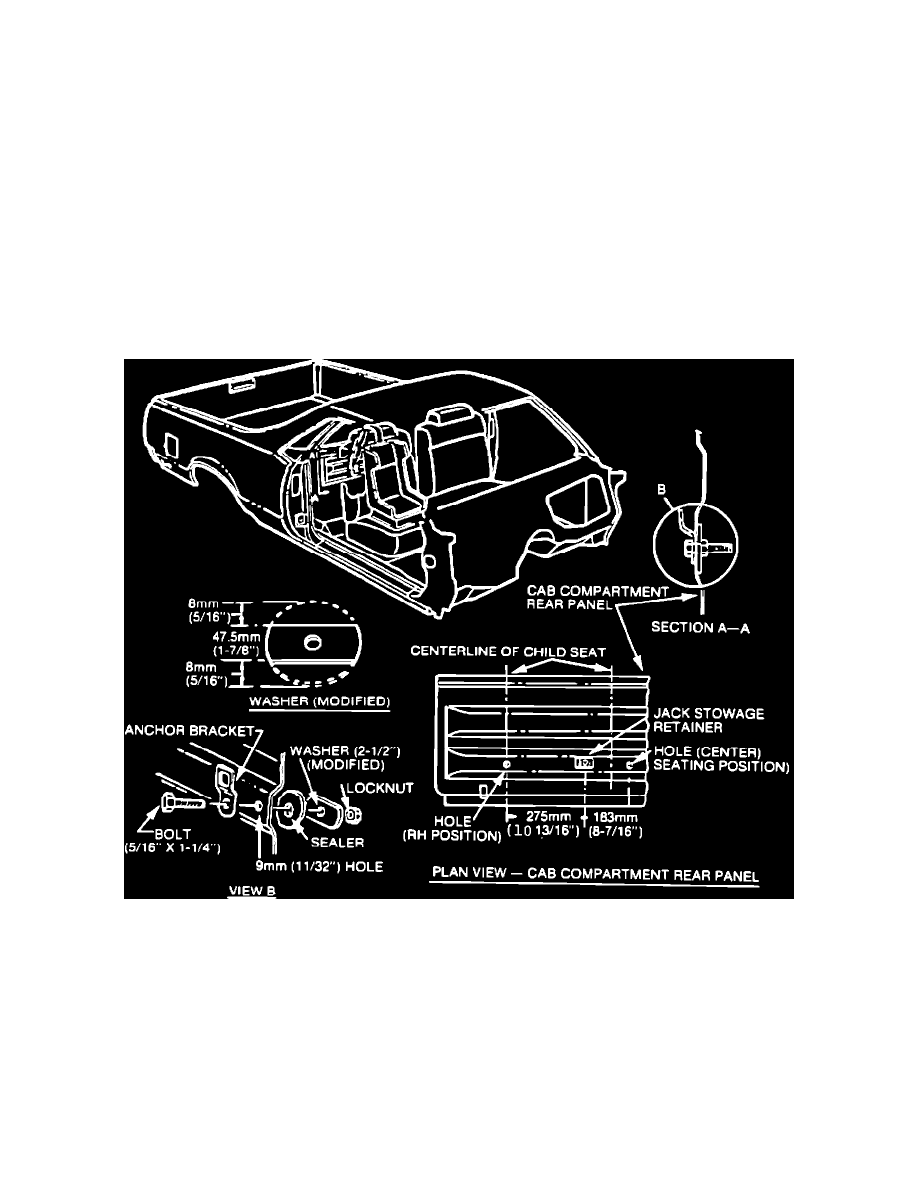
El Camino - Refer to Figure F
Figure F - Top Strap Anchor Installed - El Camino
1.
Remove trim cover from cab compartment rear panel.
2.
Locate and drill the appropriate 9 mm (11/32") hole in center of the compartment rear panel rib as shown in the plan view.
3.
Modify the washer as shown.
"S/T" Pickups, Extended Cabs, Blazer Pickup and Extended Cabs