
Equinox AWD V6-3.4L (2008)
Thermostat Housing: Service and Repair
Engine Coolant Thermostat Housing Replacement
Engine Coolant Thermostat Housing Replacement (RPO LNJ) (3.4L)
Removal Procedure
1. Remove the fuel injector sight shield. Refer to Fuel Injector Sight Shield Replacement (See: Powertrain Management/Fuel Delivery and Air
Induction/Fuel Injector/Service and Repair/Removal and Replacement/Fuel Injector Sight Shield Replacement) .
2. Drain the coolant until the coolant level is below the thermostat. Refer to Cooling System Draining and Filling (LNJ Static Fill) (See: Service and
Repair)Cooling System Draining and Filling (LNJ GE 47716 Fill) (See: Service and Repair)Cooling System Draining and Filling (LY7 Static
Fill) (See: Service and Repair)Cooling System Draining and Filling (LY7 GE 47716 Fill) (See: Service and Repair) .
3. Remove the crossover exhaust pipe. Refer to Exhaust Crossover Pipe Replacement (LNJ) (See: Exhaust System/Exhaust Pipe/Service and Repair)
.
4. Remove the radiator hose from the thermostat housing. Refer to Radiator Inlet Hose Replacement (LNJ Chevrolet) (See: Radiator Hose/Service
and Repair)Radiator Inlet Hose Replacement (LNJ Pontiac) (See: Radiator Hose/Service and Repair)Radiator Inlet Hose Replacement (LY7).
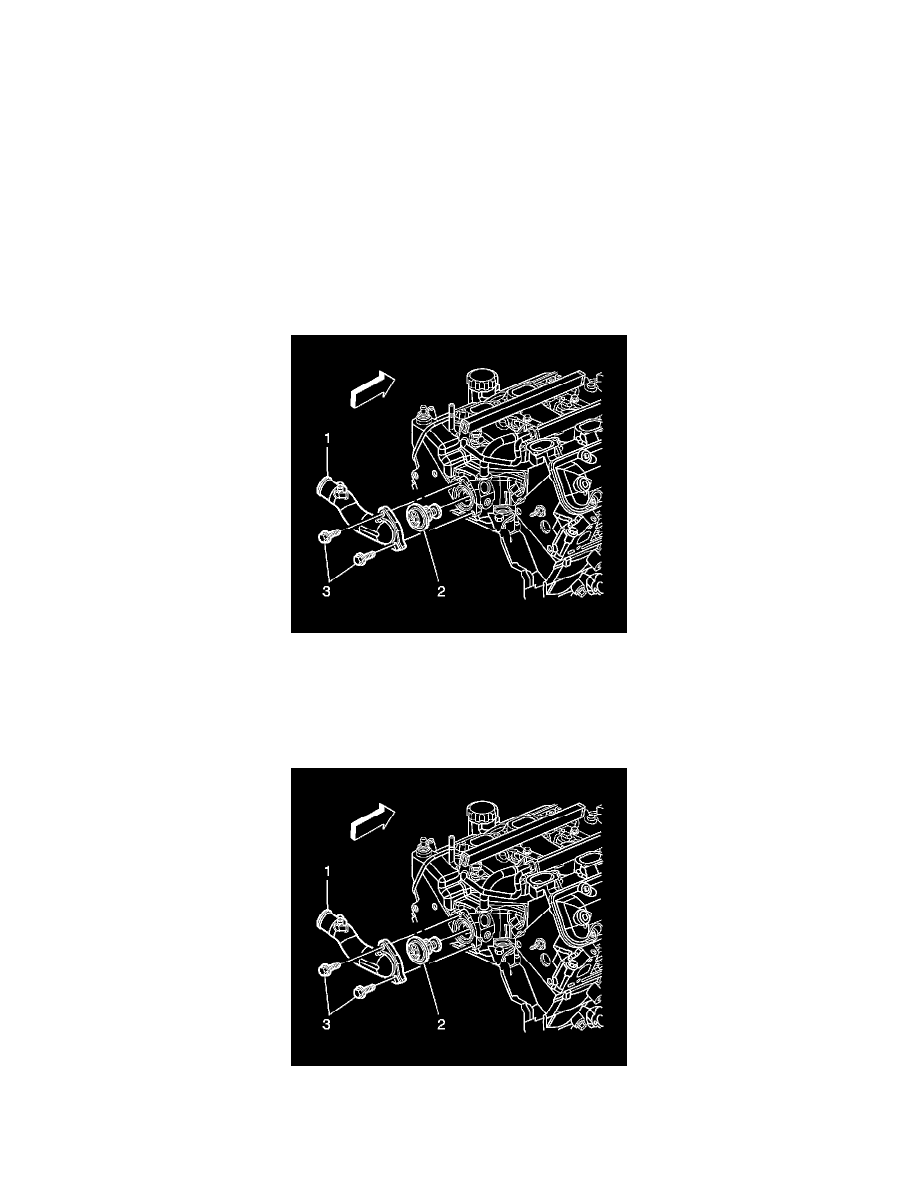
5. Remove the thermostat housing bolts (3) and clean any sealer from the bolt threads.
6. Remove the thermostat housing (1).
7. Remove the thermostat (2).
8. Clean the mating surfaces.
Installation Procedure
1. Install the thermostat (2).
2. Install the thermostat housing (1).
3. Install RTV sealer, GM P/N 12378478 (Canadian P/N 88900041) or the equivalent, to the thermostat housing bolt threads.