
Equinox AWD V6-3.4L (2008)
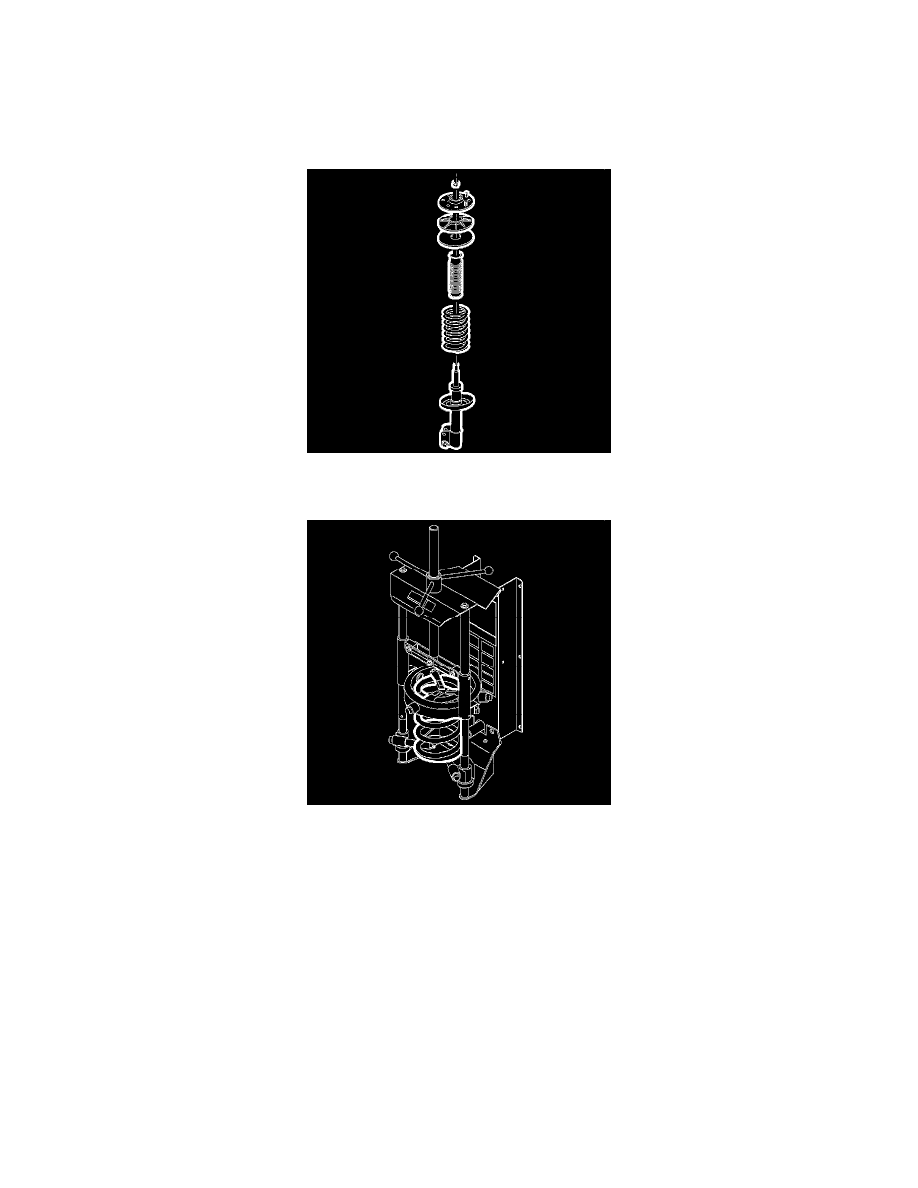
5. Remove the upper mount assembly, inspect for damage and deterioration. Replace as necessary.
6. Remove the strut dust shield and inspect for damage and deterioration. Replace as necessary.
7. Remove the hollow bumper from the strut shaft and inspect for damage and deterioration. Replace as necessary.
8. Inspect the spring for damage. Replace as necessary.
Installation Procedure
1. Extend the strut to its limit of travel.
2. Install the hollow bumper and dust boot to the strut shaft.
Important: The tag identifying the spring will be closer to the bottom of the spring. The end of the coil sits up against the tab on the
spring seat.
3. With the spring in the compressor, install the strut into the spring.
Important: The anti-rotation tab on the spring seat must face 180 degrees from the direction that the knuckle bracket points.
4. Assemble the upper spring seat onto the strut shaft and align the flat with the strut to knuckle mounting bracket.
Notice: Do not handle the top mount assembly by the plastic portion. Handle the top mount assembly by the metal portion when
removing/installing the top mount from/to the strut assembly. Holding the top mount assembly by the plastic portion may loosen the snap fit of the
bearing components and cause the bearing to fall apart.
Important: The flat on the metal plate of the top mount assembly must face the same direction of the anti-rotation tab on the spring seat.
5. Assemble the top mount onto the strut shaft and align the flat 180 degrees from flat on the upper spring seat.