
Equinox FWD V6-3.0L (2010)
Note: If the location of the original plug weld holes can not be determined, space the plug weld holes every 40 mm (1 1/2 in) apart.
Some panels may have structural weld-thru adhesive. It is necessary to replace the weld-thru adhesive with an additional spot weld between each
factory spot weld.
1. Drill 8 mm (5/16 in) plug weld holes in the service part as necessary in the locations noted from the original panel.
2. Prepare all mating surfaces as necessary.
3. Apply GM-approved Weld-Thru Coating or equivalent to all mating surfaces. Refer to Anti-Corrosion Treatment and Repair ().
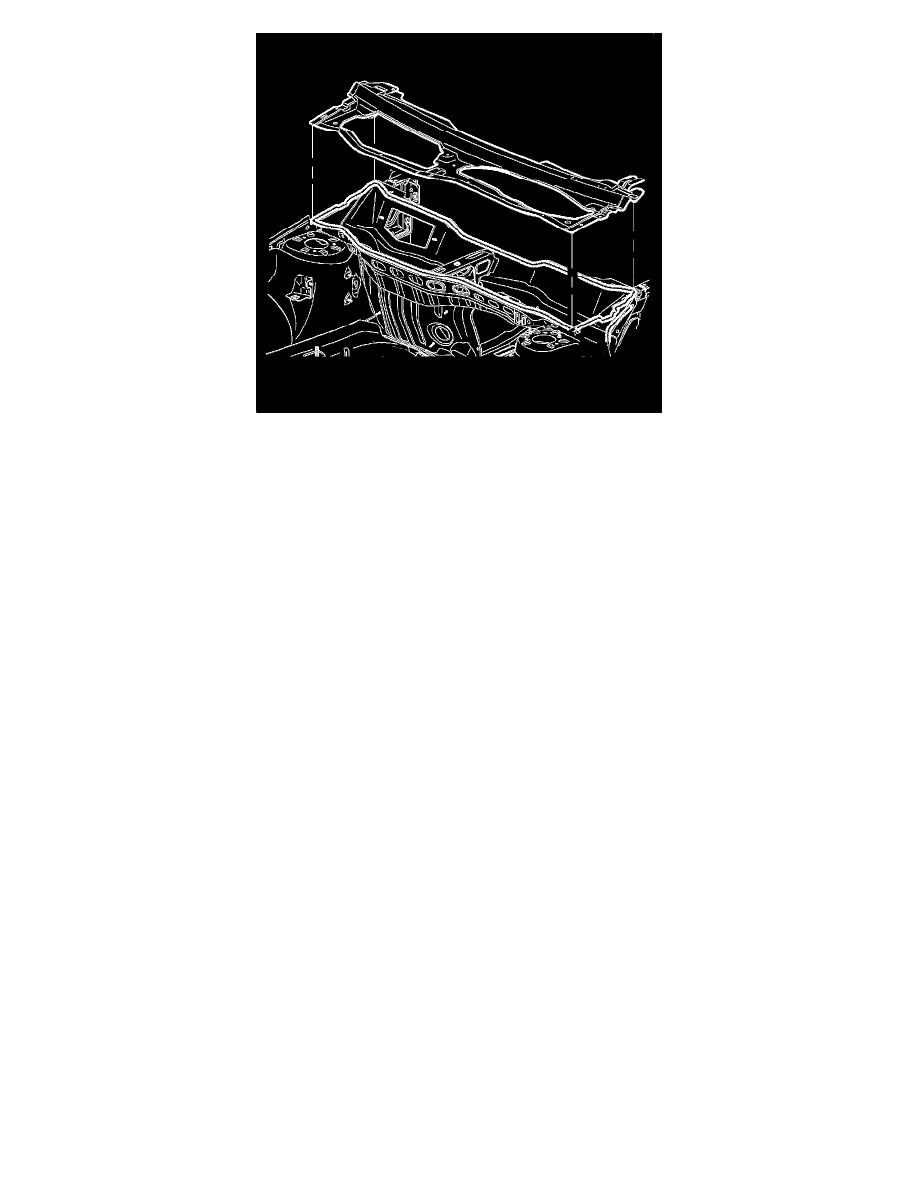
4. Position the plenum top panel to the vehicle using 3-dimensional measuring equipment. Clamp the plenum top panel into place.
5. Plug weld accordingly.
6. Clean and prepare all welded surfaces.
7. Apply the sealers and anti-corrosion materials to the repair area, as necessary. Refer to Anti-Corrosion Treatment and Repair ().
8. Paint the repair area. Refer to Basecoat/Clearcoat Paint Systems (See: Paint, Striping and Decals/Paint/Application and ID/Basecoat/Clearcoat
Paint Systems).
9. Install all related panels and components.
10. Connect the negative battery cable. Refer to Battery Negative Cable Disconnection and Connection (See: Starting and Charging/Battery/Battery
Cable/Negative/Service and Repair/Battery Negative Cable Disconnection and Connection).
11. Enable the SIR system. Refer to SIR Disabling and Enabling (See: Interior Moulding / Trim/Dashboard / Instrument Panel/Air Bag(s) Arming
and Disarming/Service and Repair).