
Equinox FWD V6-3.0L (2010)
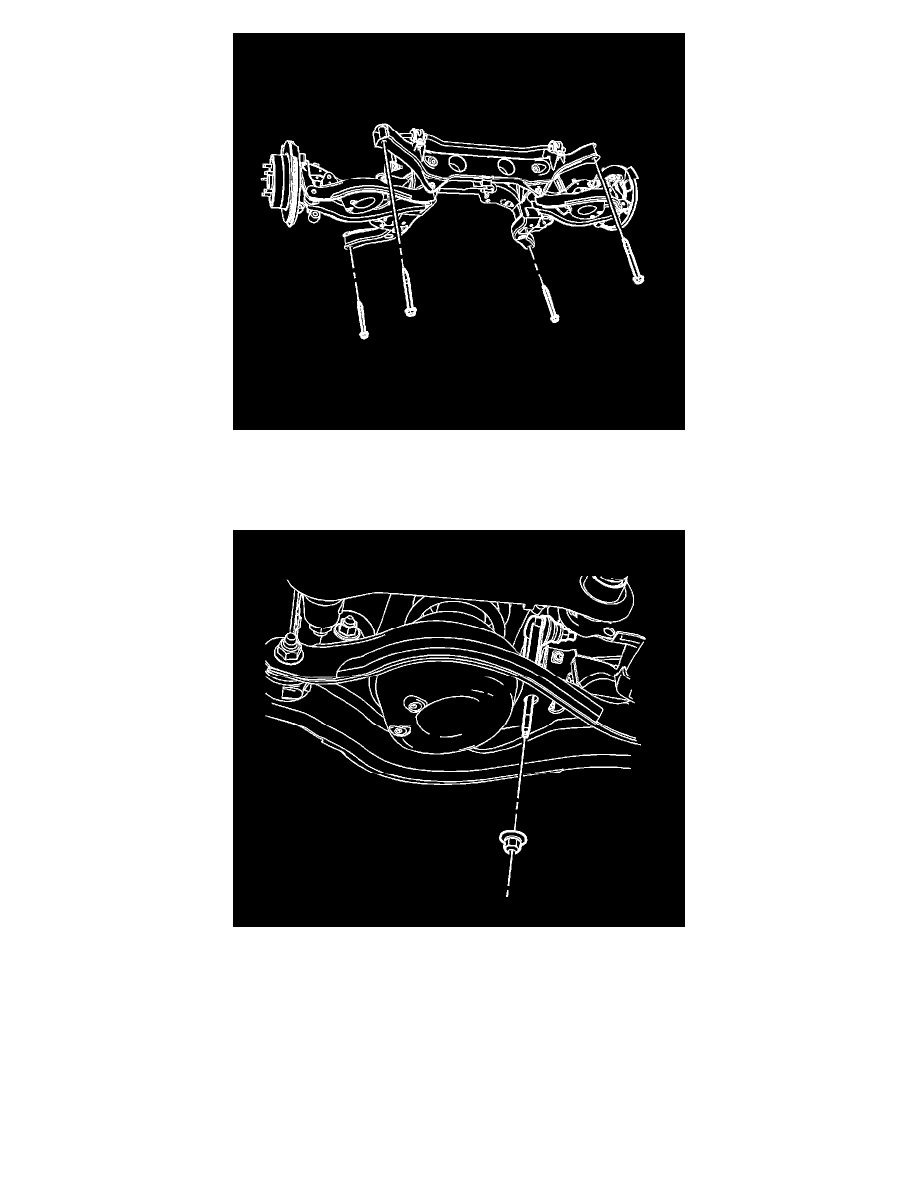
4. Install the 4 rear support to body bolts and tighten to 170 Nm (125 lb ft).
5. Install the coil springs. Refer to Coil Spring Replacement ().
6. Install the adjustment links. Refer to Adjust Link Replacement ().
7. Install the trailing arms. Refer to Trailing Arm Replacement ().
8. While holding the stabilizer link, install the stabilizer link-to-lower control arm nut and tighten to 15 Nm (11 lb ft).
Caution: Support the brake caliper with heavy mechanic wire, or equivalent, whenever it is separated from its mount and the hydraulic flexible
brake hose is still connected. Failure to support the caliper in this manner will cause the flexible brake hose to bear the weight of the caliper, which
may cause damage to the brake hose and in turn may cause a brake fluid leak.
9. Remove the supporting wire and position the brake caliper and bracket assemblies back onto the knuckles. Refer to Rear Brake Caliper Bracket
Replacement ().
10. Install the rear brake hose bracket nut and bolt and tighten to 12 Nm (106 lb in).
11. Position the wiring harness back to the original location, connect the routing clips to the rear support and upper control arms. Connect the rear
wheel speed sensor electrical connectors.