
Equinox FWD V6-3.0L (2010)
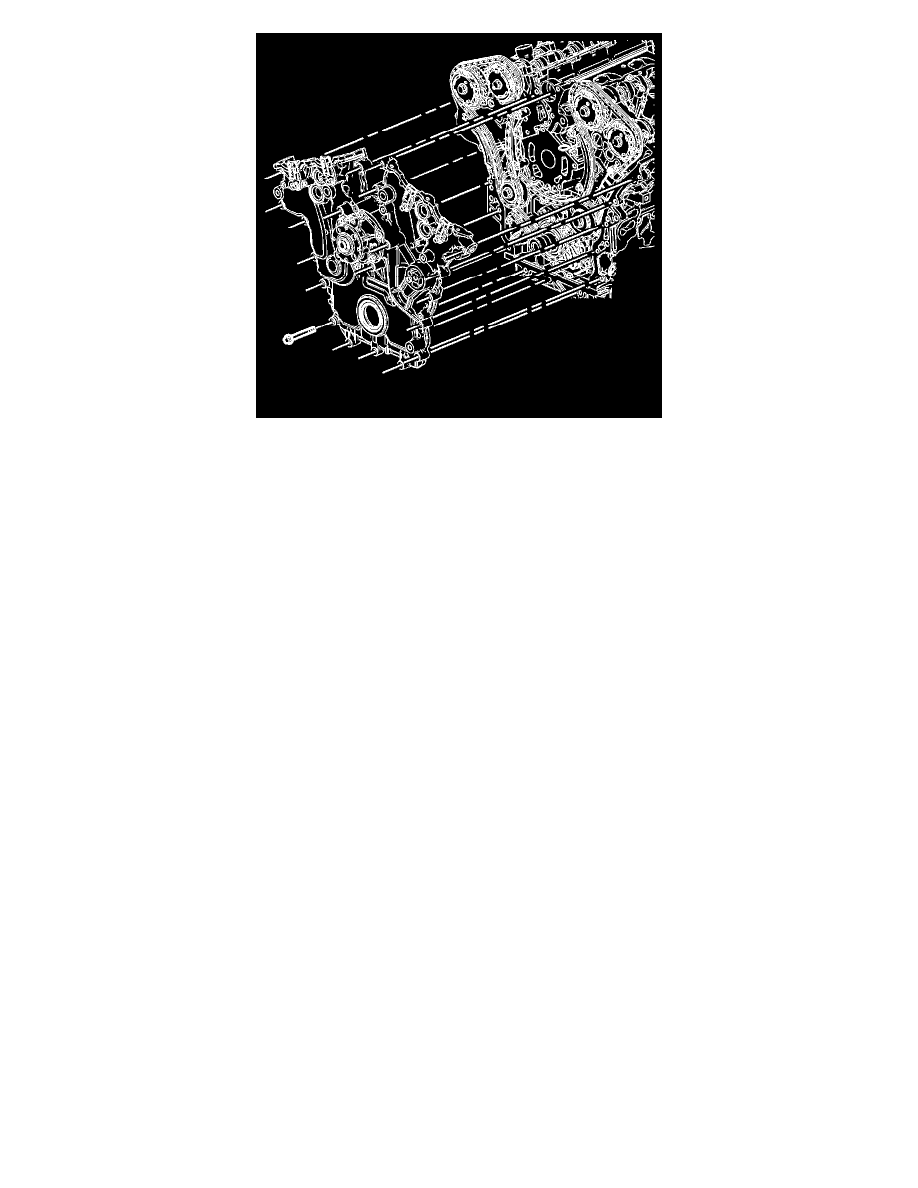
Note: There are a total of 22 M8 bolts that must be removed and 3 optional M12 bolts that may need to be removed before the front cover will
separate from the engine block.
12. Remove the engine front cover with the water pump. Refer to Engine Front Cover Removal (See: Service and Repair/Overhaul/12. Engine Front
Cover Removal).
13. Disassemble the engine front cover. Refer to Engine Front Cover Disassemble (See: Service and Repair/Overhaul/75. Engine Front Cover
Disassemble).
Note: Do NOT use sharp and/or metal gasket scrapers in order to clean the sealing surfaces.
14. Carefully clean the engine front cover sealing surfaces. Refer to Engine Front Cover Cleaning and Inspection (See: Service and
Repair/Overhaul/76. Engine Front Cover Cleaning and Inspection).
Note: Insert a piece of cardboard between the oil pan front and the oil pump in order to prevent any contaminants from falling into the oil pan.
15. Carefully clean the engine front cover sealing surfaces. Refer to Engine Front Cover Cleaning and Inspection (See: Service and
Repair/Overhaul/76. Engine Front Cover Cleaning and Inspection).
16. Use compressed air in order to remove any engine coolant from the engine cooling passages and from the top of the oil pan scraper (windage tray).
Installation Procedure
1. Assemble the engine front cover. Refer to Engine Front Cover Assemble (See: Service and Repair/Overhaul/77. Engine Front Cover Assemble).