
Equinox FWD V6-3.0L (2010)
Tie Rod: Service and Repair
Steering Linkage Inner Tie Rod Replacement
Steering Linkage Inner Tie Rod Replacement
Removal Procedure
1. Remove 1 steering gear boot. Refer to Steering Gear Boot Replacement (See: Steering Gear).
2. Turn the steering wheel in order to position the steering gear rack so that only 2 rack teeth and the flat surface of the rack are visible outside the
steering gear housing.
3. If equipped with a hydraulic power steering gear, bend the tabs on the steering gear rack thrust washer in order to release the steering linkage inner
tie rod.
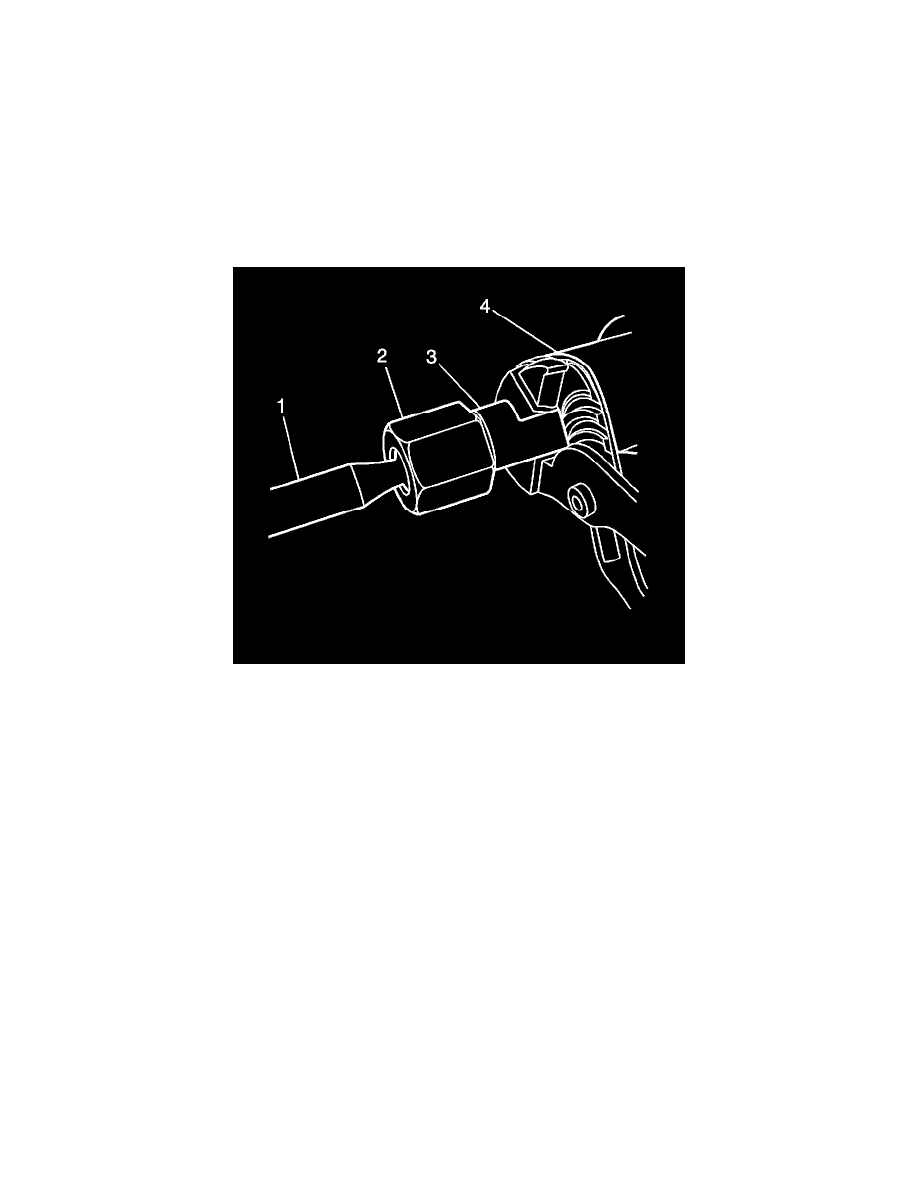
4. Place a soft jaw pipe wrench or soft jaw pliers on the flat surface of the steering gear rack (3) between the steering gear housing (4) and the inner
tie rod housing (2).
5. Place a crows foot wrench on the flats of the inner tie rod housing (2).
Caution: Do not change the steering gear preload adjustment before moving the inner tie rod from the steering gear. Changing the steering gear
preload adjustment before moving the inner tie rod could result in damage to the pinion and the steering gear.
6. Rotate the steering linkage inner tie rod housing counterclockwise while holding the steering gear rack stationary until the steering linkage inner tie
rod separates from the steering gear rack.
7. If equipped with a hydraulic power steering gear, remove the steering gear rack thrust washer.
Discard the washer.
Installation Procedure