
Equinox FWD V6-3.0L (2010)
5. Remove the trailing arm bracket.
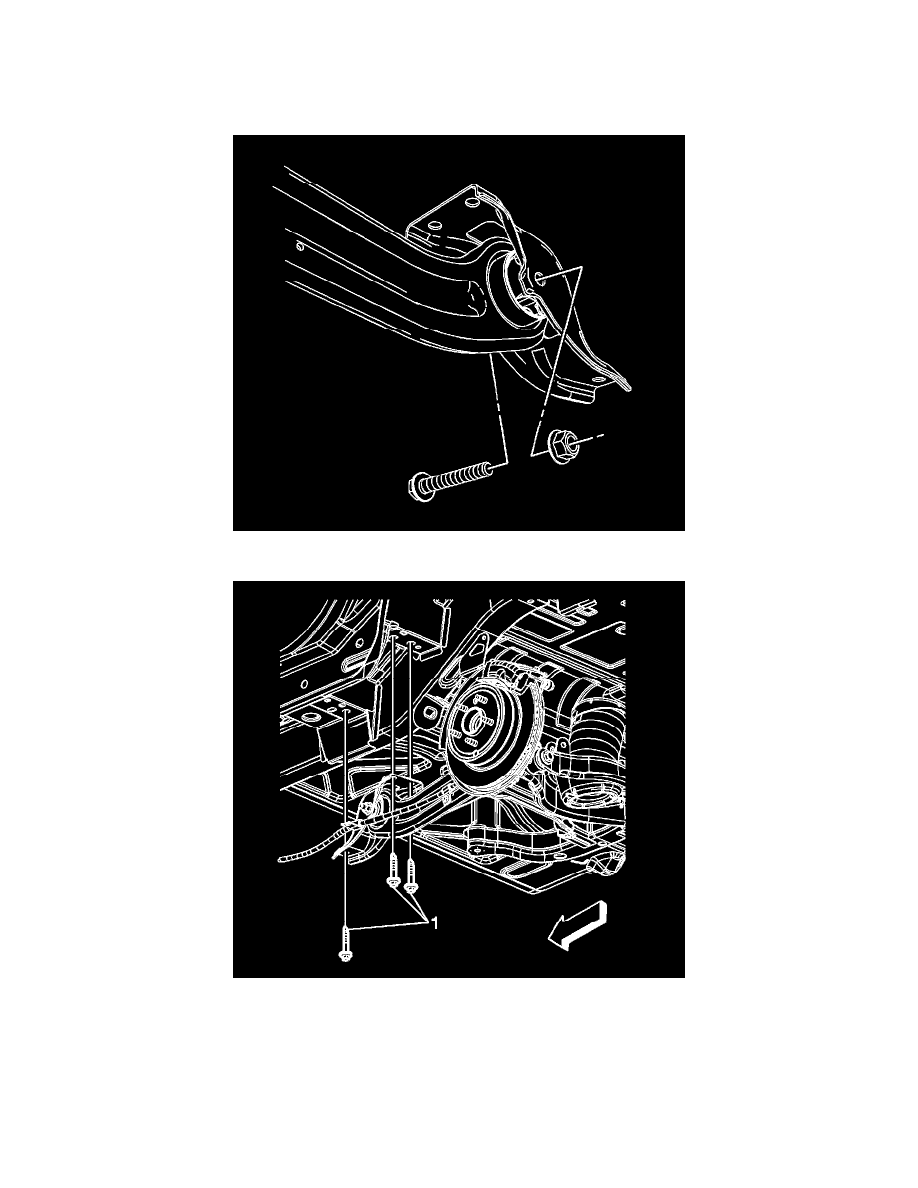
Installation Procedure
1. Position the trailing arm bracket to the trailing arm.
2. Loosely install the trailing arm bushing to bracket nut and bolt.
3. Push upward on the trailing arm bracket and loosely install the front bolt (1).
Caution: Refer to Fastener Caution (See: Service Precautions/Vehicle Damage Warnings/Fastener Caution).
4. Use a drift to align the remaining trailing arm bracket bolts (1). Tighten the bolts to 110 Nm (81 lb ft).
5. Tighten the trailing arm bushing to bracket nut and bolt to 160 Nm (118 lb ft).
6. Install the park brake cable on the trailing arm and on the frame. Refer to Parking Brake Rear Cable Replacement (Left) (See: Brakes and
Traction Control/Parking Brake System/Parking Brake Cable/Service and Repair/Parking Brake Rear Cable Replacement (Left))Parking Brake
Rear Cable Replacement (Right) (See: Brakes and Traction Control/Parking Brake System/Parking Brake Cable/Service and Repair/Parking