
Express 1/2 Ton Van V6-4.3L VIN W (1999)
Rear Door Panel: Service and Repair
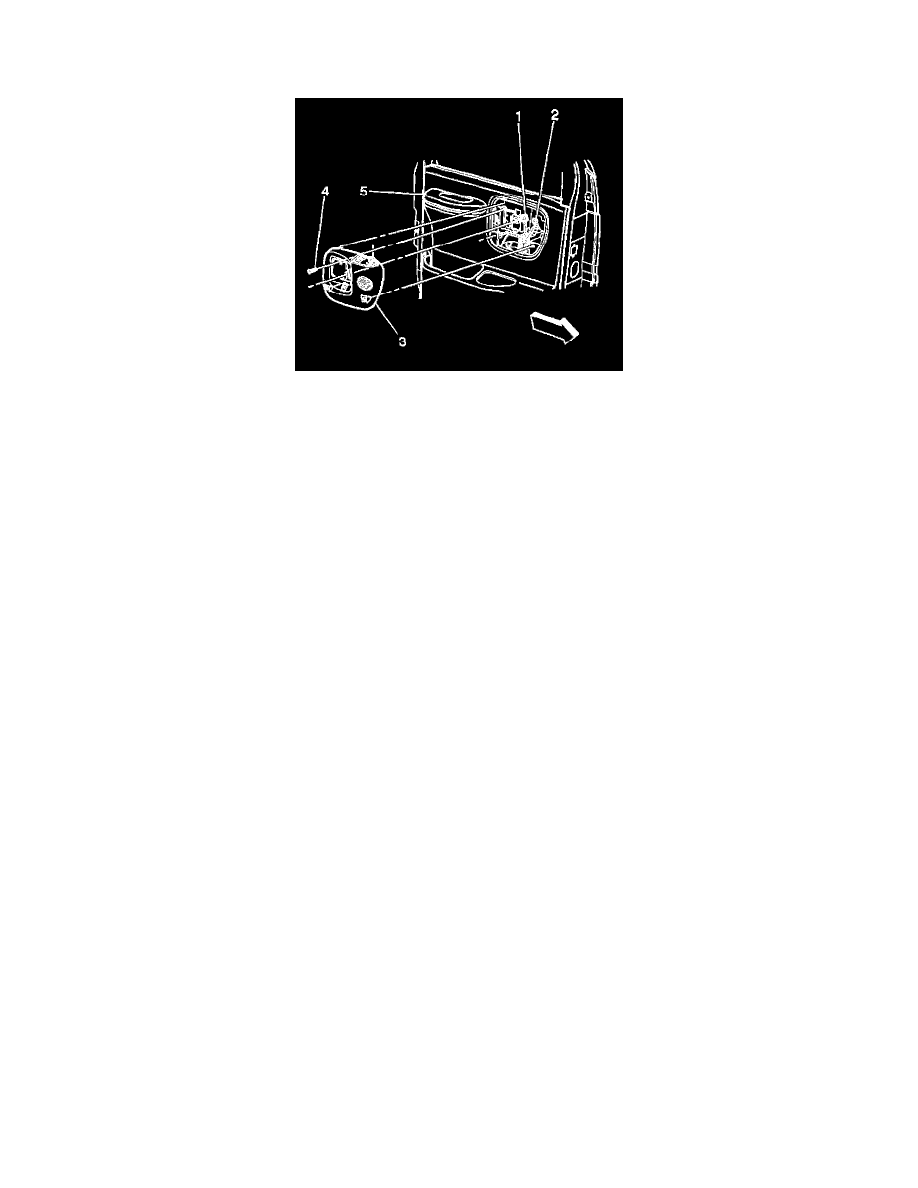
Rear Door Trim Plate Replacement (Power Windows)
REMOVAL PROCEDURE
1. Remove the inside door handle bezel.
2. Remove the screws (4) that retain the front door trim plate (3) to the door panel.
3. Pull the bottom of the front door trim plate (3) out in order to remove the retainers on the front door trim plate from the front door trim panel (5).
4. Remove the front door trim plate from the slots in the front door trim panel.
5. Disconnect the electrical connectors (1,2) from the switches on the front door trim plate.
6. Remove the front door trim plate (3) from the vehicle.
INSTALLATION PROCEDURE
1. Install the front door trim plate (3) to the front door trim panel (5).
2. Connect the electrical connectors (12) to the switches on the front door trim plate (3).
3. Install the front door trim plate (3) to the slots in the front door trim panel (5).
Align the retainers on the front door trim plate (3) to the slots in the front door trim panel (5). Press the trim plate into position.
4. Install the screws (4) that retain the front door trim plate (3) to the front door trim panel (5).
5. Install the inside door handle bezel.