
Express 1/2 Ton Van V6-4.3L VIN W (1999)
IMPORTANT: Ensure that the VCM being installed is the original VCM, or that the replacement VCM service number is identical to the original
VCM service number.
NOTE: In order to prevent possible electrostatic discharge (ESD) damage to the VCM, do not touch the connector pins or soldered components on
the circuit board.
IMPORTANT: Steps 1-4 are only necessary for a replacement VCM installation:
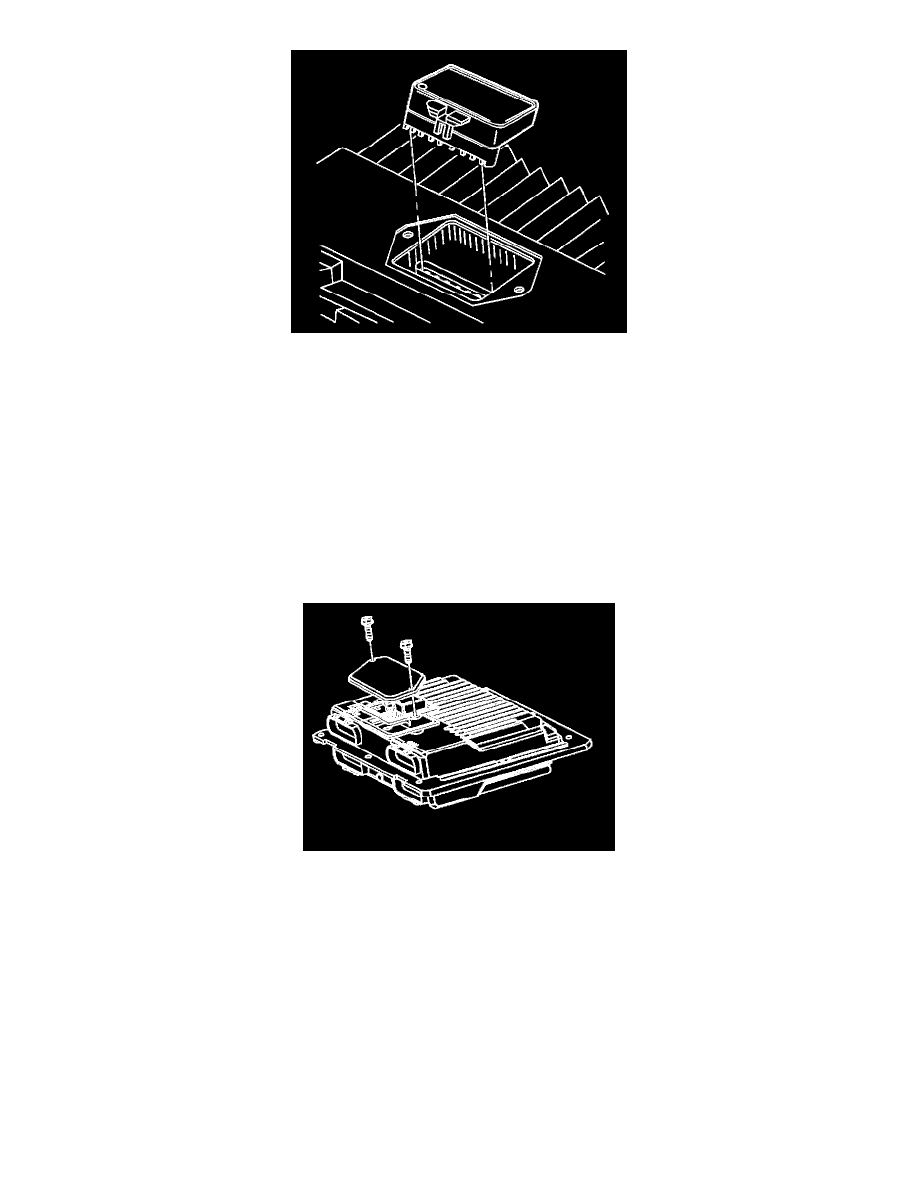
1. Align the notches of the Knock Sensor Module with the notches in the Knock Sensor Module socket.
IMPORTANT: Press only on the ends of the Knock Sensor Module. Gently press on the Knock Sensor Module until it is firmly seated in the socket.
Listen for the click.
2. Install the Knock Sensor Module in the Knock Sensor Module socket.
3. Install the access cover on the VCM.
NOTE: Refer to Fastener Notice in Service Precautions.
4. Install the access cover screws.
Tighten
Tighten the access cover screws to 5.0 N.m (44 lb in).