
Express 1/2 Ton Van V8-305 5.0L VIN M SFI (1998)
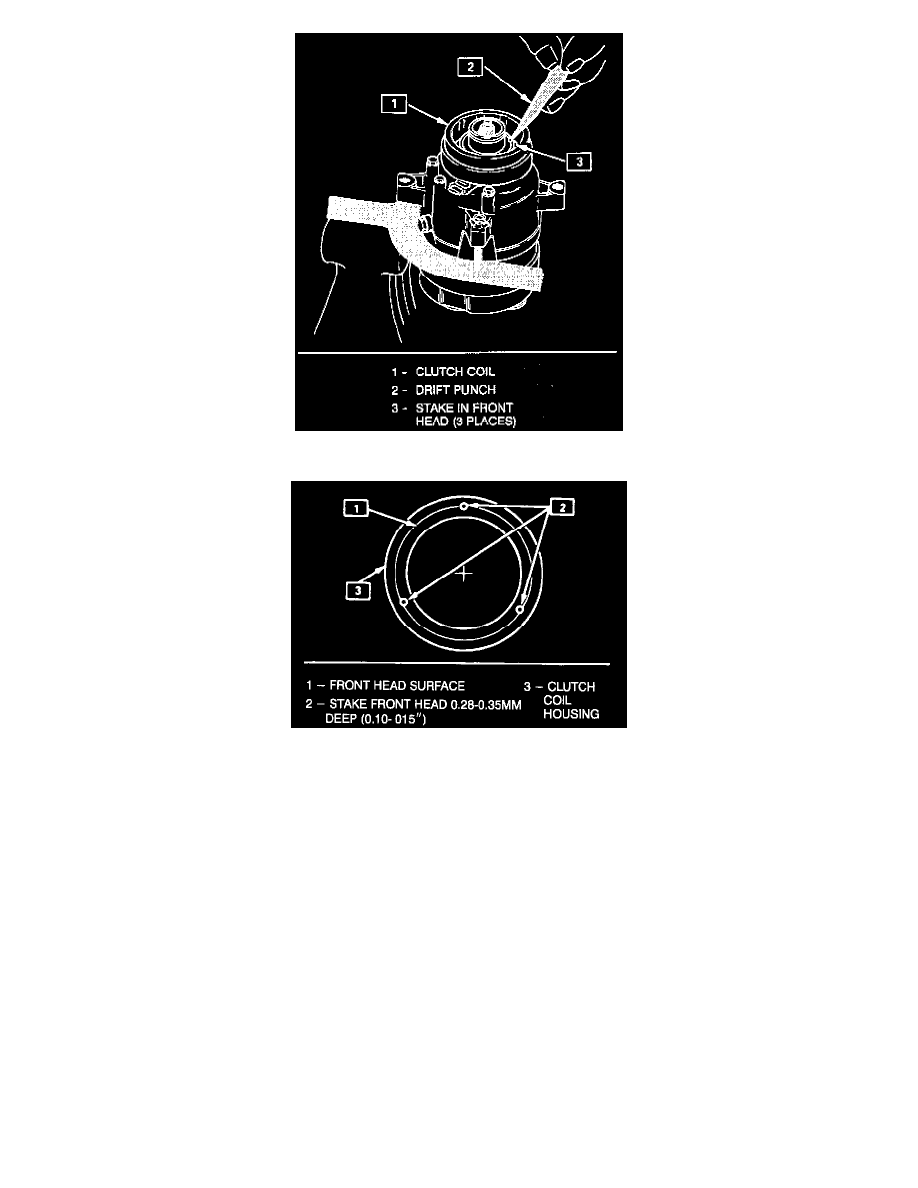
Staking Clutch Coil To Front Head
Details Of Stakes In Front Head For Clutch Coil
Remove or Disconnect
1. Perform Steps 1 through 4 of "Clutch Rotor and/or Bearings" removal procedure. Mark clutch coil terminal location on compressor front head.
2. Install J 33023-A puller pilot on front head of compressor. Also install J 8433-1 puller crossbar with J 33025 puller legs as shown in the
illustration.
3. Tighten J 8433-3 forcing screw against the puller pilot to remove the clutch coil.
Install or Connect
1. Place the clutch coil assembly on the front head with the terminals positioned at the "marked" location.
2. Place the J 33024 clutch coil installer over the internal opening of the clutch coil housing and align installer with the compressor front head.
3. Center the J 8433-1 puller crossbar in the countersunk center hole of the J 33024 clutch coil installer. Install the J34992-2 through bolts and
washers through the crossbar slots and thread them, into the holding fixture J 34992 to full fixture thickness.
4. Turn the center forcing screw of the J 8433-1 puller crossbar to force the clutch coil onto the front head. Be sure clutch coil and J 33024 installer
stay "in-line" during installation.
5. When coil is fully seated on the front head, use a 1/8" diameter drift punch and stake the front head at three (3) places 120° apart, to ensure clutch
coil remaining in position.
^
Stake size should be only one half the area of the punch tip and only approximately 0.28-035mm (0.010-0.015") deep.
6. Install rotor and bearing assembly and the clutch plate and hub assembly according.
7. Install shaft nut.