
Express 1/2 Ton Van V8-305 5.0L VIN M SFI (1998)
Inspect
^
All disassembled parts for wear. Replace if necessary.
ASSEMBLE
^
Tools Required:
-
J 8947 Rack Piston Teflon Ring Compressor
-
J 21552 Rack Piston Arbor
1. O-ring seal (6) and teflon ring (5) and lubricate with power steering fluid.
2. Worm shaft (13) to rack piston (26) outside of housing (20).
^
Fully seat worm shaft (13) to rack piston (26) and align worm shaft spiral groove with rack piston ball return guide hole.
Important
^
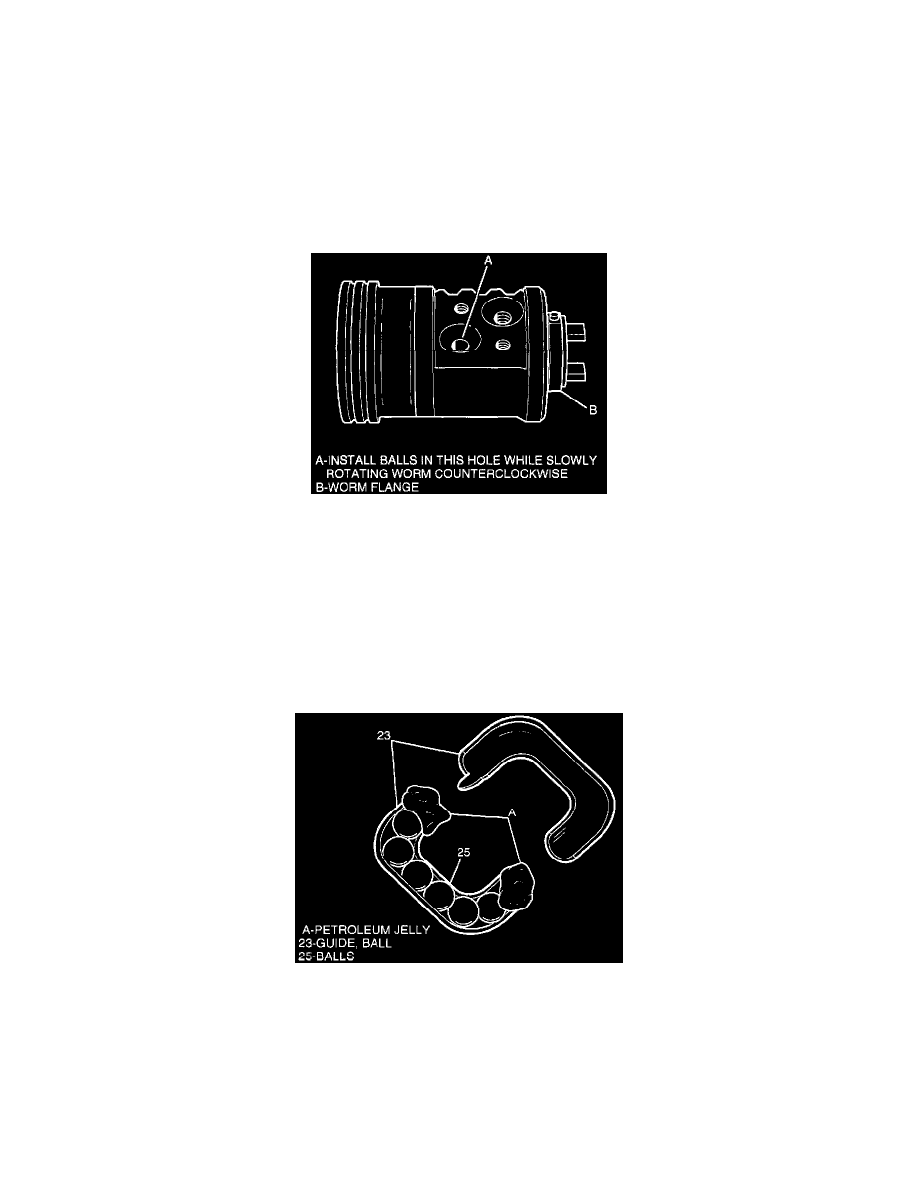
Make sure that all rack piston balls (25) are reinstalled in the rack piston. Improper rack piston ball installation may result in personal injury.
Notice: The black rack piston balls are smaller than the silver balls. The black and silver balls must be installed alternately into the rack piston
and ball guide to maintain rack piston to worm shaft preload.
^
Lubricate rack piston balls (25) with power steering fluid.
3. Rack piston balls (25) to rack piston (26) by inserting through ball return guide hole while turning worm shaft (13) counterclockwise.
4. Remaining rack piston balls (25) to ball guide (23) using grease at each end to retain balls (25).
5. Ball guide (23) to rack piston (26).
NOTICE: Always use the correct fastener in the proper location. When you replace a fastener, use ONLY the exact part number for that
application. The manufacturer will call out those fasteners that require a replacement after removal. The manufacturer will also call out the
fasteners that require thread lockers or thread sealant. UNLESS OTHERWISE SPECIFIED, do not use supplemental coatings (paints, greases, or
other corrosion inhibitors) on threaded fasteners or fastener joint interfaces. Generally, such coatings adversely affect the fastener torque and joint
clamping force, and may damage the fastener. When you install fasteners, use the correct tightening sequence and specifications. Following these
instructions can help you avoid damage to parts and systems.