
Express 1/2 Ton Van V8-305 5.0L VIN M SFI (1998)
Ball Joint: Service and Repair
Lower
REMOVAL PROCEDURE
^
Tools Required:
-
J 9519-D Ball Joint Remover and Installer Set
1. Raise the vehicle. Support the vehicle with suitable safety stands.
2. Remove the tire and wheel assembly.
CAUTION: Floor jack must remain under the control arm spring seat during removal and installation to retain the spring and control
arm in position. Failure to do so could result in personal injury.
3. Place a floor jack under the control arm spring seat. Raise the jack in order to support the control arm.
4. Remove the cotter pin and the nut from the lower ball joint.
5. Using a pry bar, placed under the upper control and on top of the frame, pry upward.
6. With the aid of a helper, carefully hammer on the steering knuckle in the area of the lower ball joint stud in order to release the stud from the lower
control arm.
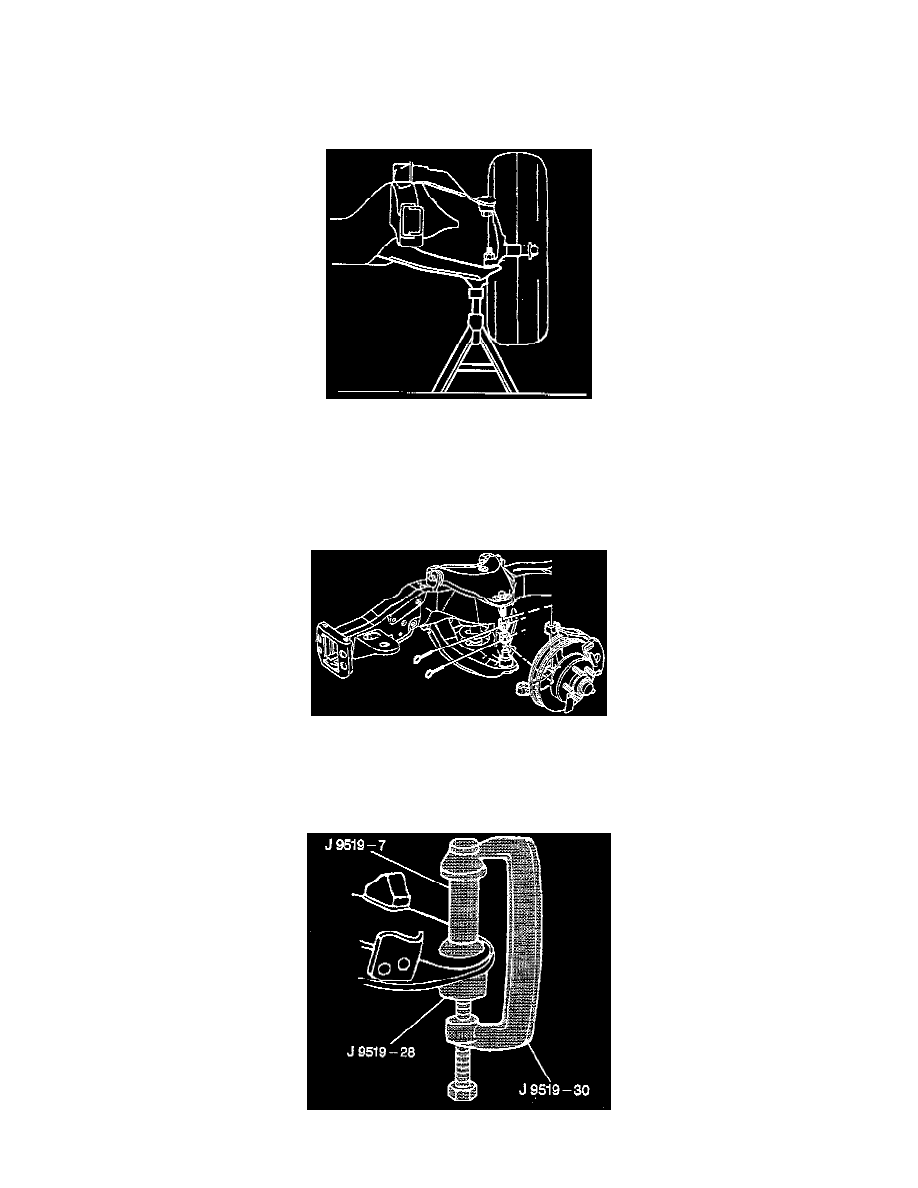
7. Place a block under the upper control arm in order to keep the control arm and the knuckle out of the way.
8. Remove the lower ball joint from the lower control arm using the tools as shown.