Express 1500 AWD V8-5.3L (2008)

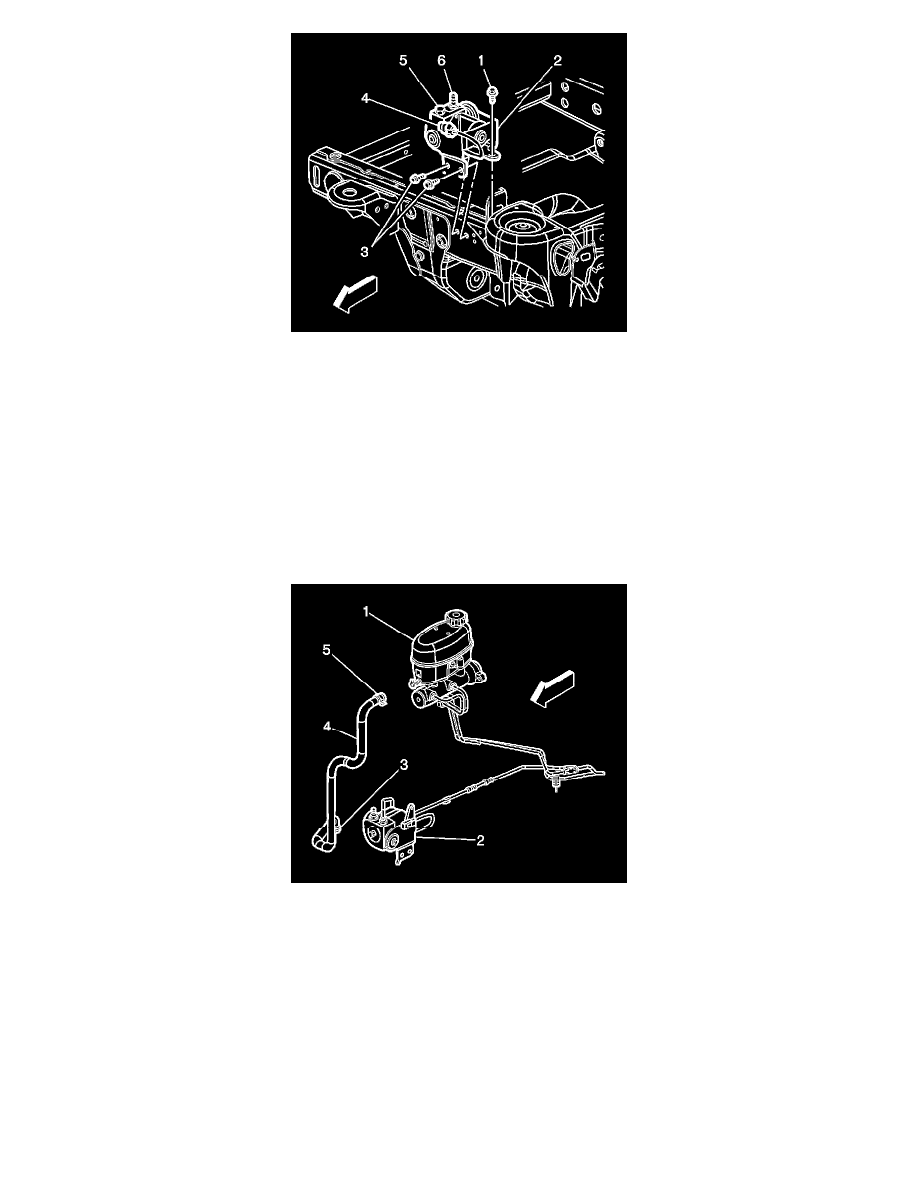
1. Install the PCP (2) into the vehicle.
Notice: Refer to Fastener Notice .
2. Install the PCP front and side mounting bracket bolts (1, 3).
Tighten the bolts to 20 N.m (15 lb ft).
3. Connect the engine wiring harness to the PCP bracket.
4. Connect the PCP electrical connector (4) to the vehicle connector harness.
5. Remove the cap or plug from the outlet pipe and install the outlet pipe to the PCP (5).
Tighten the brake fluid outlet pipe nut to 25 N.m (18 lb ft).
6. Install the inlet hose (4) and clamp (3) to the PCP (2).
7. Remove the crimping tool from the inlet hose.
8. Install the inner fender splash shield.
9. Install the left front wheel and tire. Refer to Tire and Wheel Removal and Installation .
10. Connect the negative battery cable. Refer to Battery Negative Cable Disconnection and Connection .
11. Fill the master cylinder reservoir. Refer to Master Cylinder Reservoir Filling (See: Hydraulic System/Brake Master Cylinder/Service and
Repair/Procedures/Master Cylinder Reservoir Filling) .
12. Using a scan tool, perform a PCP bleed procedure. Refer to Antilock Brake System Automated Bleed Procedure (W/JL4) (See: Brake
Bleeding/Service and Repair)Antilock Brake System Automated Bleed Procedure (w/o JL4) (See: Brake Bleeding/Service and Repair) .
