Express 1500 AWD V8-5.3L (2008)

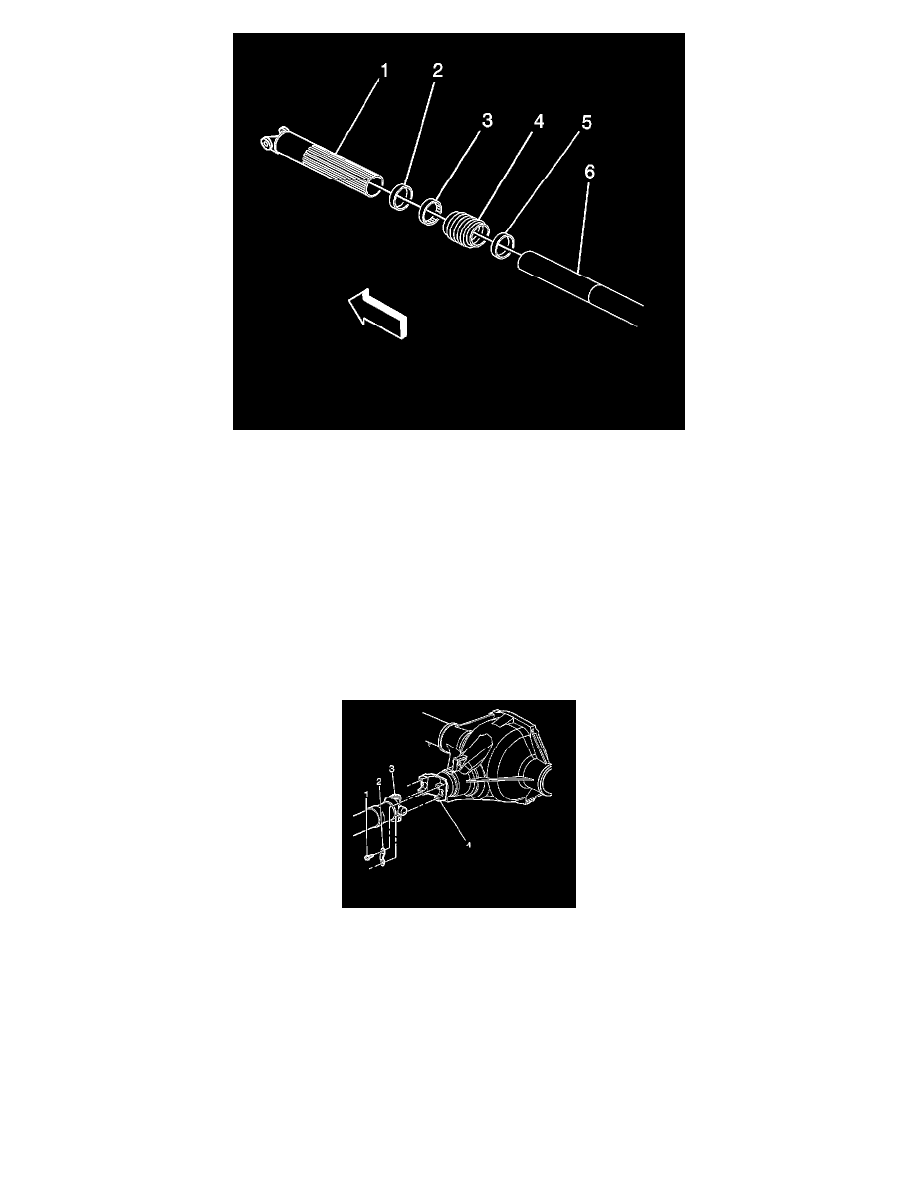
1. Clean the splines of the rear inner tube (6) and the outer tube (1).
2. Inspect the outer and inner splines for damage. Replace the propeller shaft assembly if necessary.
3. Apply grease, GM P/N 12345879 (Canadian P/N 109535511) or equivalent, to the splines of the rear inner tube (6).
4. Install the bushing (3) on the outer tube (1). The flanged end of the bushing should be toward the rear of the vehicle.
5. Install the 81.5 mm clamp (5) onto the rear inner tube (6). The size is stamped on the clamp.
6. Install the 86.5 mm clamp (2) on the large diameter end of the boot (4). The size is stamped on the clamp.
7. Slide the boot (4) onto the rear inner tube (6), small diameter end toward the rear of the vehicle.
8. Install the 81.5 mm clamp (5) onto the boot (4).
Important: The rear inner tube and outer tube splines are not keyed. It is important to observe the alignment marks made during
removal during the installation process.
9.
Utilizing the alignment marks made during removal, reassemble the rear inner tube to the outer tube.
10. Wipe off the excess grease from the tubes.
11. Install the propeller shaft (3) to the rear axle pinion yoke (4). Align the shaft and the yoke using the marks made during removal.
Notice: Refer to Fastener Notice .
12. Install the yoke retainers (2) and the bolts (1).
Tighten the rear axle pinion yoke retainer bolts to 25 N.m (18 lb ft).
13. Using the J 43218 or equivalent, crimp the outer tube clamp.
