Express 1500 AWD V8-5.3L VIN T (2004)

Expansion Block/Orifice Tube: Service and Repair
EXPANSION (ORIFICE) TUBE REPLACEMENT
TOOLS REQUIRED
-
J 26549-E Orifice Tube Remover and Installer
-
J 39400-A Halogen Leak Detector
REMOVAL PROCEDURE
1. Recover the refrigerant from the A/C system. Refer to Refrigerant Recovery and Recharging.
2. Remove the evaporator hose retaining nut from the evaporator.
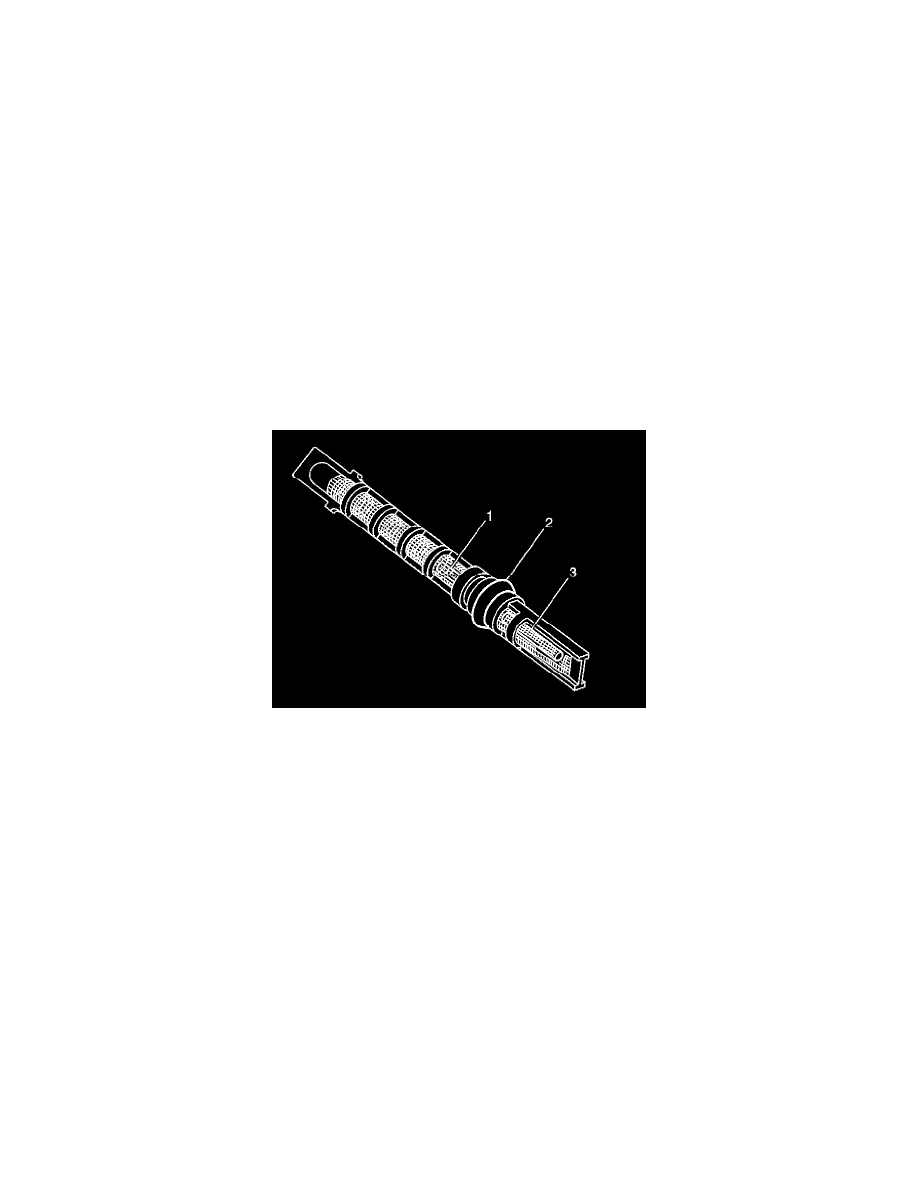
3. Use the J 26549-E in order to remove the expansion tube (1).
4. If the expansion tube is stuck perform the following:
-
Remove as much of the impacted residue as possible.
-
Carefully apply heat with a heat gun, or hair dryer 7 mm (0.25 in) from the dimples on the inlet pipe. DO NOT overheat the pipe.
-
While applying heat, use the J 26549-E in order to grip the expansion tube. Use a turning motion along with a push-pull motion to loosen the
impacted expansion tube and remove.
INSTALLATION PROCEDURE
IMPORTANT:
-
Install the shorter screen end (3) first into the evaporator.
-
Coat the O-ring seal (2) with 525 viscosity refrigerant oil.
1. Use the J 26549-E in order to install the expansion tube.
2. Install new sealing washers to the evaporator tube.
3. Install the evaporator hose to the evaporator.
NOTE: Refer to Fastener Notice in Service Precautions.
4. Install the evaporator hose retaining nut to the evaporator.
Tighten
Tighten the nut to 16 N.m (12 lb ft).
5. Evacuate and recharge the A/C system. Refer to Refrigerant Recovery and Recharging.
6. Leak test the fittings of the components using the J 39400-A.
