
Express 1500 RWD V6-4.3L VIN X (2005)
15. Remove the oil pan gasket.
16. Discard the oil pan gasket.
17. Clean all sealing surfaces on the engine and the oil pan.
Installation Procedure
Notice: Any time the transmission and the engine oil pan are off of the engine at the same time, install the transmission before the oil pan. This is
to allow for the proper oil pan alignment. Failure to achieve the correct oil pan alignment can result in transmission failure.
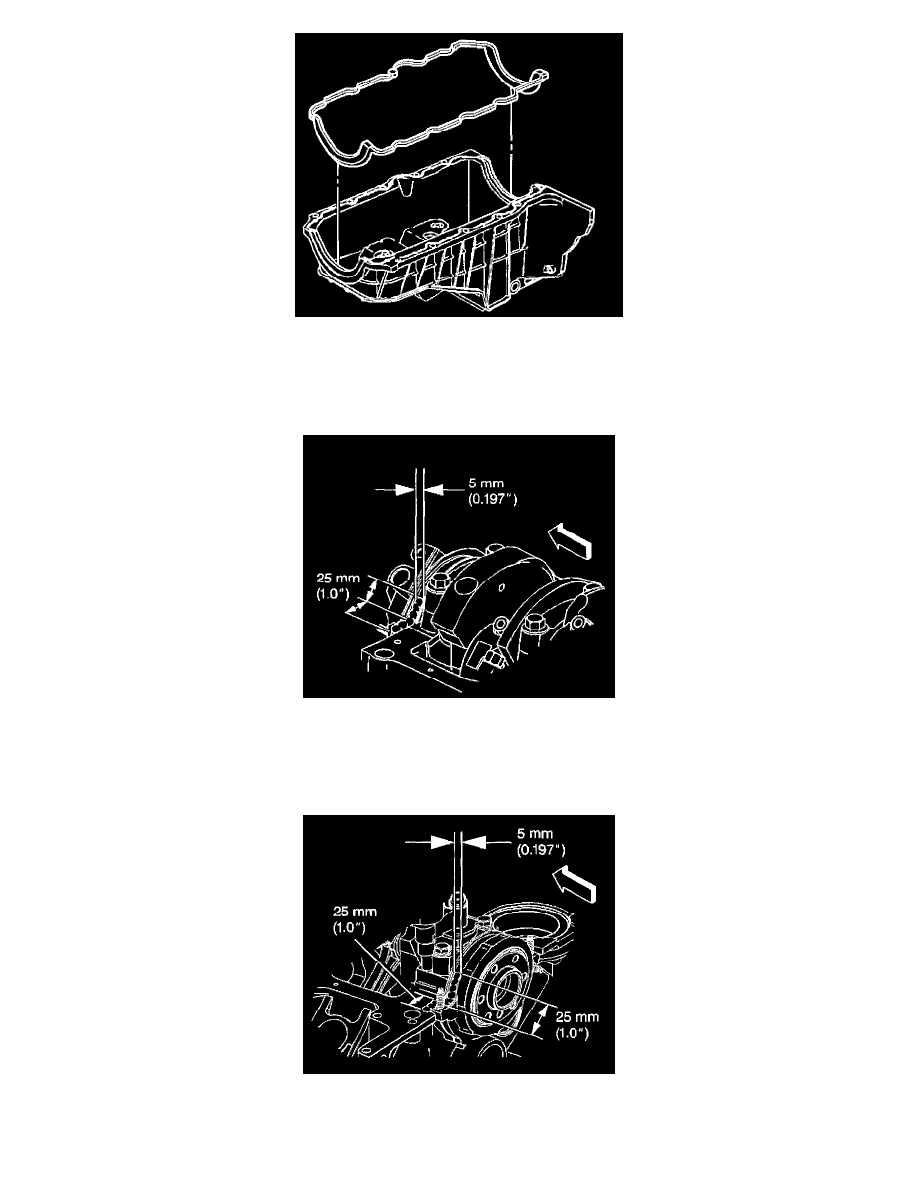
1. Apply a 5 mm (0.197 inch) wide and 25 mm (1.0 inch) long bead of adhesive GM P/N 12346141 (Canadian P/N 10953433) or equivalent to both
the right and left sides of the engine front cover to engine block junction at the oil pan sealing surfaces.
2. Apply a 5 mm (0.197 inch) wide and 25 mm (1.0 inch) long bead of adhesive GM P/N 12346141 (Canadian P/N 10953433) or equivalent to both
the right and left sides of the crankshaft rear oil seal housing to engine block junction at the oil pan sealing surfaces.