Express 1500 RWD V6-4.3L VIN X (2005)

13. Install the ignition coil wire. Note the correct orientation of the wire boot.
14. Refer to Installation Procedure 2 if the malfunction indicator lamp illuminates after installing the distributor.
IMPORTANT: If the malfunction indicator lamp illuminates after installing the distributor and DTC P1345 is set, the distributor has been installed
incorrectly.
15. Install the engine cover.
INSTALLATION PROCEDURE 2
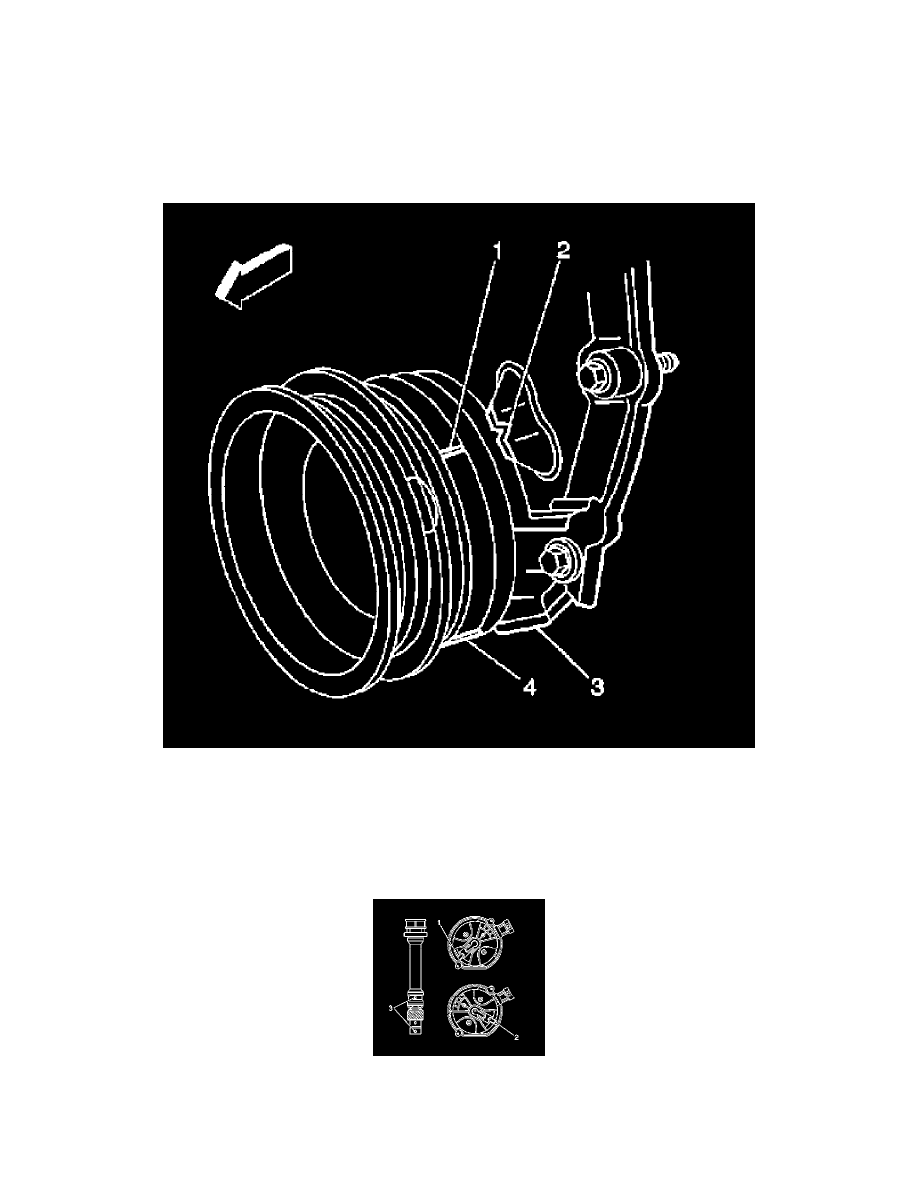
1. Rotate the crankshaft balancer clockwise until the alignment marks on the crankshaft balancer are aligned with the tabs on the engine front cover
and the number 1 piston is at TDC of the compression stroke.
IMPORTANT: Rotate the number 1 cylinder to top dead center (TDC) of the compression stroke. The engine front cover has 2 alignment tabs and
the crankshaft balancer has 2 alignment marks spaced 90 degrees apart which are used for positioning the number 1 piston at TDC. With the piston on
the compression stroke and at TDC, the crankshaft balancer alignment mark (1) must align with the engine front cover tab (2) and the crankshaft
balancer alignment mark (4) must align with the engine front cover tab (3).
2. Align the white paint mark on the bottom stem of the distributor and the pre-drilled indent hole in the bottom of the gear (3).
3. With the gear in this position, the rotor segment should be positioned as shown for a V6 engine (1).
-
The alignment will not be exact.
-
If the driven gear is installed incorrectly, the dimple will be approximately 180 degrees opposite of the rotor segment when installed in the
