
Express 1500 RWD V6-4.3L VIN X (2005)
Compressor Clutch Coil: Service and Repair
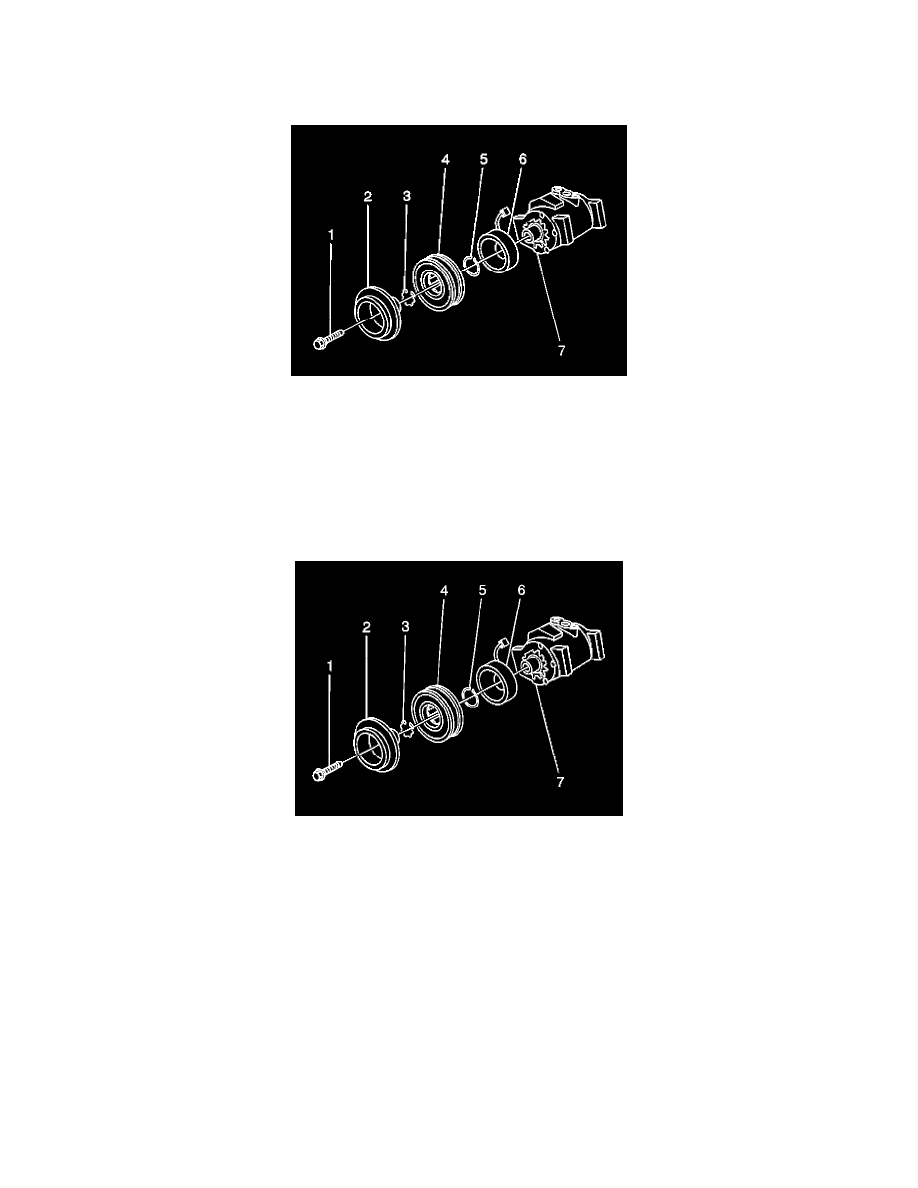
COMPRESSOR CLUTCH COIL REPLACEMENT
REMOVAL PROCEDURE
1. Remove the clutch plate retaining bolt (1).
2. Remove the clutch plate assembly.
3. Remove the clutch hub/bearing snap ring.
4. Remove the clutch hub/bearing assembly.
5. Remove the clutch coil connector bracket retaining screw.
6. Remove the clutch coil snap ring.
7. Remove the clutch coil assembly.
INSTALLATION PROCEDURE
1. Install the coil assembly to the compressor.
2. Install the coil snap ring.
NOTE: Refer to Fastener Notice in Service Precautions.
3. Install the coil connector retaining bracket screw.
Tighten
Tighten the screw to 9 N.m (80 lb in).
4. Install the clutch hub/bearing assembly.
5. Install the clutch hub/bearing snap ring.
6. Install the clutch plate assembly.
7. Install the clutch plate retaining bolt (1).
Tighten
Tighten the bolt to 18 N.m (13 lb ft).