
Express 1500 RWD V8-5.3L (2008)
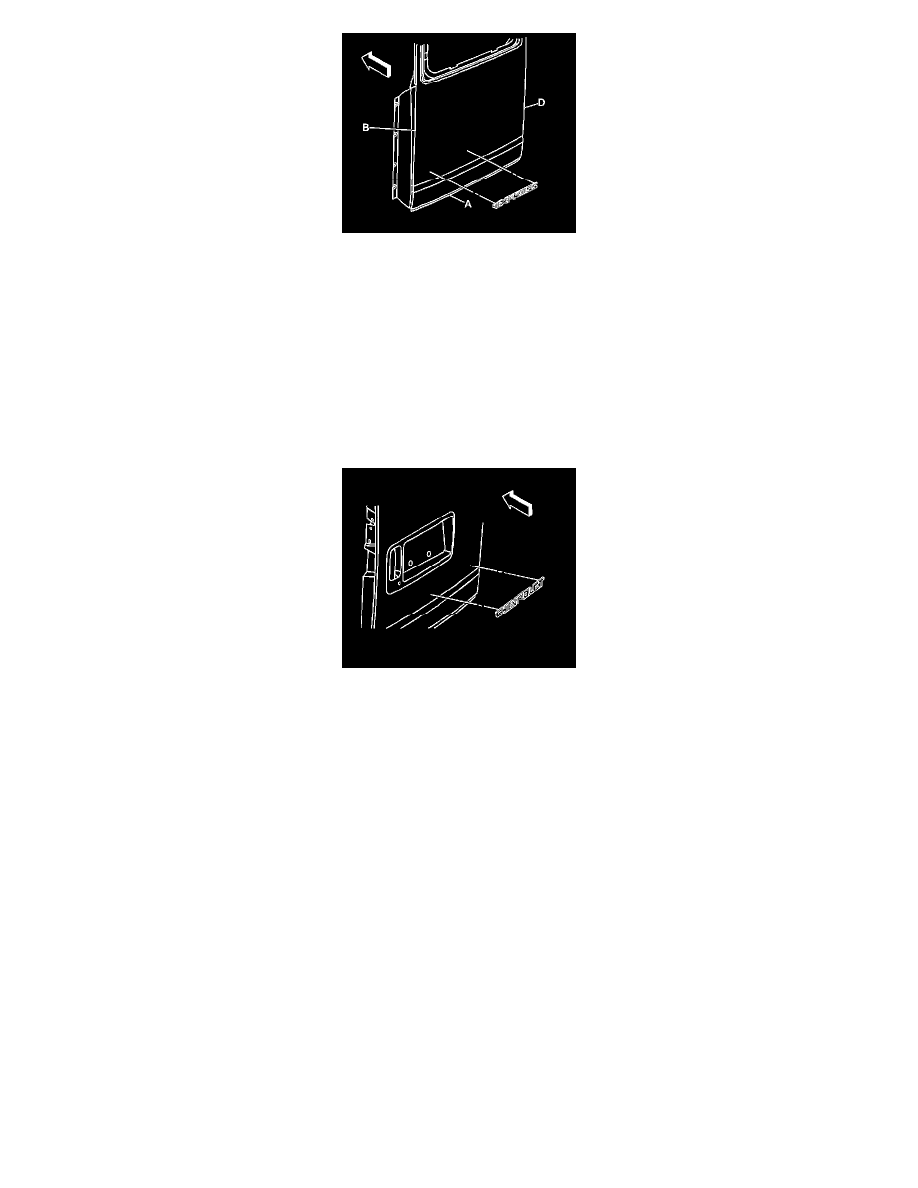
4. Use the following dimensions in order to mark the proper position of the emblem/name plate on the left rear door:
*
200.5 mm +/- 2 mm (7.9 in +/- 0.1 in) (A) from the horizontal edge
*
47.5 mm +/- 2 mm (1.9 in +/- 0.1 in) (B) from the vertical edge
5. If the body is below 19°C (66°F) due to shop temperature or outside temperature, warm the body panel using the J 25070 while proceeding with
the next step.
6. If needed, apply a double-coated acrylic foam tape such as 3M(R) Super Automotive Attachment Tape (2) or an equivalent to the
emblem/nameplate:
*
3M(R) 06380 has a white backing
*
3M(R) 06377 has a black backing
*
3M(R) 06382 has a gray backing
Important: Care should be exercised not to touch the tape with your hands or allow the adhesive tape to come in contact with any dirt or
foreign matter.
7. Peel the backing from the adhesive tape.
8. Align the emblem/nameplate with the previous length of masking tape or magnetic strip.
9. Firmly press the emblem/nameplate into place for 30 seconds in order to ensure proper adhesion of the emblem/nameplate.
10. Remove the masking tape or magnetic strip from the right rear door.
Rear Door Emblem/Nameplate Replacement (EXPRESS STABILITRAK)
Rear Door Emblem/Nameplate Replacement (EXPRESS STABILITRAK)