
Express 1500 RWD V8-5.3L (2008)
5. Install the BPMV (1) to bracket retaining bolts (4).
Tighten the bolts to 9 N.m (80 lb in).
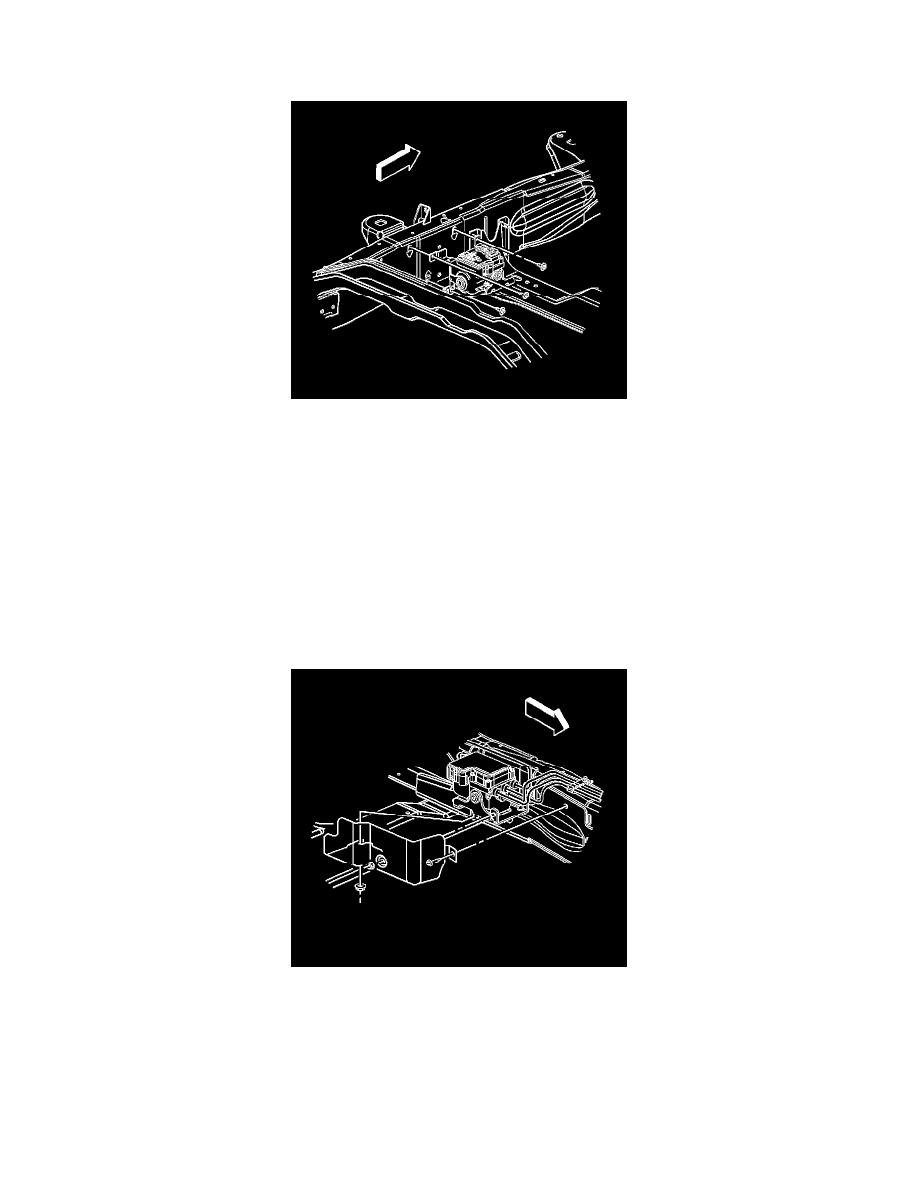
6. Install the EHCU to the vehicle frame.
Tighten the 3 EHCU bracket bolts to 25 N.m (18 lb ft).
7. Connect the 2 electrical harness connectors to the EBCM.
Important: The brake pipes are held in place by a plastic bracket mounted to the frame. Make sure that the brake pipes stay in the
correct place for proper reassembly.
8. Install the 5 brake pipes to the BPMV.
Tighten the brake pipe fittings to 30 N.m (22 lb ft).
9. Install the torsion bar. Refer to Torsion Bar and Support Assembly Replacement .
10. For cutaway vehicles, install the splash shield.
11. Bleed the brake system. Refer to Hydraulic Brake System Bleeding (Manual) (See: Brake Bleeding/Service and Repair)Hydraulic Brake System
Bleeding (Pressure) (See: Brake Bleeding/Service and Repair) .
12. Bleed the brake system. Refer to Antilock Brake System Automated Bleed Procedure (W/JL4) (See: Brake Bleeding/Service and Repair)Antilock
Brake System Automated Bleed Procedure (w/o JL4) (See: Brake Bleeding/Service and Repair) .