
Express 1500 RWD V8-5.3L (2008)
Parking Brake Shoe: Service and Repair
Parking Brake Shoe Replacement (1500 Series)
Removal Procedure
Caution: Refer to Brake Dust Caution .
1. Raise and support the vehicle. Refer to Lifting and Jacking the Vehicle .
2. Remove the tire and the wheel. Refer to Tire and Wheel Removal and Installation .
3. Disable the park brake cable automatic adjuster. Refer to Parking Brake Cable Adjuster Disabling (See: Parking Brake Cable/Service and
Repair/Procedures/Parking Brake Cable Adjuster Disabling) .
4. Remove the park brake cable from the park brake actuator lever.
5. Remove the rotor. Refer to Rear Brake Rotor Replacement (W/Dual Wheels) (See: Disc Brake System/Brake Rotor/Disc/Service and
Repair/Removal and Replacement/Rear Brake Rotor Replacement (W/Dual Wheels))Rear Brake Rotor Replacement (Except Dual Wheels) (See:
Disc Brake System/Brake Rotor/Disc/Service and Repair/Removal and Replacement/Rear Brake Rotor Replacement (Except Dual Wheels)) .
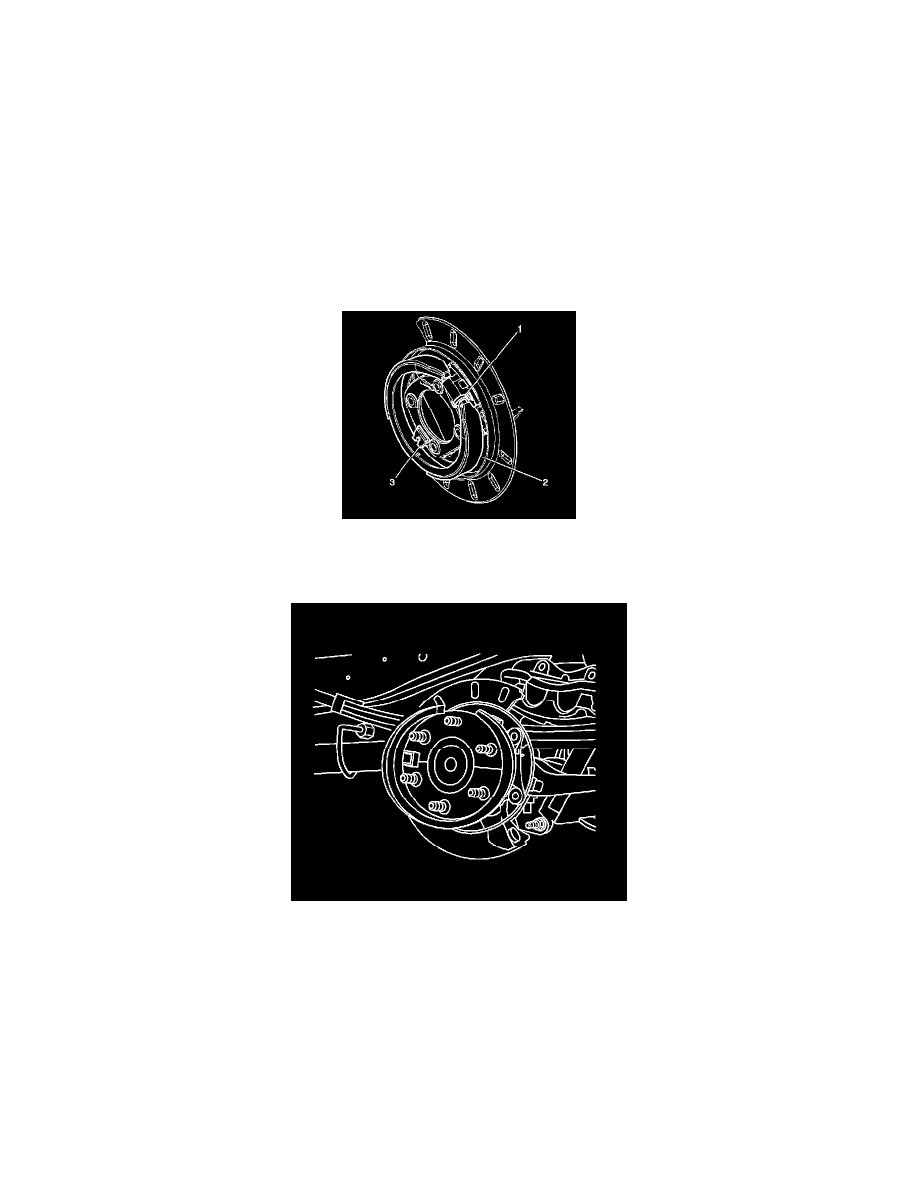
6. Turn the adjustment screw (1) to the fully home position in the notched adjustment nut.
7. Remove the park brake shoe assembly from the backing plate by removing the tips from the slots and sliding the shoe (2) towards the retaining
spring (3) until the shoe disengages from the spring.
8. Remove the park brake shoe assembly from the vehicle by placing one of the open ends of the shoe over the axle flange and rotating the shoe until
it has cleared the flange.
Installation Procedure
1. Clean the debris and the dust from the park brake components using a clean shop cloth.