
Express 1 Ton Van V8-5.7L VIN R (1999)
Hose/Line HVAC: Service and Repair
Compressor Hose Assembly Replacement
REMOVAL PROCEDURE
CAUTION: Refer to Battery Disconnect Caution in Service Precautions.
1. Remove the negative battery cable.
2. Recover the refrigerant from the system. Refer to Refrigerant Recovery and Recharging. See: Refrigerant/Service and Repair
3. Remove the coolant recovery or the surge tank.
4. Remove the air cleaner from the vehicle.
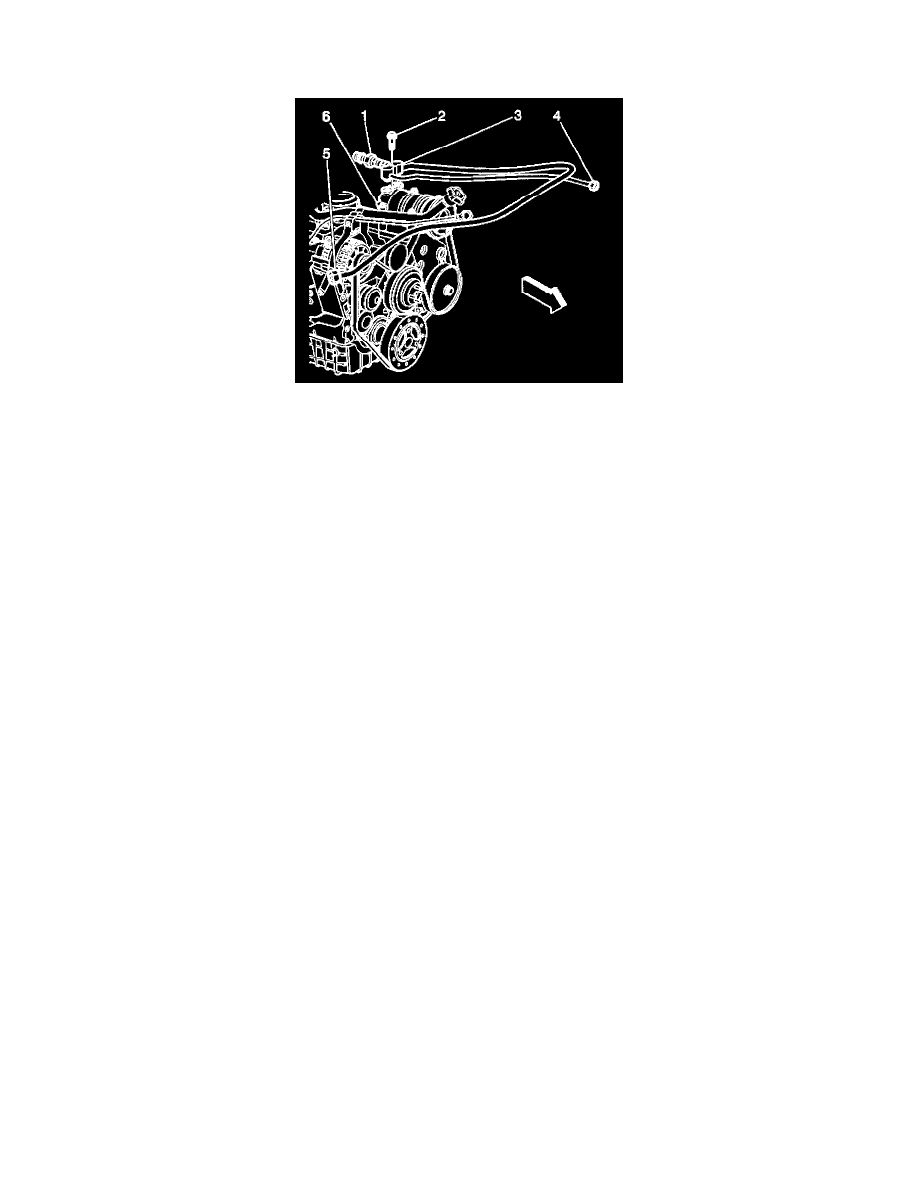
5. Remove the air conditioning lines to the accumulator (5) and the condenser (4).
6. Remove the auxiliary hose connection at the compressor it equipped.
7. Cap or plug all open connections.
8. Remove the bolt from the hose to the compressor.
9. Remove the hose (3) from the vehicle.
INSTALLATION PROCEDURE
1. Install the hose (3) to the vehicle.
NOTE: Refer to Fastener Notice in Service Precautions.
2. Install the bolt and the hose to the compressor.
Tighten
Tighten the hose retaining bolt to 45 N.m (33 lb ft).
3. Install the auxiliary hose connection at the compressor if equipped.
Tighten
Tighten the auxiliary hose connection to the compressor to 45 N.m (33 lb ft).
4. Install the air conditioning lines to the accumulator (5) and the condenser (4).
Tighten
^
Tighten the A/C line to the accumulator to 48 N.m (35 lb ft).
^
Tighten the A/C line to the condenser to 28 N.m (21 lb ft).
5. Install the air cleaner to the vehicle.
6. Install the coolant recovery or the surge tank.
7. Recharge the refrigerant to the system. Refer to Refrigerant Recovery and Recharging.
8. Install the negative battery cable.