
Express 1 Ton Van V8-5.7L VIN R (1999)
9. Punch the rivets out. Use a small pin punch.
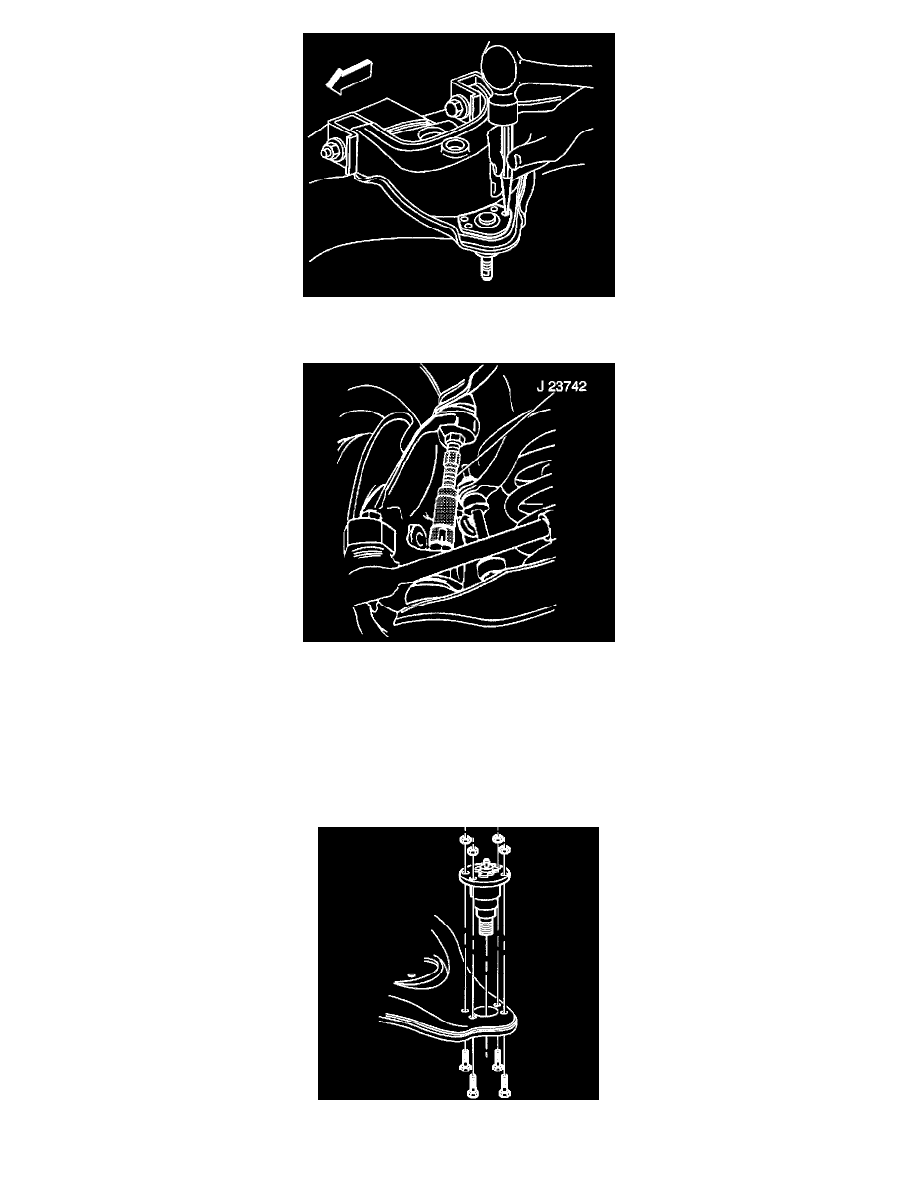
10. Remove the cotter pin and nut.
11. Using the J-23742 separate the ball joint from the steering knuckle.
12. Remove the J-23742.
13. Pull the stud away from the knuckle.
14. Remove the ball joint.
INSTALLATION PROCEDURE
1. Install a new upper ball joint to the upper control arm.
NOTICE: Refer to Fastener Notice in Service Precautions.
2. Position four attaching bolts and nuts.
-
Tighten the nuts to 24 Nm (18 ft. lbs.).