
Express 1 Ton Van V8-5.7L VIN R (1999)
Wheel Bearing: Adjustments
Wheel Bearing Adjustment (10 1/2 Inch Ring Gear)
Rear Wheel Bearing Adjustment
Removal Procedure
^
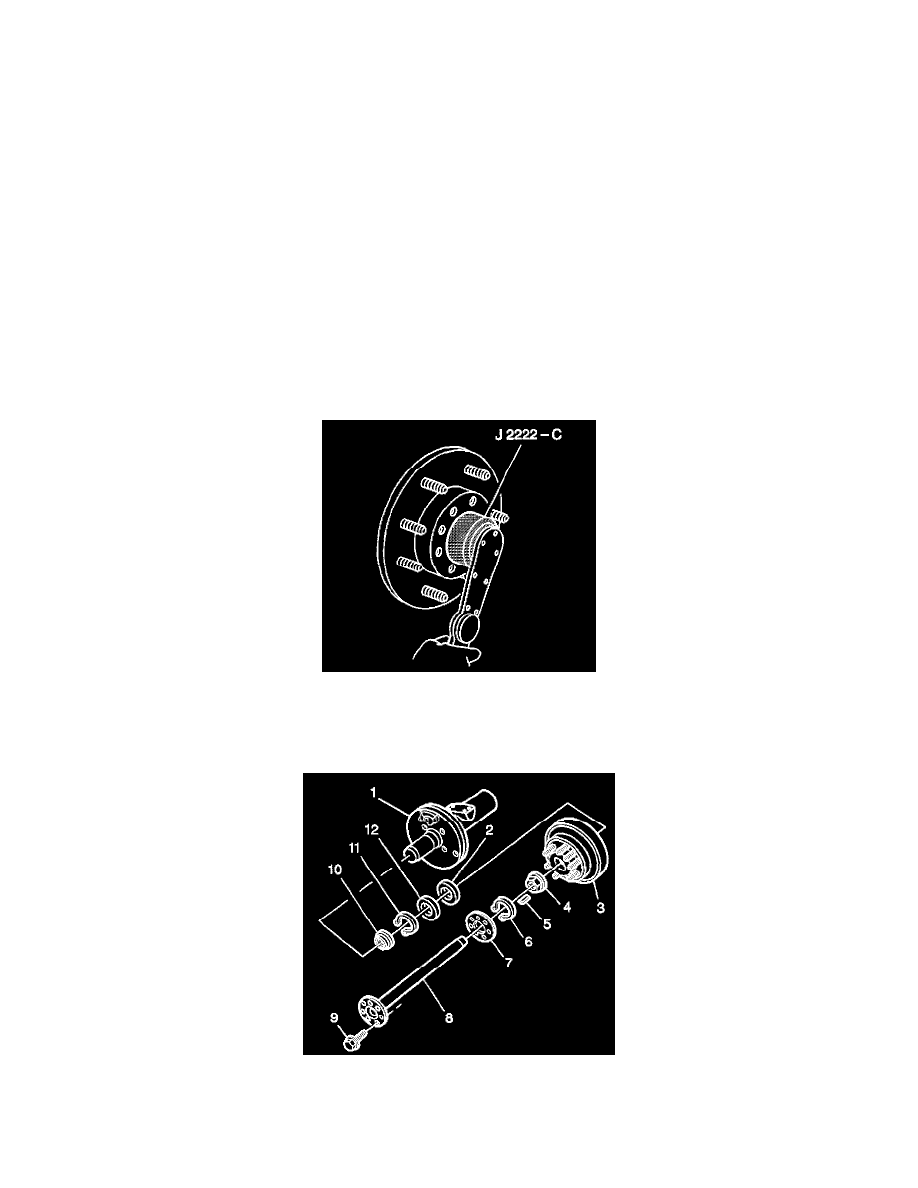
Tools Required
-
J2222-C Wheel Bearing Nut Wrench
1. Ensure the brakes are fully released and do not drag.
2. Pull or push the tire at the top back and forth in order to test the wheel bearing play.
^
Use a pry bar under the tire as an alternative.
^
If the wheel bearing adjustment is correct, the movement will be barely noticeable.
^
If the movement is excessive, adjust the bearings.
3. Raise and support the vehicle on a hoist.
4. Remove the axle shaft. Refer to Axle Shaft Replacement (10 1/2 Inch Ring Gear).
5. Remove the retaining ring (6).
6. Remove the key (5).
Notice: Refer to Fastener Notice in Service Precautions.
7. Tighten the wheel bearing adjusting nut.
^
Tighten the adjusting nut to 68 Nm (50 ft. lbs.).
^
Rotate the hub in the opposite direction as the adjusting nut turns.
^
Ensure the inner bearing roller assembly seats against the spindle shoulder.
8. Use the following procedure in order to adjust the nut:
8.1.
Back off the adjusting nut (4) 1/4 turn.
8.2.
Retighten the adjusting nut to 17 Nm (13 ft. lbs.).
8.3.
Align the closest adjusting nut slot with the keyway in the axle spindle.