
Express 2500 V8-6.6L DSL Turbo (2010)
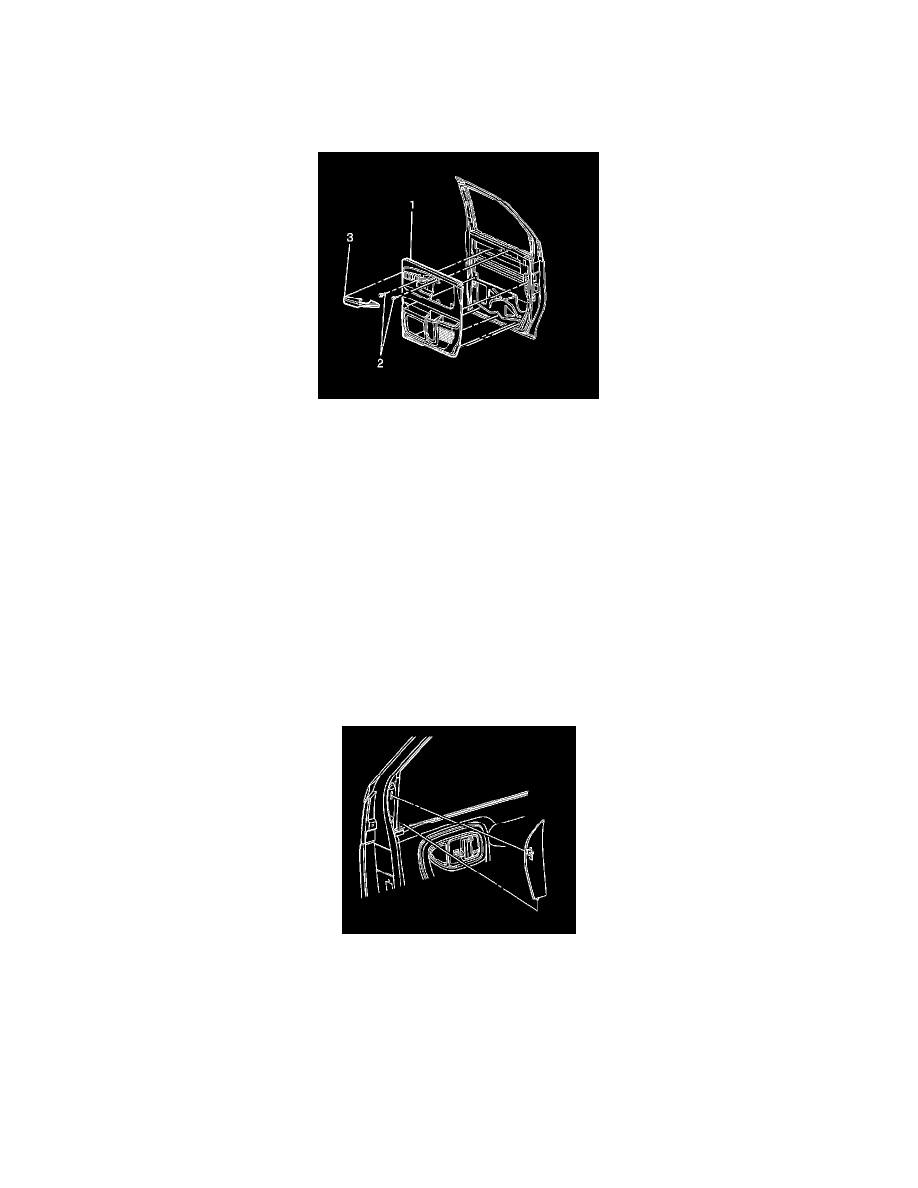
4. Remove the door trim panel screws (2), located behind the armrest.
5. Use the J 38778 to disengage the retainers around the outside edges of the door trim panel (1).
6. Slide the door trim panel (1) upwards to release the door panel from the door.
7. Remove the front door panel (1) from the vehicle.
Installation Procedure
1. Install the door trim panel (1), by hooking the top of the door trim panel (1) to the door belt line.
2. Align the door trim panel retainers to the door.
3. Push towards the door to engage the retainers to the sheet metal.
Caution: Refer to Fastener Caution (See: Service Precautions/Vehicle Damage Warnings/Fastener Caution).
4. Install the door trim panel screws (2) and tighten to 2.0 Nm (18 lb in).
5. Install the armrest (3). Refer to Armrest Replacement (See: Interior Moulding / Trim/Arm Rest/Service and Repair).
6. Install the front door trim plate. Refer to Front Door Trim Plate Replacement (See: Front Door Trim Plate Replacement).
7. Install the front door garnish molding. Refer to Front Side Door Front Garnish Molding Replacement (See: Front Side Door Front Garnish
Molding Replacement).
Front Side Door Front Garnish Molding Replacement
Front Side Door Front Garnish Molding Replacement
Removal Procedure
1. Grasp the front door front garnish molding.
Gently pull at the top of the molding in order to disengage the retaining clips.
2. Lift the front door front garnish molding up to disengage the tab on the garnish molding from the slot on the door trim panel.
3. Inspect the front door front garnish molding for broken or missing retaining clips. Replace any clips, if needed.
Installation Procedure