
Express 2500 V8-6.6L DSL Turbo (2010)
Replace the components as necessary.
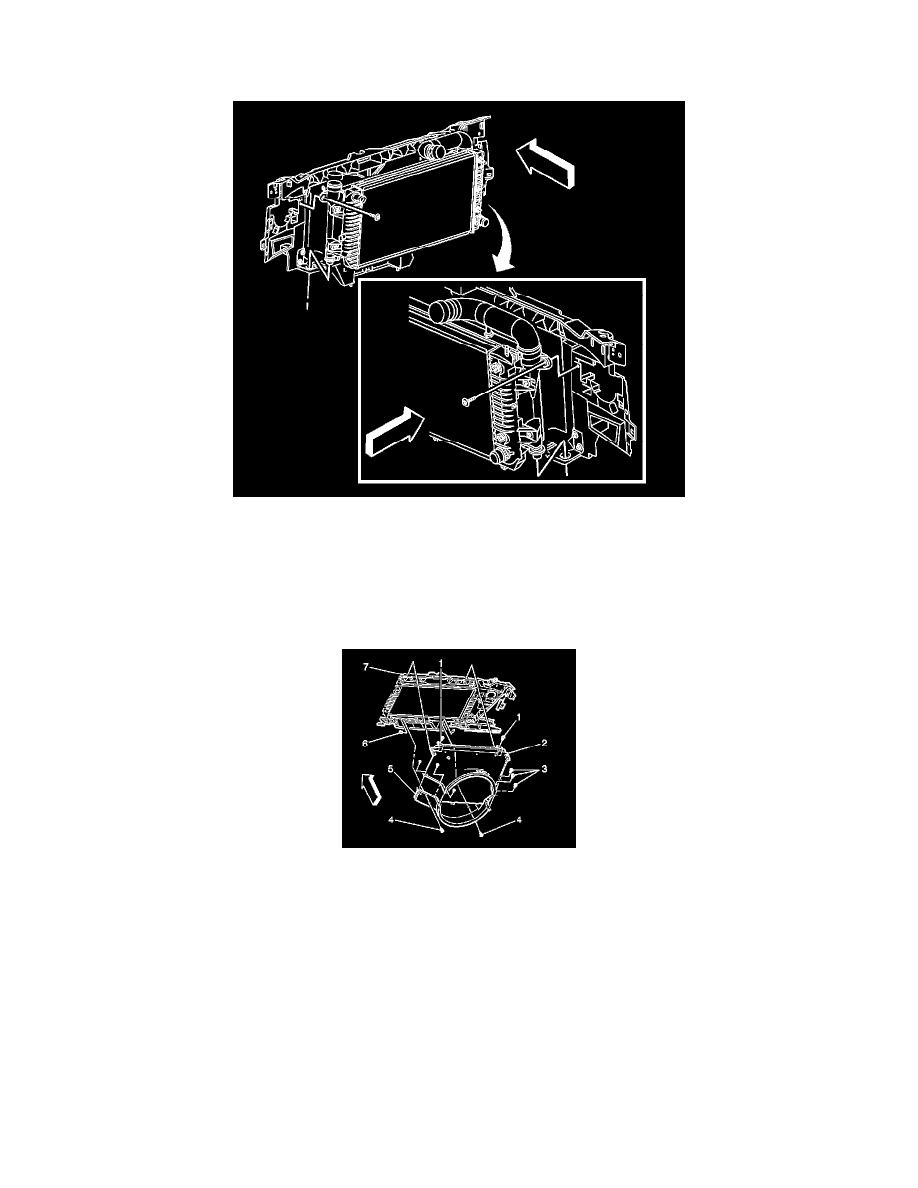
Installation Procedure
1. Install the radiator insulators.
Caution: Refer to Fastener Caution (See: Service Precautions/Vehicle Damage Warnings/Fastener Caution).
2. Install the radiator to the charge air cooler and tighten the bolts to 6 Nm (53 lb in).
3. Install the radiator and charge air cooler as an assembly.
4. Install the radiator mounting bolts to the charged air cooler and tighten to 6 Nm (53 lb in).
5. Install the fan shroud bolts (1) to the top of the radiator support and tighten to 6 Nm (53 lb in).
6. Install the fan shroud bolts (3) to the sides of the fan shroud and tighten to 6 Nm (53 lb in).
7. Install the engine oil cooler lines. Refer to Engine Oil Cooler Pipe/Hose Quick Connect Fitting Replacement (See: Engine/Engine Lubrication/Oil
Cooler/Service and Repair).
8. Install the automatic transmission oil cooler lines. Refer to Transmission Fluid Cooler Hose/Pipe Quick-Connect Fitting Disconnection and
Connection (See: Transmission and Drivetrain/Automatic Transmission/Transaxle/Fluid Line/Hose/Service and Repair/4L60-E/4L65-E/4L70-E -
Automatic Transmission/Transmission Fluid Cooler Hose/Pipe Quick-Connect Fitting Disconnection and Connection) for the
4L60-E/4L65-E/4L70-E transmissions or Transmission Fluid Cooler Hose/Pipe Quick-Connect Fitting Disconnection and Connection (See:
Transmission and Drivetrain/Automatic Transmission/Transaxle/Fluid Line/Hose/Service and Repair/6L45/6L50/6L80/6L90 - Automatic
Transmission/Transmission Fluid Cooler Hose/Pipe Quick-Connect Fitting Disconnection and Connection) for the 6L90 transmissions.