Express 2500 V8-6.6L DSL Turbo (2010)

Intake Manifold: Service and Repair
Intake Manifold Replacement - Left Side
VIN L
Intake Manifold Replacement - Left Side
Special Tools
J-37228 - Seal Cutter
For equivalent regional tools, refer to Special Tools (See: Tools and Equipment/Special Tools).
Removal Procedure
1. Remove the center intake manifold. Refer to Center Intake Manifold Replacement (See: Center Intake Manifold Replacement).
2. Remove the injection pump. Refer to Fuel Injection Pump Replacement (See: Powertrain Management/Fuel Delivery and Air Induction/Fuel
Pump/Service and Repair/Fuel Injection Pump Replacement).
3. Remove the left fuel rail. Refer to Fuel Injection Fuel Rail Assembly Replacement - Bank 2 (See: Powertrain Management/Fuel Delivery and Air
Induction/Fuel Rail/Service and Repair/Fuel Injection Fuel Rail Assembly Replacement - Bank 2).
Note: The intake manifold uses sealer. Pry at the area by the fuel rail bolt holes in order to avoid damage to the sealing surface.
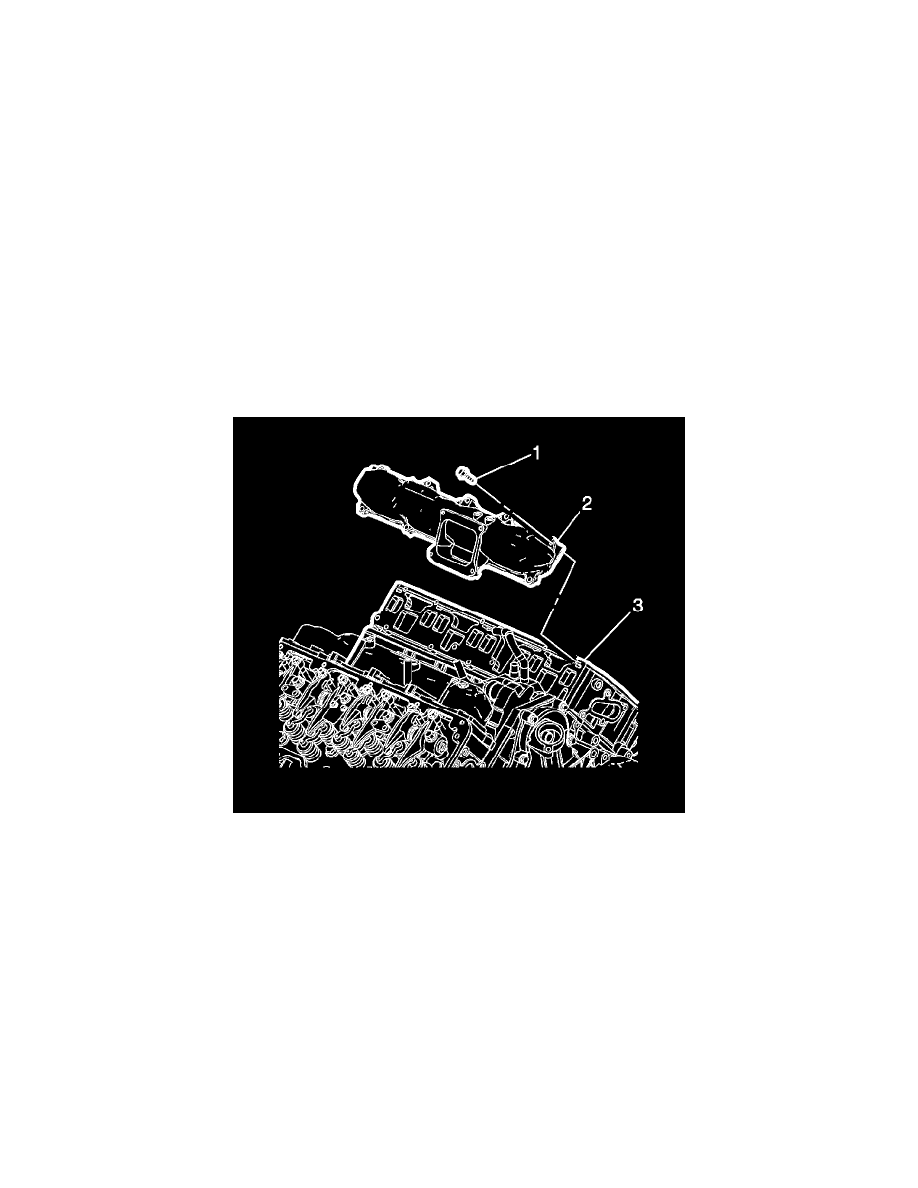
4. Remove the left intake manifold bolts (1). Do not forget to remove the bolt inside the intake manifold tube.
5. Separate the intake manifold (2) from the cylinder head (3) using J-37228 - cutter.
6. Remove the left intake manifold.
7. Inspect and clean. Refer to Intake Manifold Cleaning and Inspection (See: Service and Repair/Overhaul/68. Intake Manifold Cleaning and
Inspection).
Installation Procedure
