
Express 2500 V8-6.6L DSL Turbo (2010)
Crankshaft Position Sensor: Service and Repair
Crankshaft Position Sensor Exciter Ring and Oil Pump Drive Gear Replacement
VIN L
Crankshaft Position Sensor Exciter Ring and Oil Pump Drive Gear Replacement
Removal Procedure
1. Remove the engine front cover. Refer to Engine Front Cover Replacement (See: Engine, Cooling and Exhaust/Engine/Timing
Components/Timing Cover/Service and Repair).
2. Remove the upper oil pan. Refer to Upper Oil Pan Replacement (See: Engine, Cooling and Exhaust/Engine/Engine Lubrication/Oil Pan/Service
and Repair/Upper Oil Pan Replacement).
Caution: Do not use an impact driver to remove or install the oil pump driven gear nut. Use of an impact driver may shear the oil pump drive
gear pin in the crankshaft.
3. Remove the oil pump driven gears and crankshaft sensor reluctor. Refer to Oil Pump Replacement (See: Engine, Cooling and
Exhaust/Engine/Engine Lubrication/Oil Pump/Service and Repair).
Note: Do not remove the reluctor from the oil pump drive gear unless replacing the reluctor or the oil pump drive gear. The reluctor is timed to
the gear and once removed the correct timing will be lost.
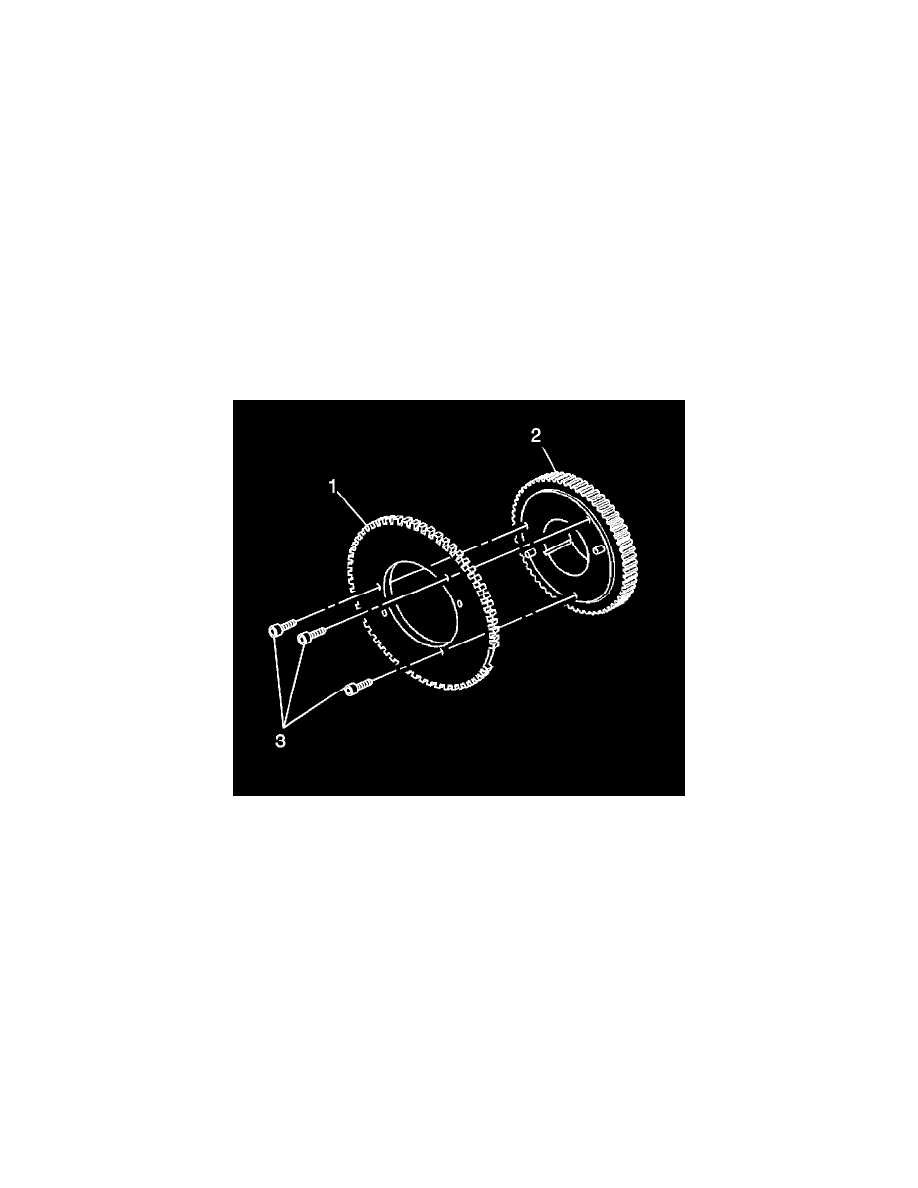
4. Remove the crankshaft reluctor (1) to oil pump drive gear (2) bolts (3).
5. Inspect the crankshaft reluctor for the damage, bent teeth, being bent or warped.
6. Inspect the oil pump drive gear for damaged or worn teeth.
7. Inspect the oil pump drive gear crankshaft pin for wear.
8. Inspect the groove of the crankshaft pin in the oil pump drive gear for wear.
9. Replace any parts that are damaged or worn.
Installation Procedure