
Express 2500 V8-6.6L DSL Turbo VIN 2 (2007)
Expansion Block/Orifice Tube: Service and Repair
Expansion (Orifice) Tube Replacement
Tools Required
*
J 26549-E Orifice Tube Remover and Installer
*
J 39400-A Halogen Leak Detector
Removal Procedure
1. Recover the refrigerant from the A/C system. Refer to Refrigerant Recovery and Recharging.
2. Remove the evaporator hose retaining nut from the evaporator.
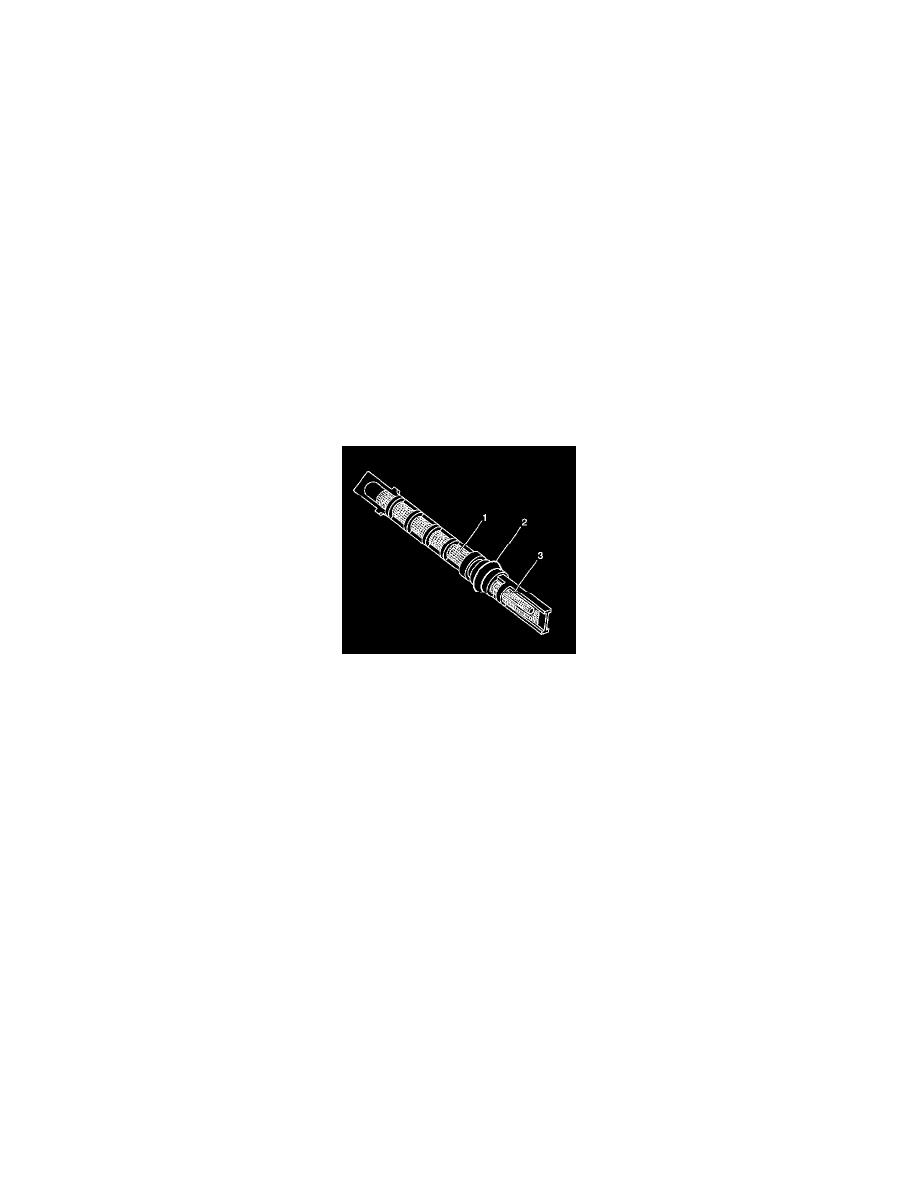
3. Use the J 26549-E in order to remove the expansion tube (1).
4. If the expansion tube is stuck perform the following:
*
Remove as much of the impacted residue as possible.
*
Carefully apply heat with a heat gun, or hair dryer 7 mm (0.25 in) from the dimples on the inlet pipe.
DO NOT overheat the pipe.
*
While applying heat, use the J 26549-E in order to grip the expansion tube. Use a turning motion along with a push-pull motion to loosen the
impacted expansion tube and remove.
Installation Procedure
Important:
*
Install the shorter screen end (3) first into the evaporator.
*
Coat the O-ring seal (2) with 525 viscosity refrigerant oil.
Use the J 26549-E in order to install the expansion tube.
2. Install new sealing washers to the evaporator tube.
3. Install the evaporator hose to the evaporator.
Notice: Refer to Fastener Notice.
4. Install the evaporator hose retaining nut to the evaporator.
Tighten the nut to 16 N.m (12 lb ft).
5. Evacuate and recharge the A/C system. Refer to Refrigerant Recovery and Recharging.
6. Leak test the fittings of the components using the J 39400-A.