
Express 3/4 Ton Van V8-305 5.0L VIN M SFI (1999)
NOTICE: Refer to Fastener Notice in Service Precautions.
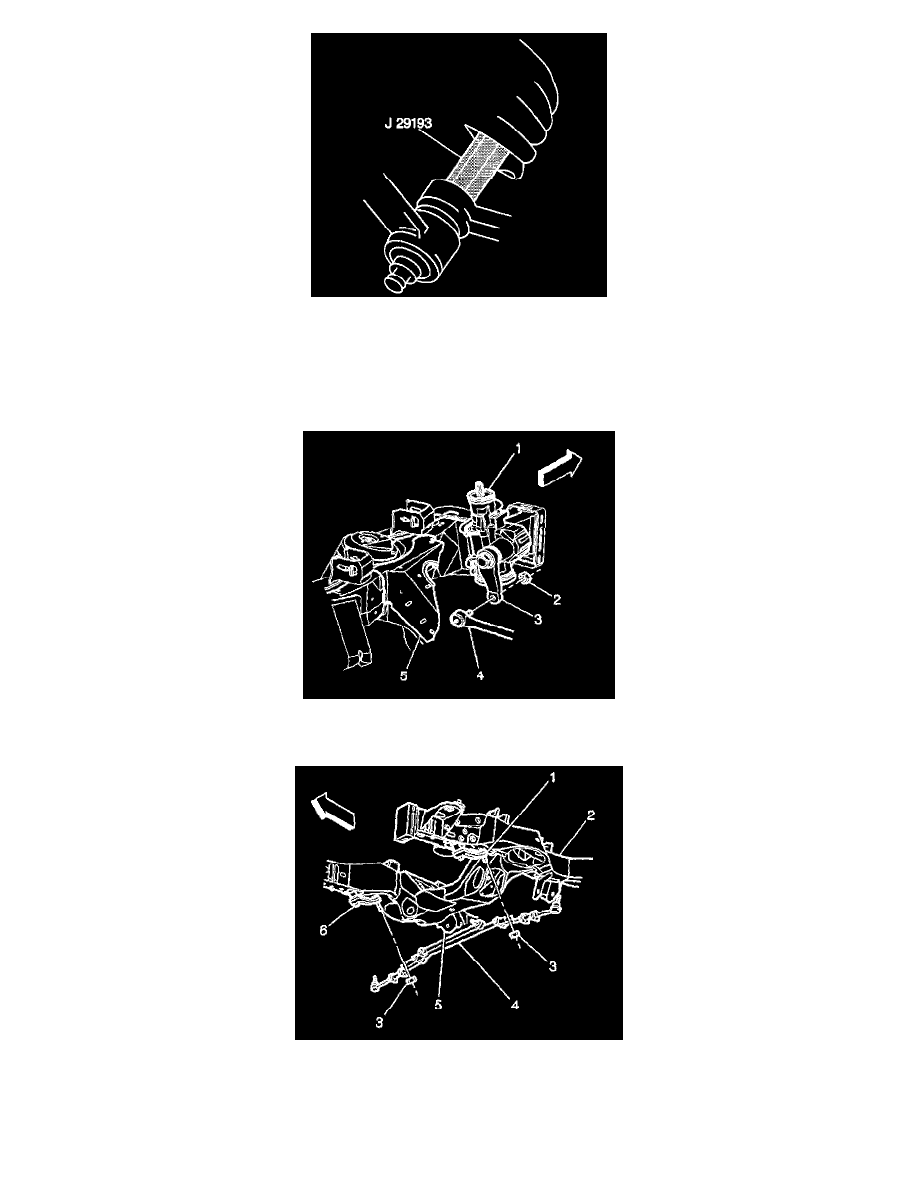
1. Use the J 29193 in order to connect the connecting rod to the pitman arm ball stud. Ensure that the seal is on the stud.
-
Tighten the J 29193 to 54 Nm (40 ft. lbs.) in order to seat the tapers.
Remove the J 29193.
2. Install the new prevailing torque nut (2) to the pitman arm (3) ball stud.
-
Tighten the nut to 47 Nm (35 ft. lbs.).
3. Use the J 29193 in order to install the connecting rod ball stud to the relay rod (4).
Ensure that the seal is on the stud.
-
Tighten the J 29193 to 54 Nm (40 ft. lbs.) in order to seat the tapers.
4. Remove the J 29193.