
Express 3/4 Ton Van V8-305 5.0L VIN M SFI (1999)
Drive/Propeller Shaft: Service and Repair
Propeller Shaft Replacement-Two Piece
Removal Procedure
Important: If either the front or rear shaft of a two-piece propeller shaft is replaced, the mating shaft must be re-balanced with the replaced shaft.
Two-piece shafts have a notice affixed to them.
1. Raise and suitably support the vehicle with safety stands.
2. Reference mark the rear propeller shaft to the pinion flange and to the front propeller shaft, then reference mark the front shaft to the yoke at the
transmission.
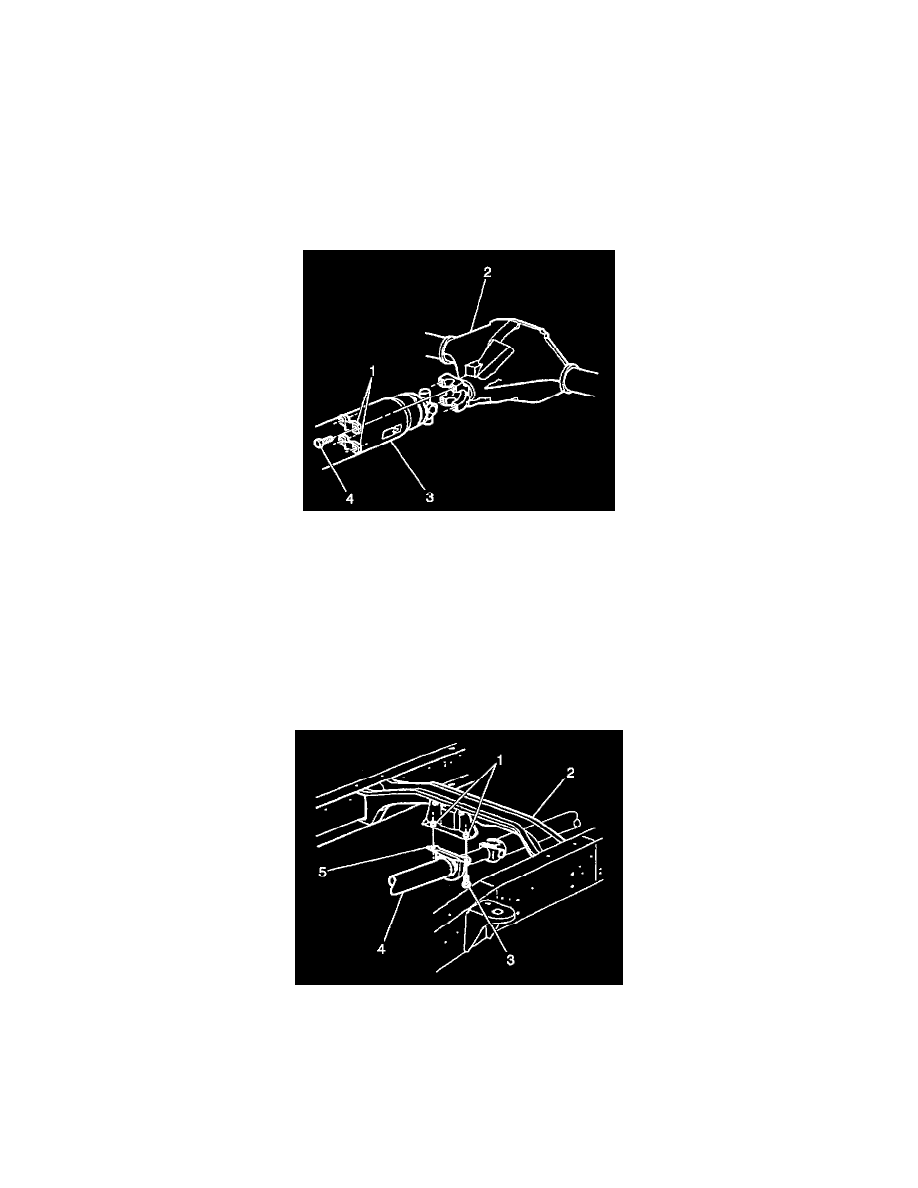
3. Remove the bolts at the pinion flange.
4. Remove the retainers (1) at the pinion flange.
5. Remove the rear propeller shaft.
6. Slide the propeller shaft (3) forward in order to disengage the rear universal joint from the pinion flange.
7. Slip the shaft off the spline.
Important: Do not allow the propeller shaft to incline unsupported, because the joint may fracture. Do not pound on the propeller shaft yoke ears.
Never pry or place any tool between a yoke and a universal joint. You could damage the bearing seals. Tape bearing cups onto the yoke and the
universal joints in order to prevent loss of the needle bearings. Slide the propeller shaft forward in order to disengage the rear universal joint from the
pinion flange. Then slide the shaft rearward off of the front propeller shaft splines.
8. Clean the mating surfaces bearing caps, bearing straps and pinion yoke of corrosion using crocus cloth or 400 grit sandpaper.
9. Remove the bolts (3) from the center bearing support (5) to the hanger bracket.
10. Remove the propeller shaft (4) with the center bearing support (5) from the vehicle.