
Express 3/4 Ton Van V8-4.8L VIN V (2003)
Correction
The original position of the component being adjusted should be marked prior to adjusting. This may help reference the beginning point and show how
much adjustment was made.
Inspect/Adjust the door strikers, door wedge guide and rollers as needed.
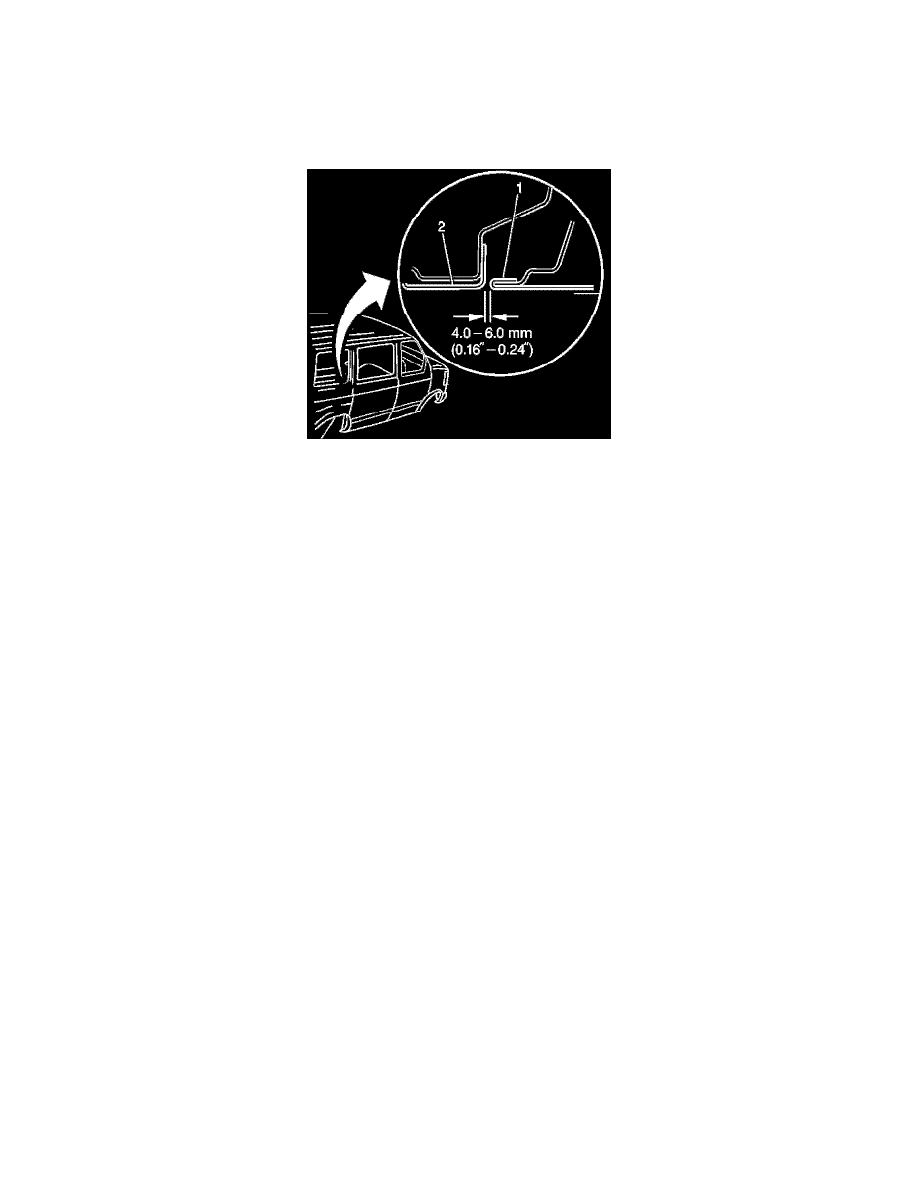
Inspect the rear sliding door front and rear gaps. The ideal gap should be between 4-6 mm (0.16-0.24 in).
Inspect the rear sliding door to body line fits at the rear quarter and the front door.
Inspect the rear sliding door for flushness to the rear quarter panel or inwards 1 to 2 mm (0.039 to 0.078 in).
Adjust the door strikers, door wedge guide and rollers as needed. Refer to Sliding Rear Door Adjustment in SI.
Tip
The striker has a tendency to move or rotate when tightening the bolts. The top striker bolt should be snugged first while holding the striker in position.
Verify that the body lines at the rear quarter and the front door line up with the rear sliding door.
Verify that the door opens and closes properly after making any adjustments.
Condition 2
The sliding door may not open using the inside door handle.
Cause
There may be several causes for the inside sliding door handle not opening the door which are listed below:
The door handle lock rod may not be adjusted correctly or disconnected from the retaining clip.
The handles, latches, lock rods and retaining clips may be loose or damaged.
Correction
Replace any damaged components and adjust the sliding door handle lock rod linkage using the steps below:
Verify that the child safety lock is not engaged prior to performing any repairs for this condition.
Verify that the door is in the unlock position.
Using the outside handle, open the rear sliding door about a foot to access the rear latch from outside the van.
Lock the rear latch to the closed position with a pen or screwdriver.
Remove the inside door handle. Refer to Sliding Door Inside Handle Replacement in SI.