
Express 3/4 Ton Van V8-4.8L VIN V (2003)
Lower Side Moulding / Trim: Service and Repair
Molding Replacement - Body Side
Molding Replacement - Body Side
Tools Required
*
J 41409 Body Molding Removal Tool
*
J 25070 Heat Gun
*
3M 07502 3M Scotch Brite Adhesive and Stripe Removal Disk
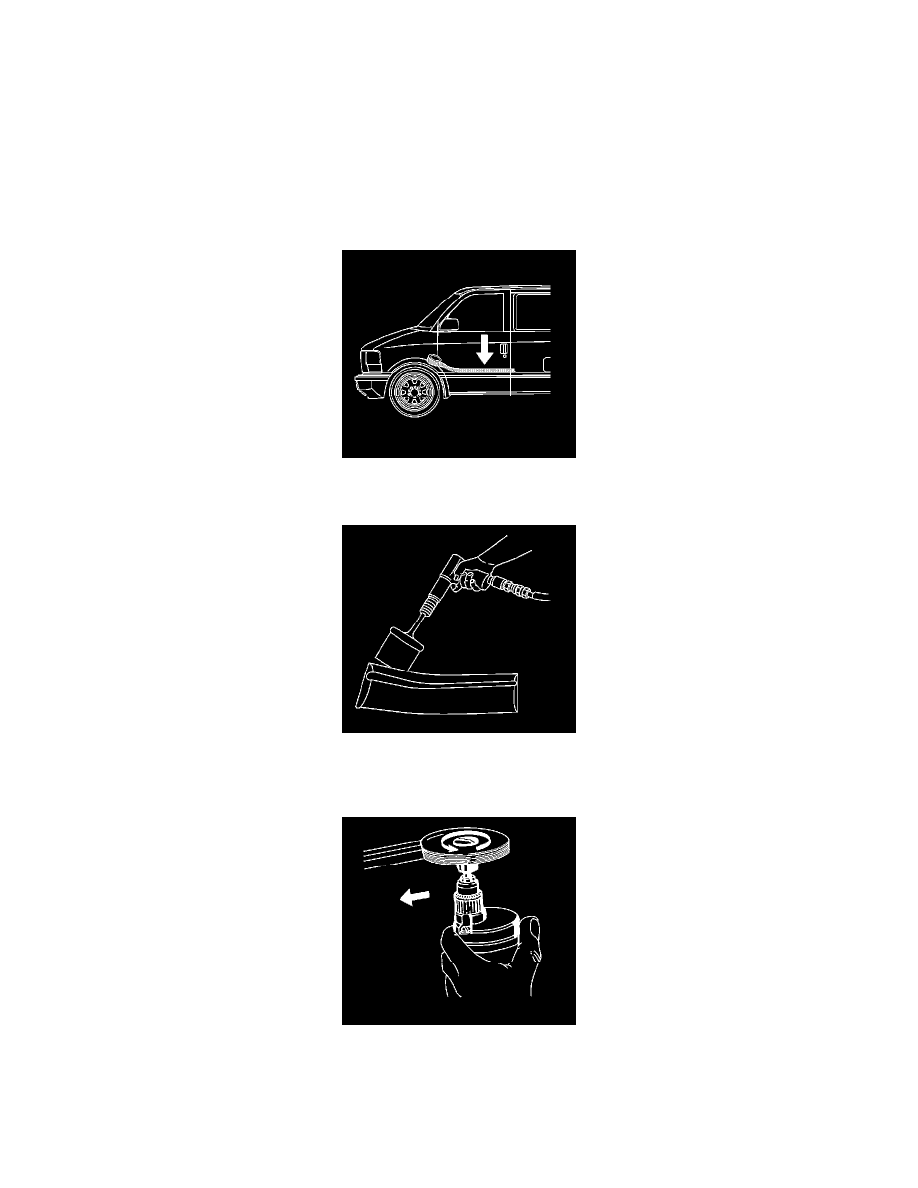
Removal Procedure
1. Apply masking tape to the body side border of the molding in order to protect the body from scratches. The tape will also aid in aligning the
molding during installation.
2. Use the J 41409 or a 0.8 mm (0.03 in) fishing line in order to cut through the adhesive material.
Installation Procedure
Important: In order to ensure a good replacement of new or old adhesive retained molding, verify that the panel surface temperature is
approximately 24-41°C (80-105°F), and the panel surface is clean and free of any wax or oily film. If you will be painting the molding, do
not bake the molding. Doing this will distort the part, making the part useless.
1. Use a general purpose adhesive remover or 3M 07502 3M P/N 7502, attached to a drill. You can also use a 5-8 cm (2-3 in) square rubber or felt
block. Use the cleaners in order to remove all traces of adhesive from the body panel.