
Express 3/4 Ton Van V8-4.8L VIN V (2003)
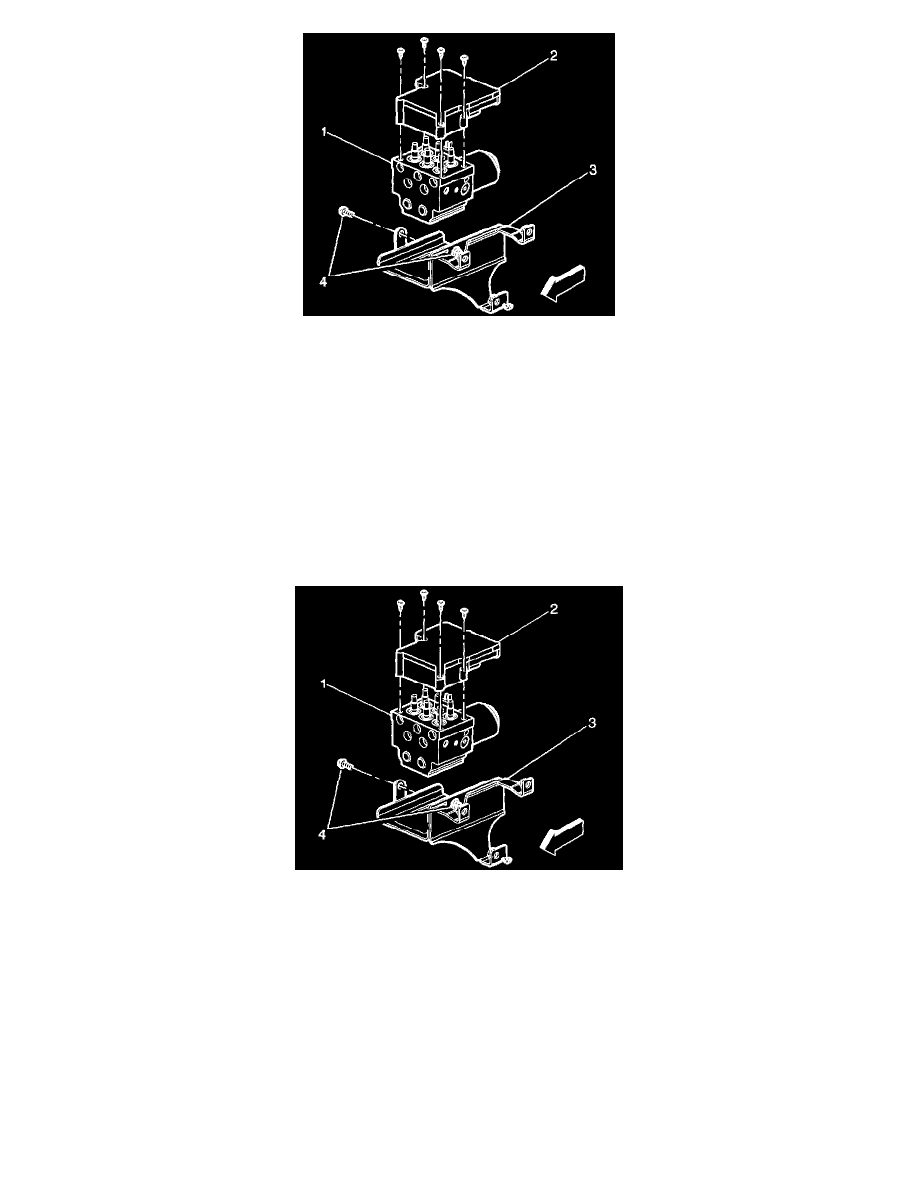
7. Remove the bolts (4) securing the BPMV (1) to the EHCU mounting bracket (3).
8. Disconnect the 2-way ABS pump motor connector.
9. Remove the bolts from the EBCM (2).
10. Remove the EBCM (2) from the BPMV (1). Removal may require a light amount of force.
Important: Do not use a tool to pry the EBCM or the BPMV. Excessive force will damage the EBCM.
Important: Do not reuse the EBCM mounting bolts. Always install new bolts.
11. Clean the EBCM to BPMV mounting surfaces with a clean cloth.
Installation Procedure
Important: Do not use RTV or any other type of sealant on the EBCM gasket or mating surfaces.
1. Install the EBCM (2) onto BPMV (1).
Notice:
Refer to Fastener Notice in Service Precautions.
See: Service Precautions/Vehicle Damage Warnings/Fastener Notice
Important: Do not reuse the old mounting bolts. Always install new EBCM bolts with the new BPMV.
2. Install the EBCM bolts.
Tighten the bolts to 5 Nm (44 inch lbs.) in an X-pattern.
3. Connect the 2-way ABS pump motor connector to the EBCM.
4. Install the BPMV (1) to EHCU bracket (3).
5. Install the BPMV (1) to bracket retaining bolts (4).
Tighten the bolts to 9 Nm (80 inch lbs.).