
Express 3/4 Ton Van V8-4.8L VIN V (2003)
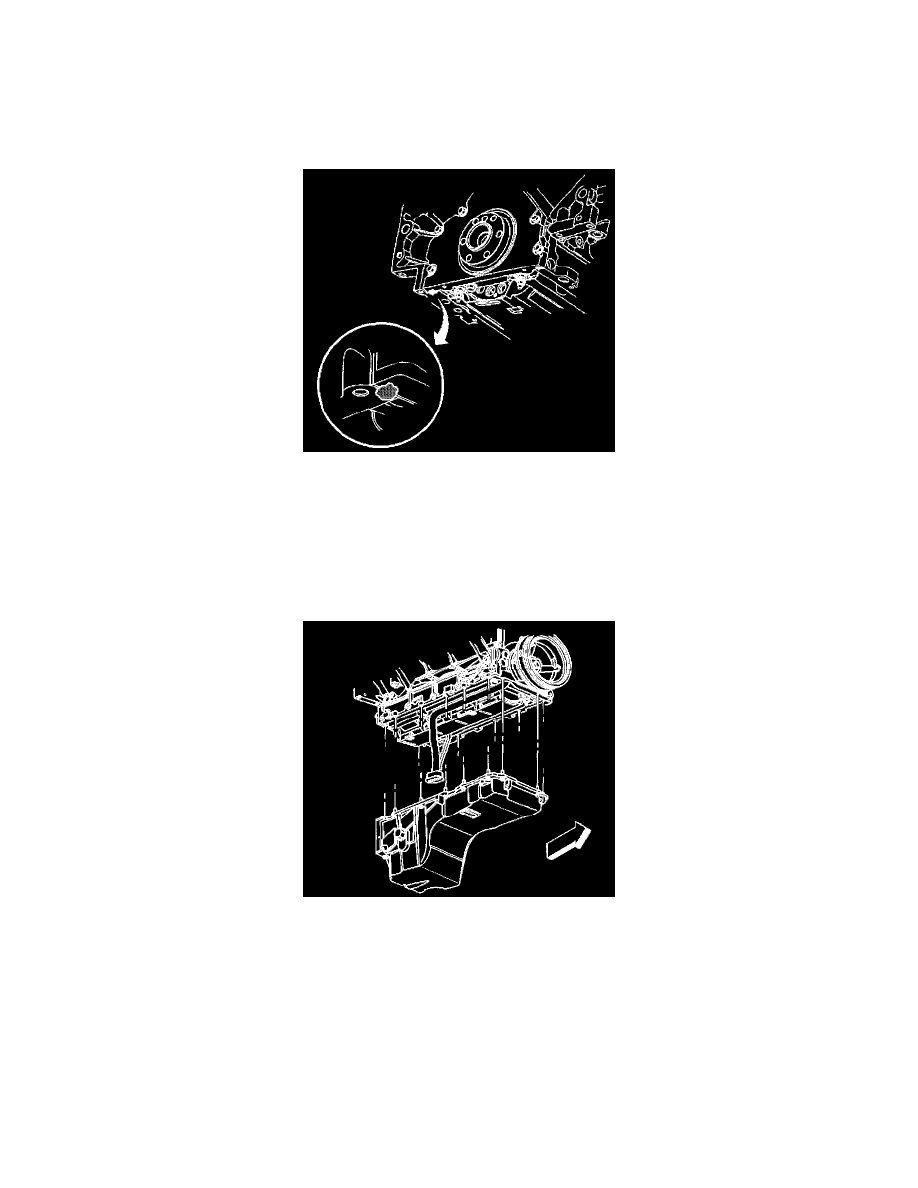
bellhousing. To ensure the rigidity of the powertrain and correct transmission alignment, it is important that the rear of the block and the rear of the
oil pan must NEVER protrude beyond the engine block and transmission bellhousing plane.
^
Do not reuse the oil pan gasket.
^
It is not necessary to rivet the NEW gasket to the oil pan.
1. Apply a 5 mm (0.20 inch) bead of sealant GM P/N United States 12378190, or equivalent 20 mm (0.80 inch) long to the engine block. Apply the
sealant directly onto the tabs of the front cover gasket that protrudes into the oil pan surface.
2. Apply a 5 mm (0.20 inch) bead of sealant GM P/N United States 12378190, or equivalent 20 mm (0.8 inch) long to the engine block. Apply the
sealant directly onto the tabs of the rear cover gasket that protrudes into the oil pan surface.
Important: Be sure to align the oil gallery passages in the oil pan and engine block properly with the oil pan gasket.
3. Pre-assemble the oil pan gasket to the pan.
^
Install the gasket onto the pan.
^
Install the oil pan bolts to the pan and through the gasket.
4. Install the oil pan, gasket and bolts to the engine block.
5. Tighten the oil pan bolts until snug. Do not overtighten.