Express 3/4 Ton Van V8-4.8L VIN V (2003)

3.
Release the J-strip fastener on the bottom of the seatback cover.
4.
Remove the two push-in retainers at the lower rear of the seatback.
5.
From the bottom of the seatback, place your hand up the front side of the seatback cover and release the hook and loop fasteners that attach the
seatback cover to the foam pad.
Important
The retaining spring clip in the next step is similar to those used to attach manual window crank handles. Do not remove the clip completely to
remove the armrest. To avoid the possibility of losing the clip, reinstall the clip immediately after removing the armrest.
6.
On bucket seats, remove the armrest by accessing and releasing the retaining spring clip from the bottom of the seatback cushion cover.
7.
Starting at the bottom of the seatback, pull the seatback cover upwards. The bottom of the cover should be turning inside out as the cover rolls
upward. Continue pulling the cover upwards until it reaches the top of the seatback.
8.
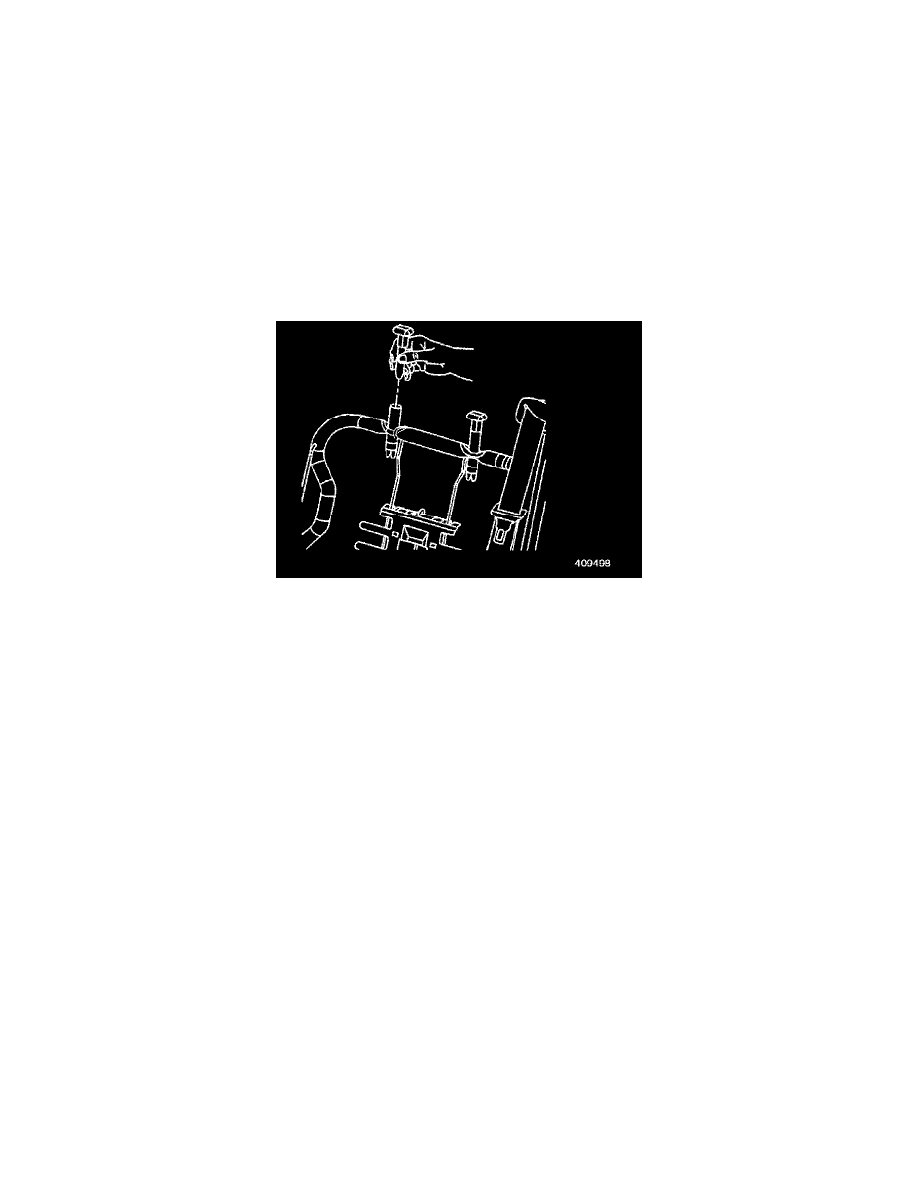
Reach up inside the seat and squeeze the base of each head restraint retainer and push it up and out of the seatback frame.
9.
Unsnap the seat belt bezel from the retractor tower.
10.
Finish removing the seat cover.
11.
Release the adhesive between the foam pad and the cardboard on both the left and right sides of the seatback. Remove the cardboard.
12.
Remove the seat belt retractor from the seatback tower.
13.
Remove the bolt attaching the retractor to the lower seatback.
14.
Remove the bolt attaching the retractor to the upper seatback and remove the retractor.
15.
Release and remove the foam pad from the seat frame.
16.
On seats WITHOUT lumbar features, remove the seatback spring support from the seatback frame and transfer it to the NEW seatback frame.
17.
On seats WITH lumbar features, disconnect the electrical connectors.
18.
Remove the two outboard bolts attaching the seatback frame to the lower cushion frame.
19.
Remove the one inboard bolt attaching the seatback frame to the lower cushion frame.
20.
Slide the seatback frame upwards to separate it from the lower frame.
21.
On seats WITH lumbar features, drill out the necessary rivets and transfer the lumber feature to the new seatback frame.
22.
Position the new seatback frame to the lower seat cushion frame and slide into position.
23.
Install the one inboard bolt attaching the seatback frame to the lower frame.
