
Express 3/4 Ton Van V8-5.7L VIN R (1998)
Hydraulic Control Assembly - Antilock Brakes: Service and Repair
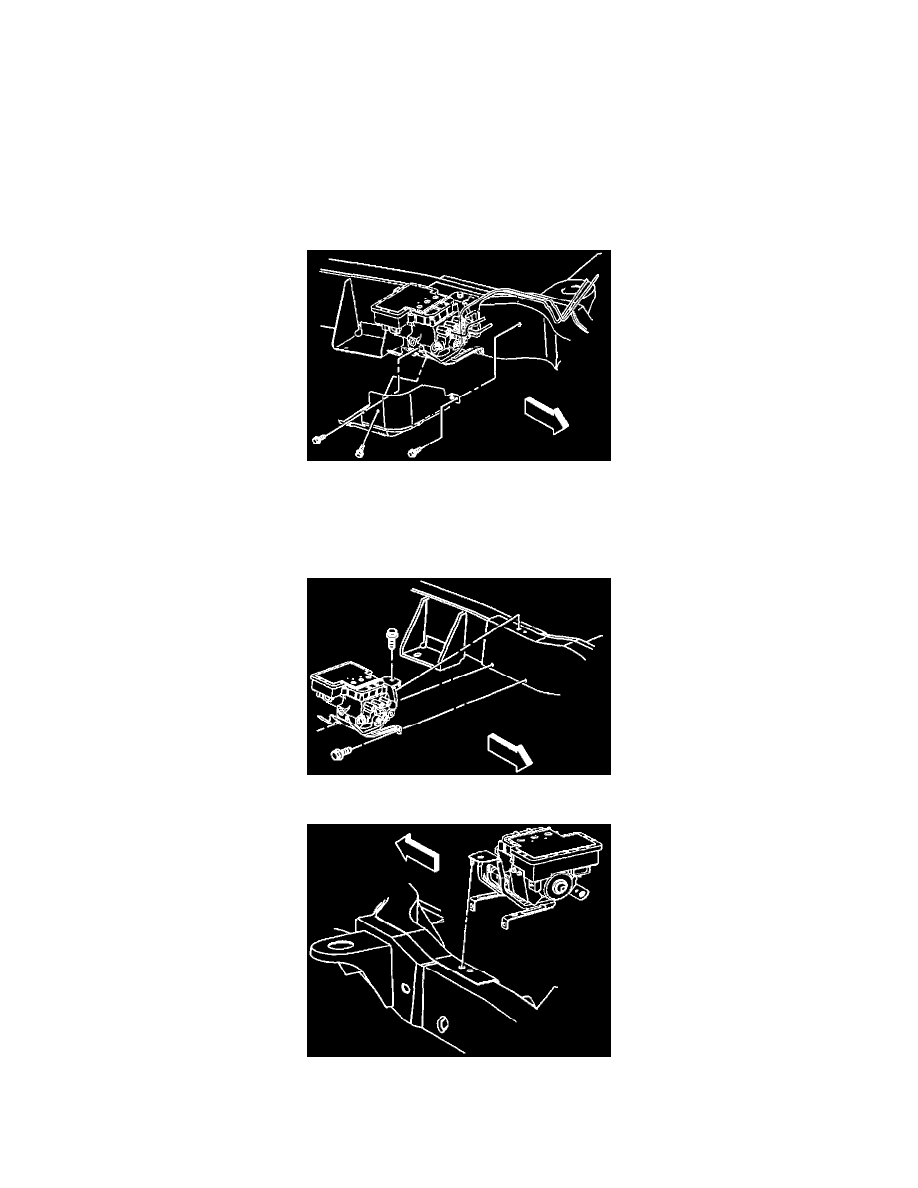
Brake Pressure Modulator Valve Replacement
REMOVAL PROCEDURE
1. Negative Battery Cable.
CAUTION: Before removing or installing any electrical unit or when a tool or equipment could easily come in contact with "live"
exposed electrical terminals, disconnect the negative battery cable to help prevent personal injury and/or damage to the vehicle or
components. Unless instructed otherwise, the ignition switch must be in the "OFF" or "LOCK" position.
2. Raise vehicle and properly support.
3. Remove the three Electronic Hydraulic Control Unit (EHCU) (1) shield bolts and shield.
4. Disconnect the four electrical connectors from Electronic Brake Control Module (EBCM).
5. Disconnect the electrical connector from the combination valve.
6. Remove the front and rear brake pipes (from master cylinder) from the combination valve.
7. Remove the right front, left front and rear brake pipes from the tube adapters.
8. Remove the three bolts (1) that fasten the EHCU bracket to the frame.
9. Remove the EHCU from the frame.
10. Remove the three bolts retaining the Brake Pressure Modulator Valve (BPMV) (4) form the bracket.