
Express 3/4 Ton Van V8-5.7L VIN R (1998)
9. If reusing the fasteners, apply threadlock GM P/N United States 12345382, GM P/N Canada 10953489, or equivalent, to the threads of the
evaporative emission (EVAP) canister purge solenoid valve studs.
10. Install the EVAP canister purge solenoid valve and studs.
Tighten
Tighten the EVAP canister purge solenoid valve studs to 10 Nm (89 lb in).
11. Install the engine wiring harness bracket and nut.
Tighten
Tighten the engine wiring harness bracket nut to 12 Nm (106 lb in).
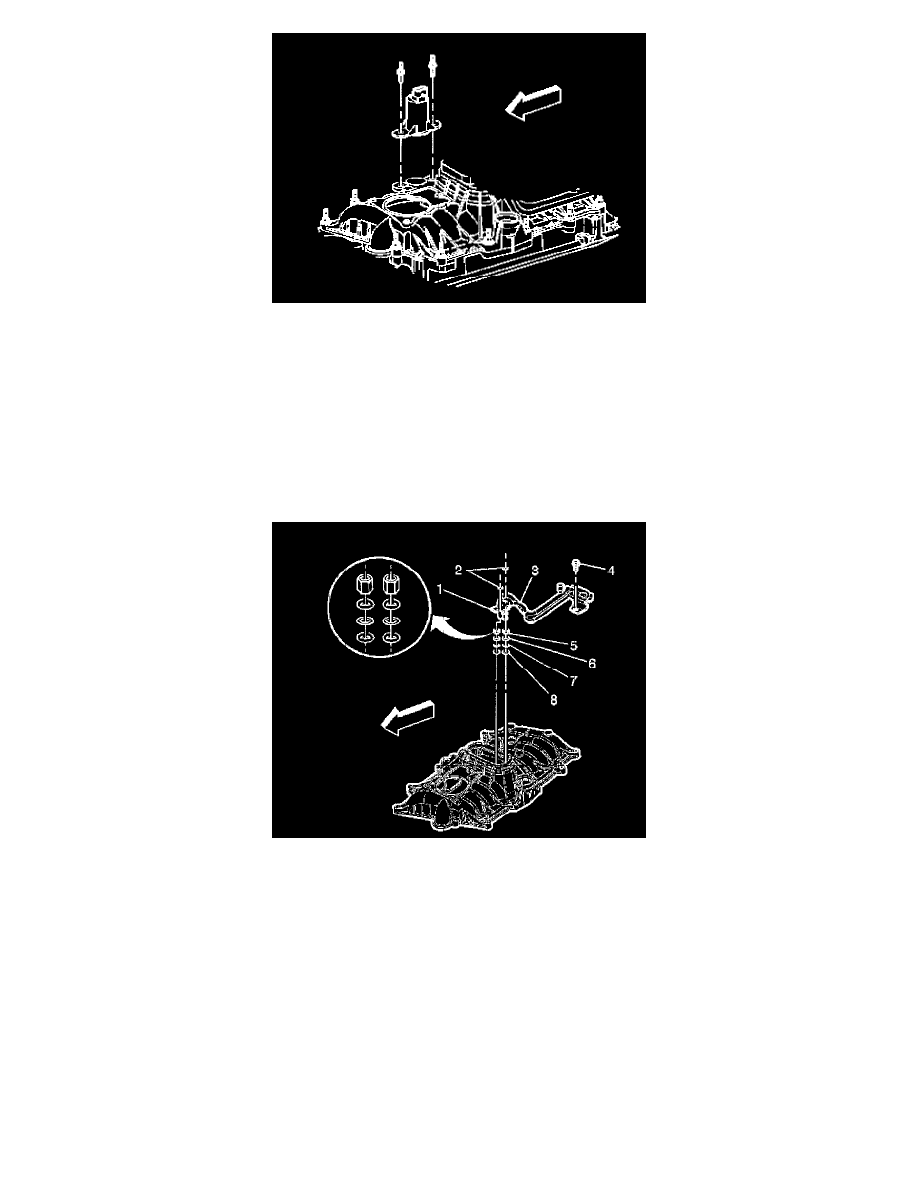
12. Install the NEW fuel seals (8), black O-rings, into the fuel meter body.
13. Install the NEW spacer rings (7), flat washers, into the fuel meter body.
14. Install NEW fuel seals (6), yellow O-rings, into the fuel meter body.
15. Install the NEW fuel seal retainers (5) into the fuel meter body.
16. Install the fuel pipe (3) into the fuel meter body.
17. Install the fuel pipe retainer (1) and the nuts (2).
18. If reusing the fastener, apply threadlock GM P/N United States 12345382, GM P/N Canada 10953489, or equivalent, to the threads of the fuel
pipe bolt (4).
19. Install the fuel pipe bolt (4).
Tighten
a. Tighten the fuel pipe retainer nuts (2) to 3 Nm (27 lb in).
b. Tighten the fuel pipe bolt (4) to 6 Nm (53 lb in).