
Express 3500 V8-4.8L VIN V (2005)
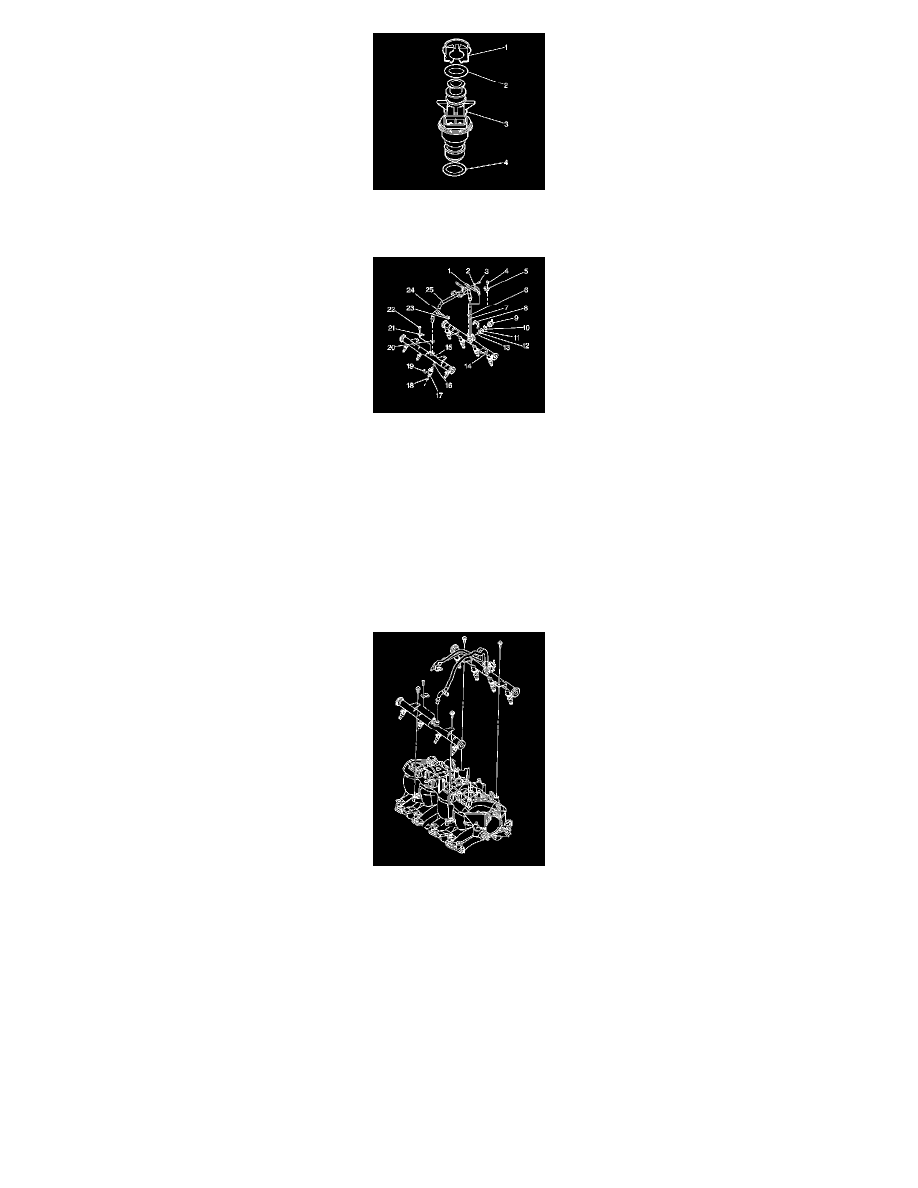
1. Lubricate the NEW fuel injector lower O-ring seals (4) with clean engine oil.
2. Install the NEW O-ring seals (4) to the end of each injector (3).
3. Remove the retaining clip attaching screw (22) and crossover pipe retainer (21) to the right hand fuel rail.
4. Remove the crossover pipe rail (25) from the right fuel rail (15).
5. Remove the crossover pipe O-ring (20).
6. Lubricate a NEW O-ring (20) with clean engine oil.
7. Install a NEW crossover pipe O-ring (20) on the crossover pipe (25).
8. Install the crossover pipe (25) into the right fuel rail (15).
IMPORTANT: When installing the retaining clip attaching screw for the crossover pipe, always start the screw by hand. This will prevent
consequent stripping of the threads in the fuel rail.
9. Loosely install the crossover pipe retainer (21) and retaining clip attaching screw (22) to the right fuel rail.
10. Install the fuel rail.
11. Apply a 5 mm (0.020 in) band of GM P/N 12345382 (Canadian P/N 10953489) threadlock, or equivalent, to the threads of the fuel rail bolts.
NOTE: Refer to Fastener Notice in Service Precautions.
12. Install the fuel rail bolts.
1. Tighten the bolts to 10 N.m (89 lb in).
2. Tighten the screw to 3.8 N.m (34 lb in).