
Express 3500 V8-4.8L VIN V (2005)
CAUTION: Refer to Battery Disconnect Caution in Service Precautions.
2. Relieve the fuel system pressure. Refer to Fuel Pressure Relief Procedure.
3. Drain the fuel tank. Refer to Fuel Tank Draining Procedure.
4. Remove the fuel tank.
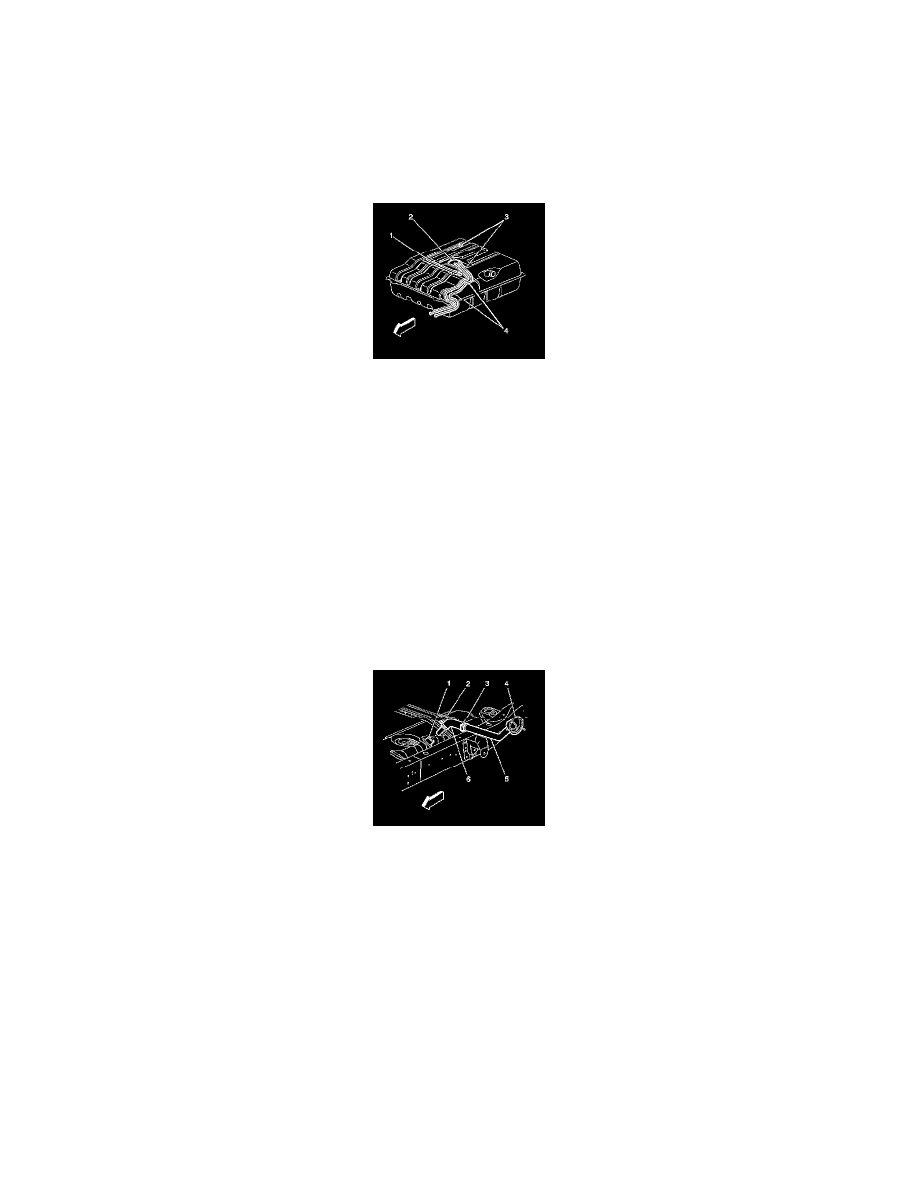
5. Remove the fuel feed and return pipes (4) from the fuel sender (2).
INSTALLATION PROCEDURE
1. Install the fuel feed and return pipes (4) to the fuel sender (2).
2. Install the fuel tank.
3. Lower the vehicle.
4. Refill the fuel tank.
5. Tighten the fuel filler cap.
6. Connect the negative battery cable.
7. Inspect for leaks:
1. Turn ON the ignition for 2 seconds.
2. Turn OFF the ignition for 10 seconds.
3. Turn ON the ignition.
4. Inspect for fuel leaks.
Fuel Hose/Pipes Assembly Replacement (Cutaway Van Side Tank)
FUEL HOSE/PIPES ASSEMBLY REPLACEMENT (CUTAWAY VAN SIDE TANK)
REMOVAL PROCEDURE
1. Disconnect the negative battery cable.
CAUTION: Refer to Battery Disconnect Caution in Service Precautions.
2. Clean all the fuel pipe and hose connections and the surrounding areas before disconnecting in order to avoid possible contamination of the fuel
system.
3. Remove the fuel filler cap.
4. Drain the fuel below the level of the fuel tank fill hose. Refer to Fuel Tank Draining Procedure.
5. Raise the vehicle. Refer to Vehicle Lifting.
6. Loosen the fuel fill hose clamps (2, 3).
7. Remove the fuel fill hose (6).
8. Cap the open end of the fuel tank.
INSTALLATION PROCEDURE