
Express 3500 V8-6.0L (2010)
Note: If installing the original brake pads, mark the position of the inner and outer brake pads for proper installation.
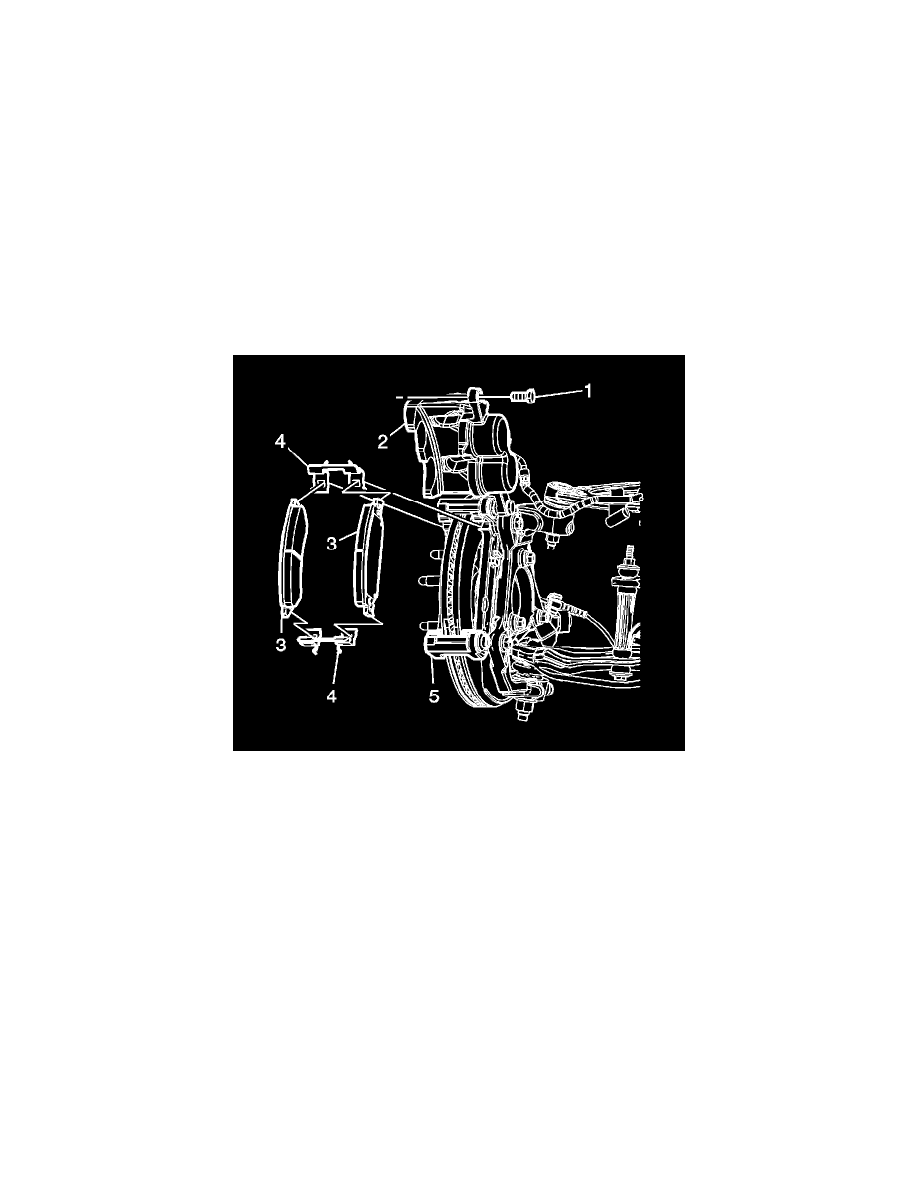
10. Remove the brake pads (3).
Note:
*
If installing the original brake pads and spring clips, mark the position of the pads and spring clips for proper installation.
*
If installing new brake pads, install new pad spring clips. Do not reuse the old brake pad spring clips with new brake pads.
11. Remove the brake pad spring clips (4) from the mounting bracket (5).
12. Thoroughly clean the pad hardware mating surfaces of the caliper bracket of any corrosion or debris with denatured alcohol and allow to dry.
Note: Use care when cleaning the brake caliper pistons to avoid damaging the piston dust seals.
13. If installing new brake pads, thoroughly clean the brake caliper piston faces and caliper housing to brake pad contact surfaces of all disc brake pad
insulator adhesive residue with denatured alcohol and allow to dry.
Installation Procedure
1. Apply a very thin coating of high temperature silicone brake lubricant to the pad mating surfaces of the caliper bracket only.
2. Install the spring clips (4) to the mounting bracket.
*
Install the NEW spring clips if replacing the brake pads.
*
Install the original spring clips in their original position if installing the original brake pads.
3. If installing new brake pads, remove the adhesive backing paper from the brake pad insulators.
Note: If installing the original brake pads, position the brake pads as marked during the removal procedure.
4. Install the brake pads (3).
5. Rotate the brake caliper (2) into the proper position on the mounting bracket (5).