
G 10 Van V8-379 6.2L DSL (1987)
Timing Cover: Service and Repair
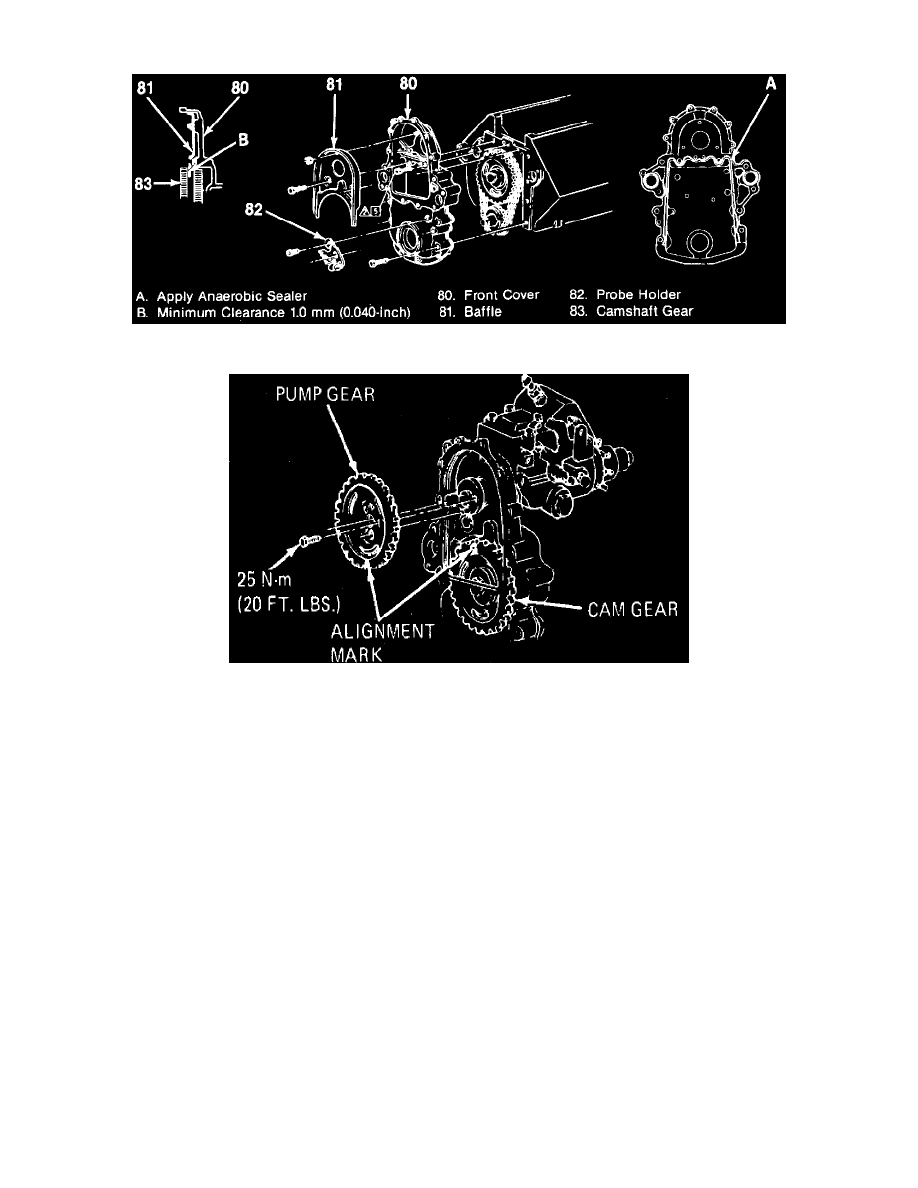
Front Cover Components
Fig. 22 Injection pump & cam gear alignment
SPECIAL TOOLS REQUIRED (or equivalents)
^
J-22102, Front cover seal installer.
^
J-33O42, Timing fixture (if a new cover is to be installed).
REMOVE OR DISCONNECT
1. Drain the cooling system and remove the water pump.
2. Rotate the engine until the timing marks on the pump gear and camshaft gear are aligned. Scribe a mark aligning the injection pump flange and
front cover.
3. Torsional damper.
4. Four front cover to oil pan bolts.
5. Two fuel return line clips.
6. Injection pump gear and pump retaining nuts at the front cover.
7. Baffle.
8. Front cover bolts and front cover.
9. Front crankshaft seal, pry out with a screwdriver.
10. Clean Sealing surfaces on front cover and oil pan.
11. Inspect front cover for cracks or damage to sealing surfaces.
INSTALL OR CONNECT
1. New front crankshaft seal to the front cover using J-22102.
^
Apply a 2 mm (3/32 in) bead of anaerobic sealant GM P/N 1052357 or equivalent to the front cover sealing area.
^
Apply a 5 mm (3/16 in) bead of RTV sealant to the front cover sealing surface that mates against the oil pan.
2. Front cover to the engine. Install the attaching bolts and tighten cover to block bolts to 45 Nm (33 ft lbs) and oil pan to cover bolts to 10 Nm (84
in lbs).