
G 10 Van V8-393 6.5L DSL VIN P (1995)
Fuel Tank: Service and Repair
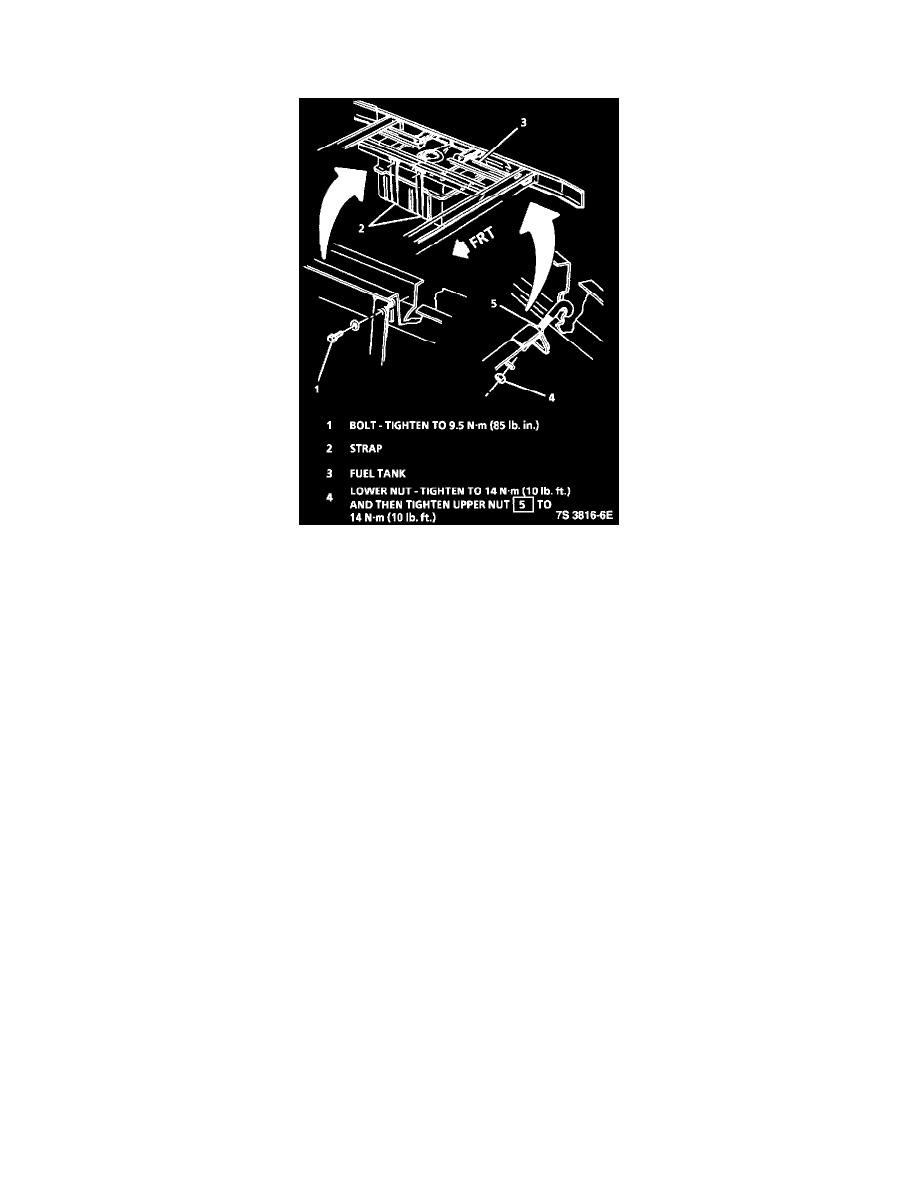
Fuel Tank Assembly
Fuel Tank
WARNING: The water/diesel fuel mixture is flammable, and could be hot. To help avoid personal injury and/or property damage, do not
touch the fuel coming from the drain hose, and do not expose the fuel to open flames or sparks. Be sure you do not overfill the container. Heat
(such as from the engine) can cause the fuel to expand. If the container is too full, fuel could be forced out of the container. This could lead to a
fire and the risk of personal injury and/or vehicle damage.
REMOVE OR DISCONNECT
1. Drain fuel tank refer to Draining Fuel Tank. See: Fuel Tank Draining
2. Raise vehicle.
3. Off road shield (if equipped).
Clean
-
Clean all fuel pipe and hose connections and surrounding areas before disconnecting to avoid possible contamination of the fuel system.
4. Vent hose at fuel tank.
5. Filler tube connection at fuel tank.
6. With aid of an assistant, support tank, and remove fuel tank strap attaching bolts and retaining fuel tank straps and shield.
CAUTION: Do Not bend fuel tank straps, as this may damage straps.
-
Lower tank enough to disconnect fuel sender electrical connector and remove the retaining clips.
-
Hoses from fuel sender.
-
Fuel tank from vehicle and place in a suitable work area.
DISASSEMBLE
-
If fuel tank is not being replaced proceed to Install or Connect.
-
Fuel sender refer to Fuel Sender Replacement. See: Fuel Pump/Service and Repair
ASSEMBLE
-
Install fuel sender assembly with new O-rings on pipes refer to Fuel Sender Replacement. See: Fuel Pump/Service and Repair
INSTALL OR CONNECT
1. Position and support fuel tank. Position fuel tank straps with insulators and connect: